Asset Handler GUI

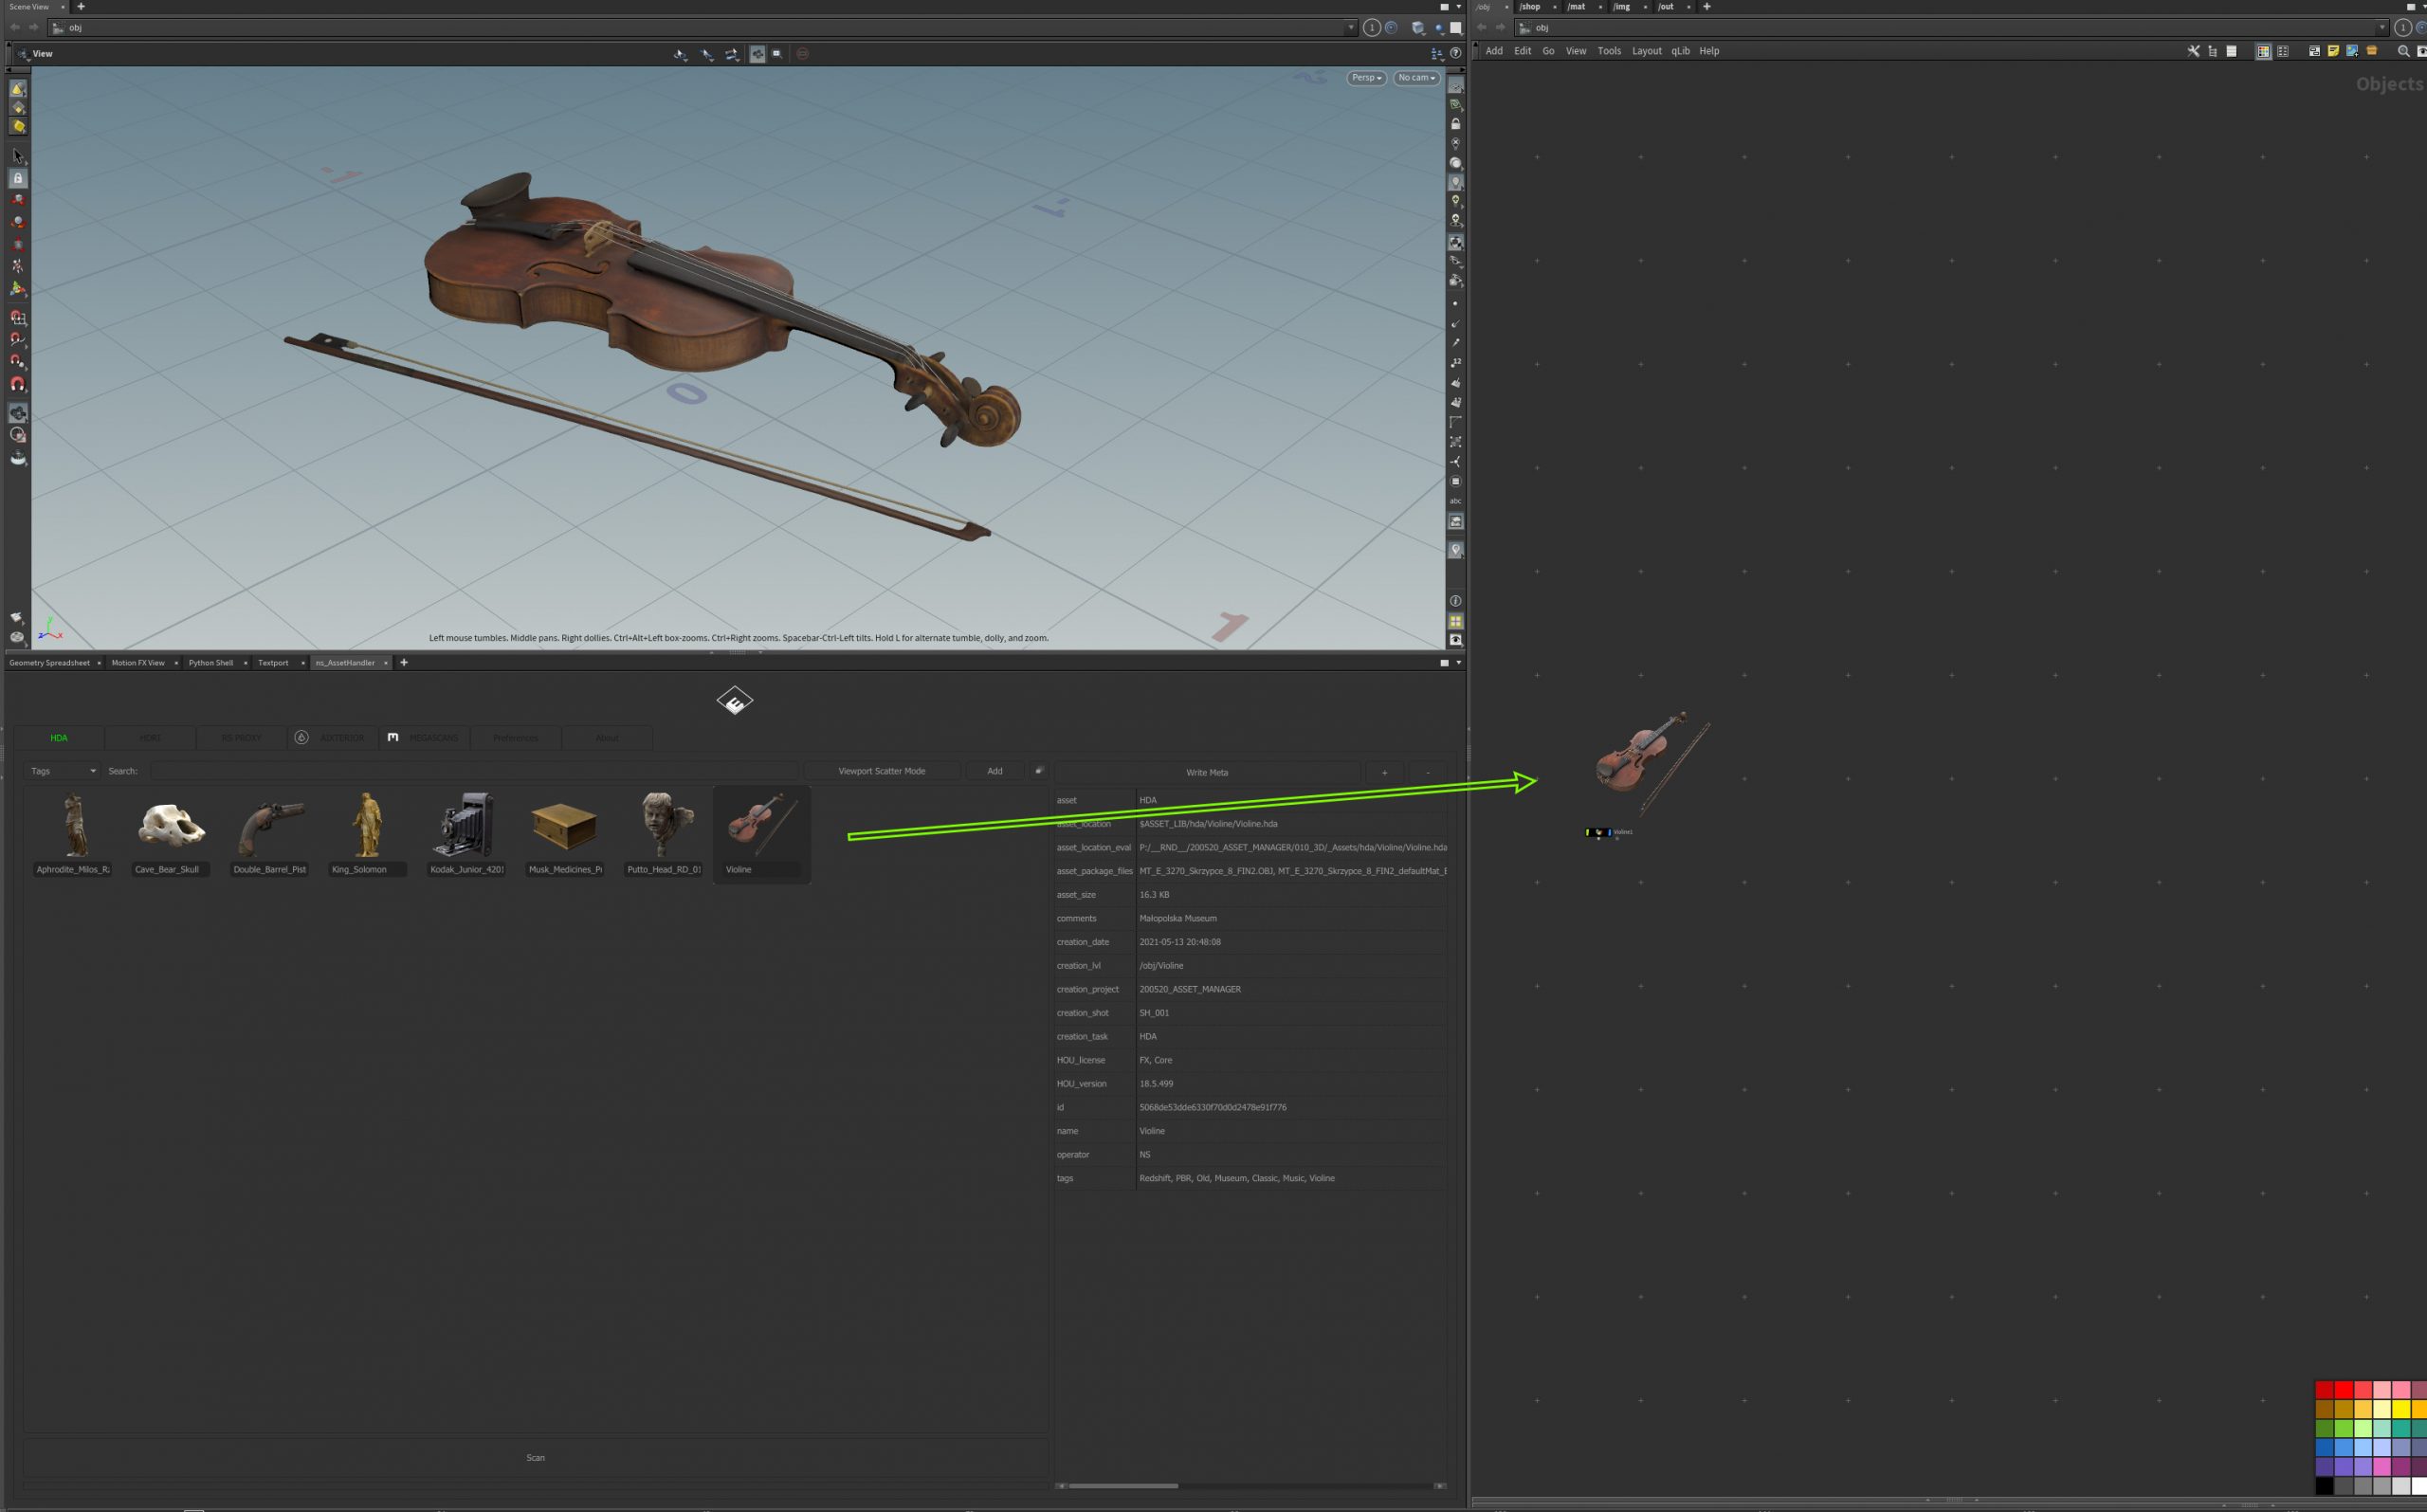
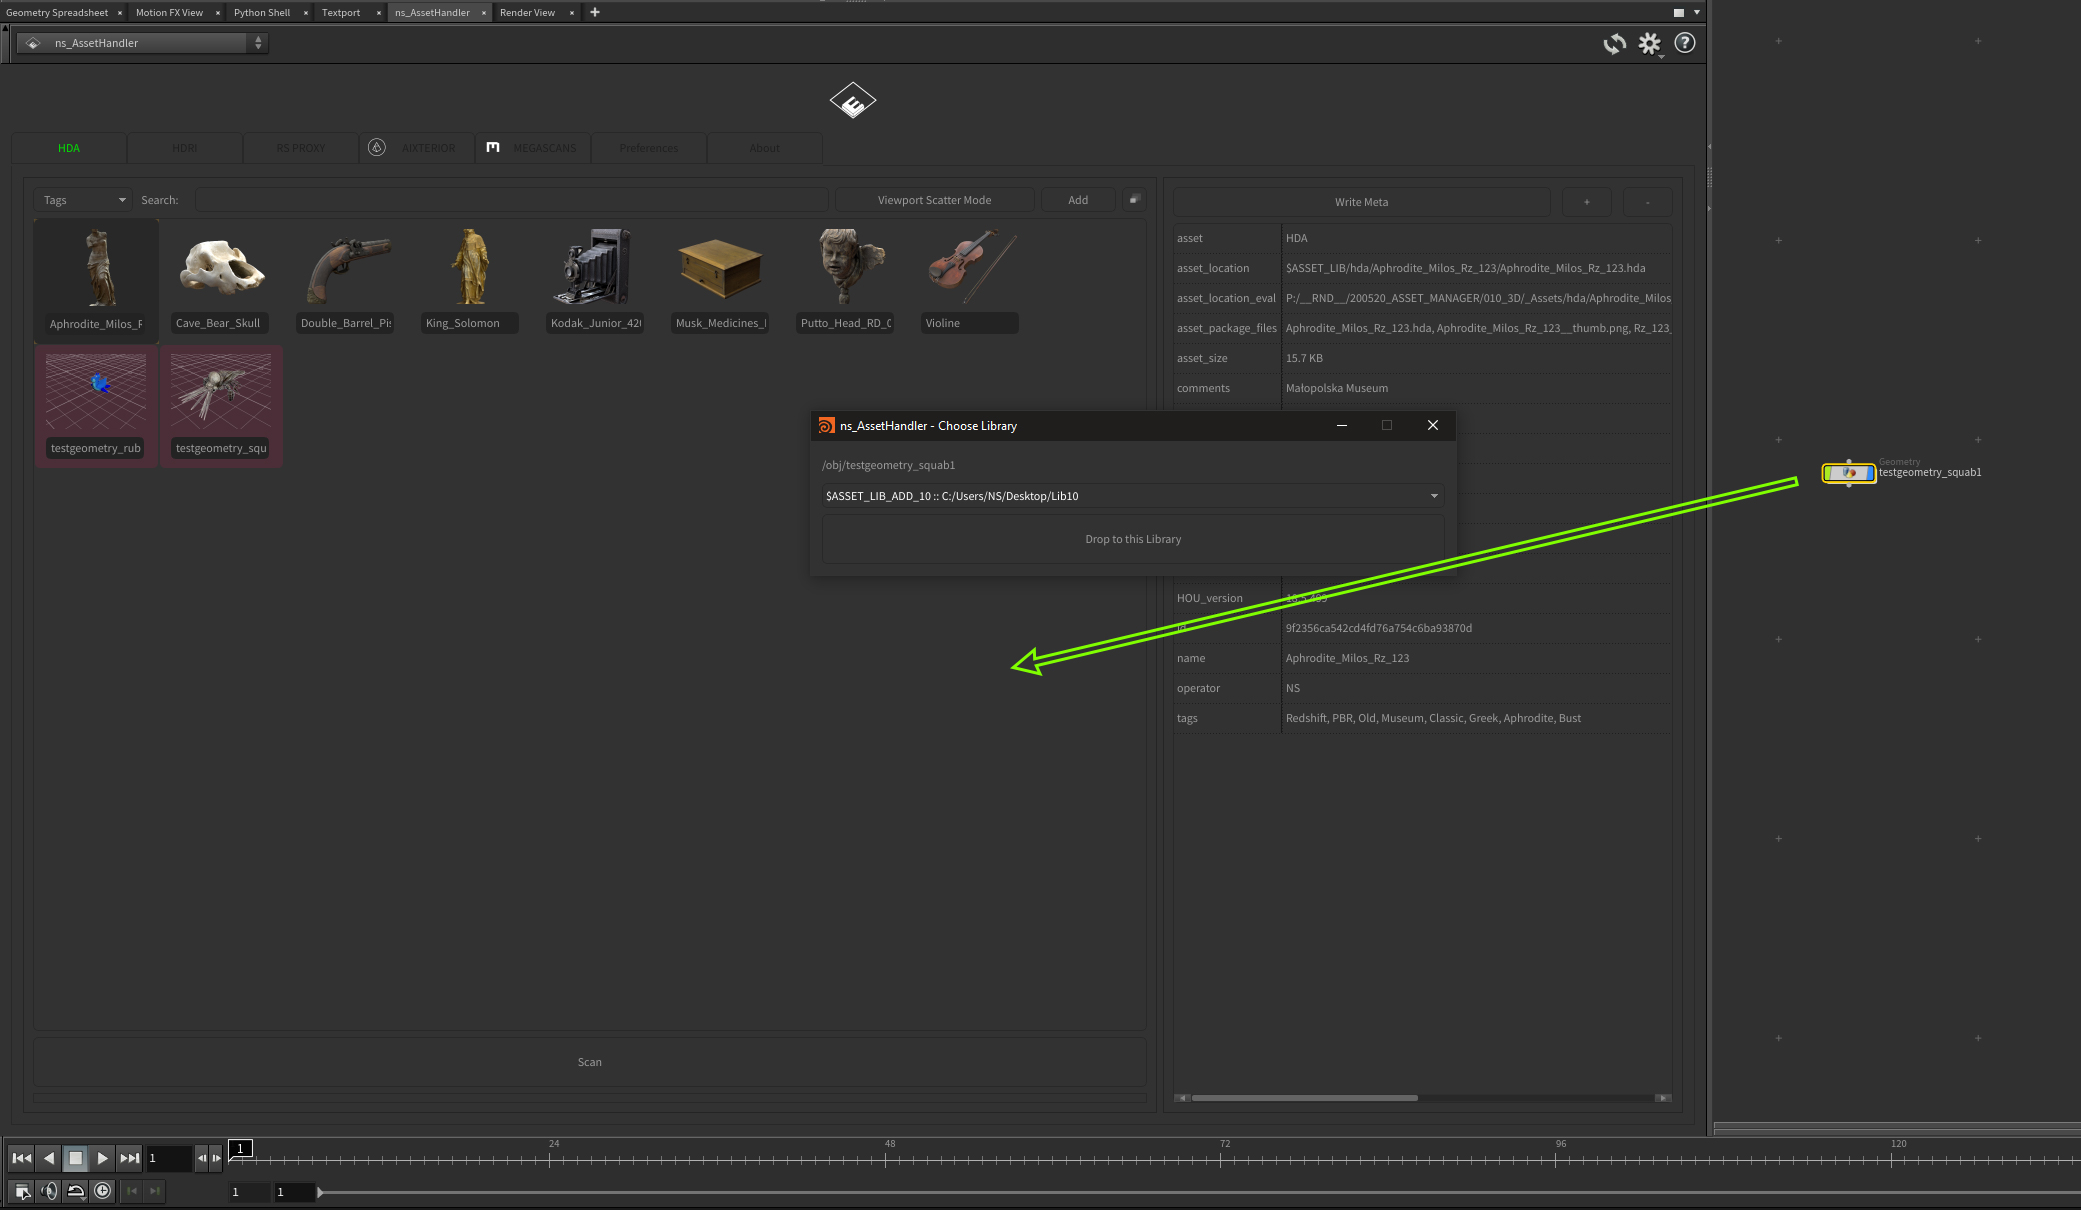
To add a HDA or PROXY asset you can just drop down the spezific node to the corresponding Tab. A Asset Package will be automatically created.
Note: You can drop more than one OBJ node at a time.
Preference Tab
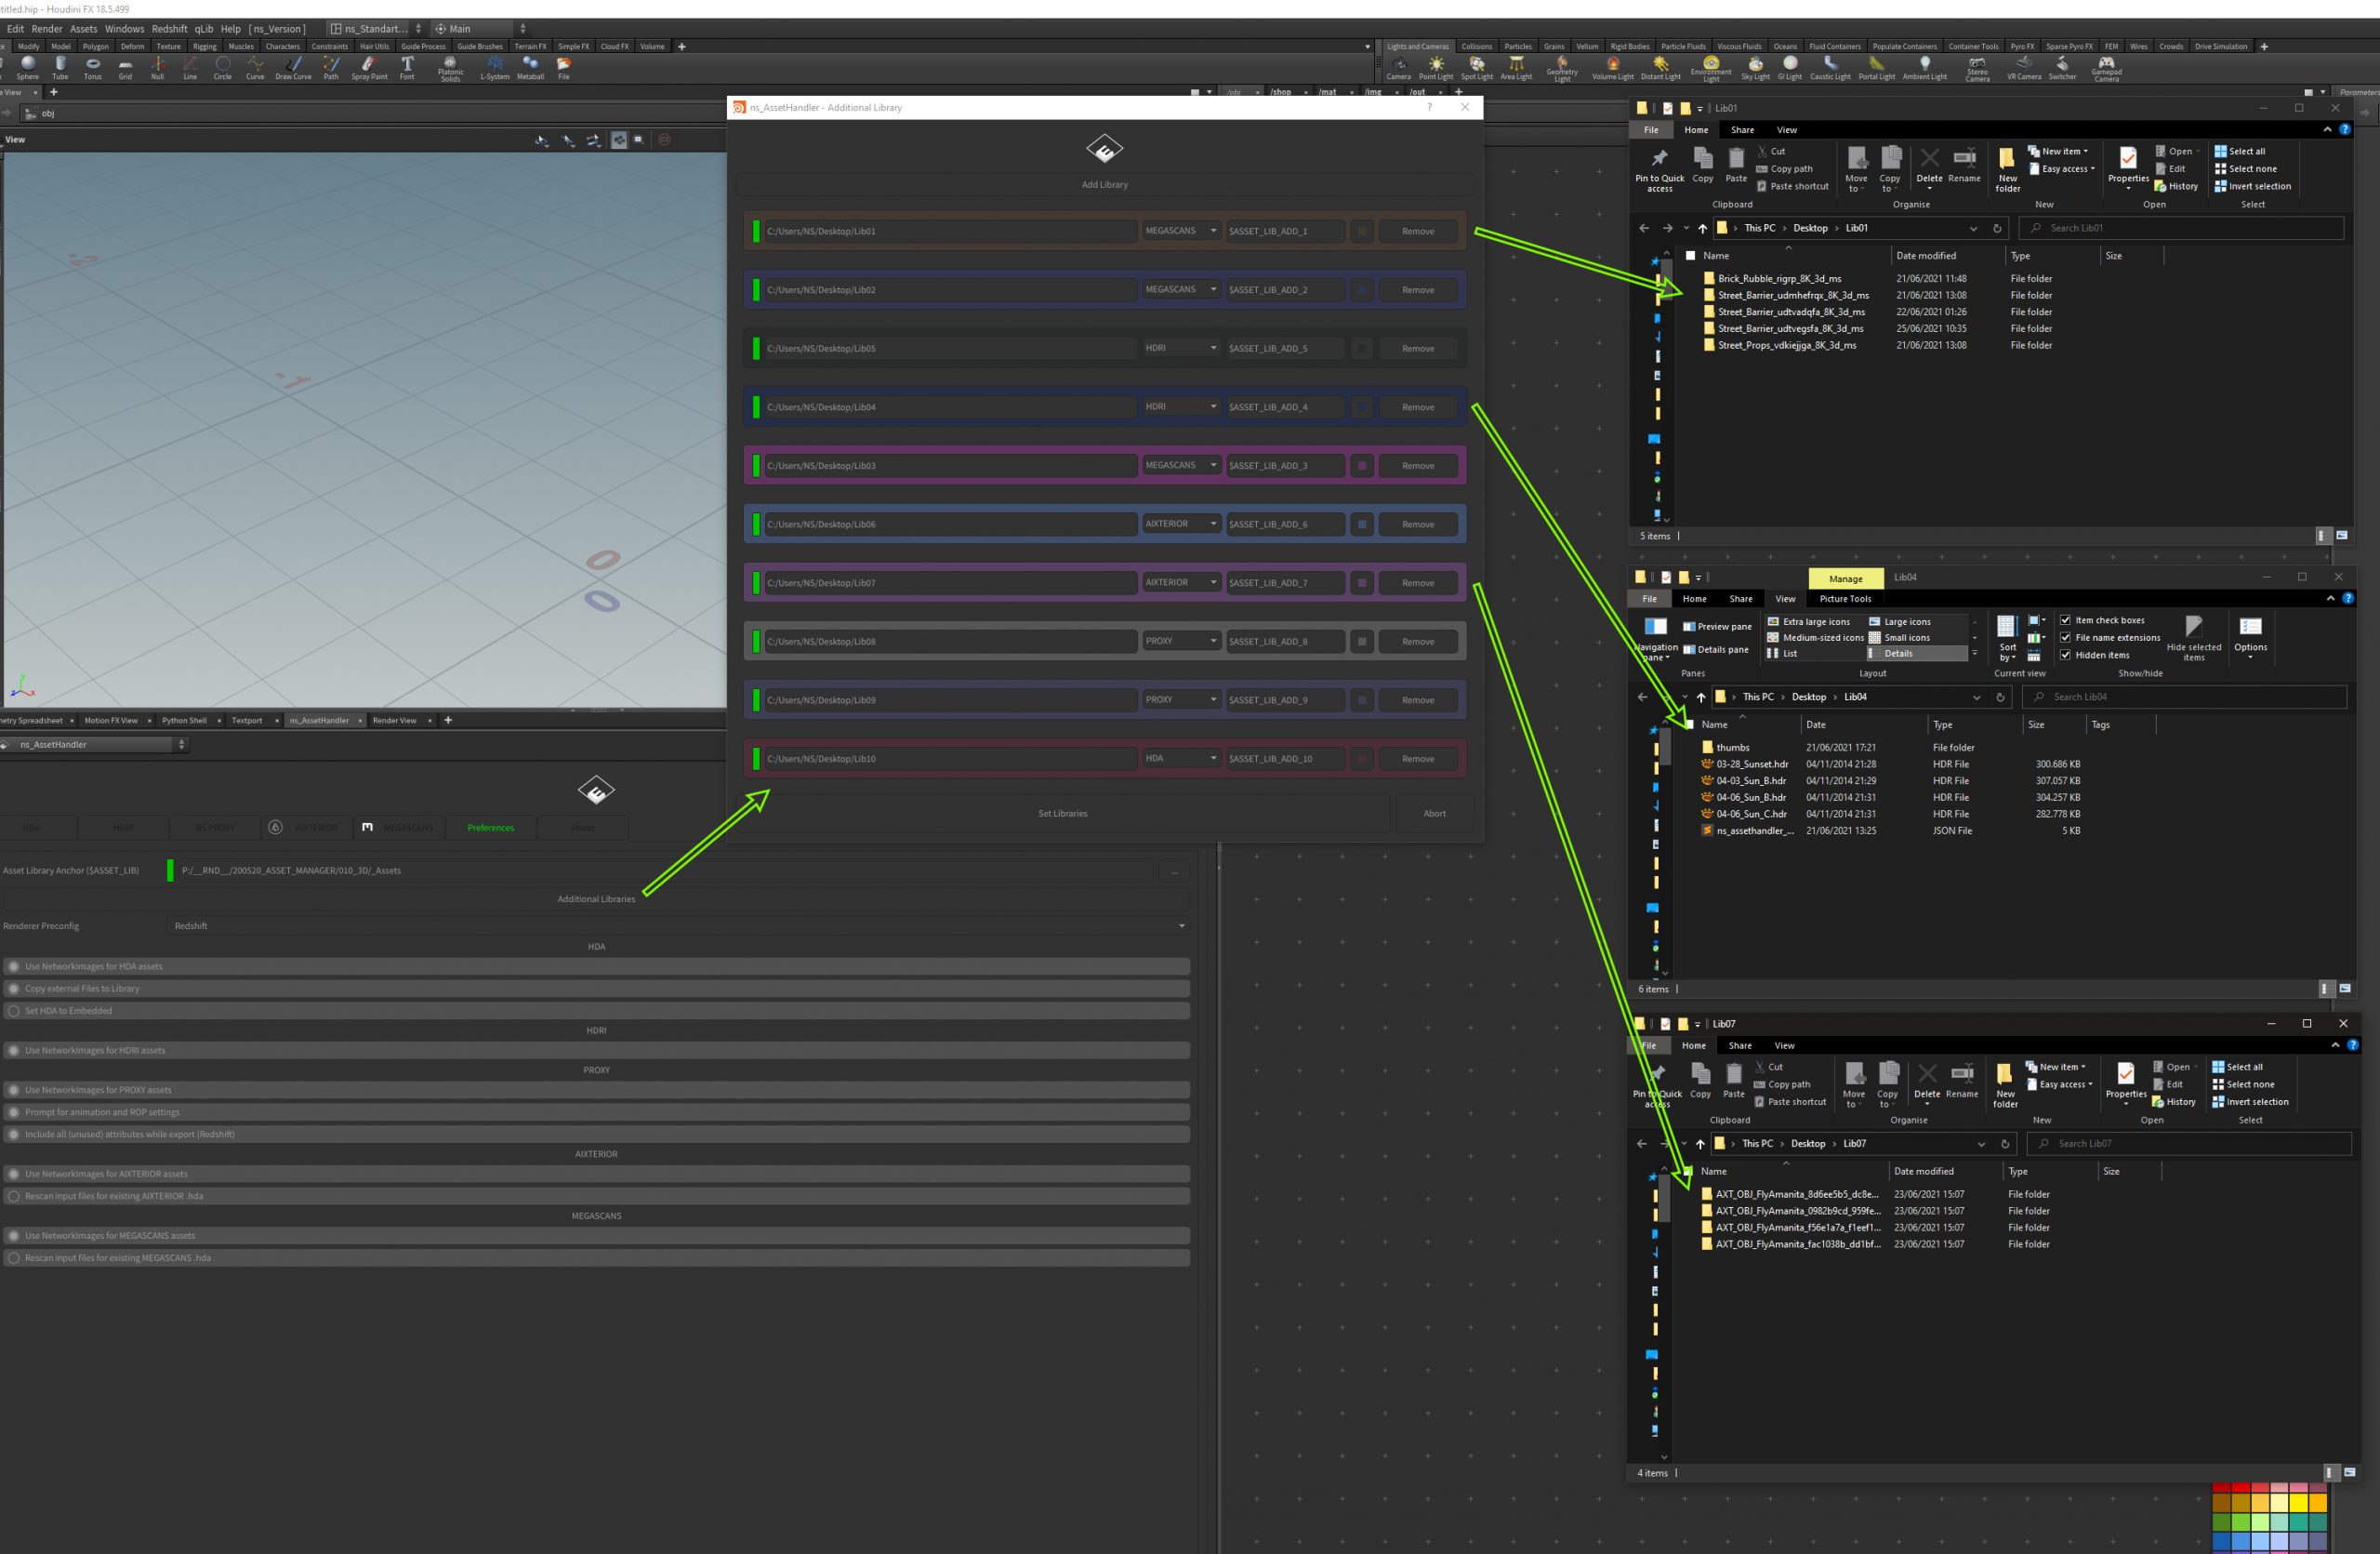
Preferences:
- “Asset Library Anchor ($ASSET_LIB)”: set the Library Path/Location. Its like the main library and should be project related.
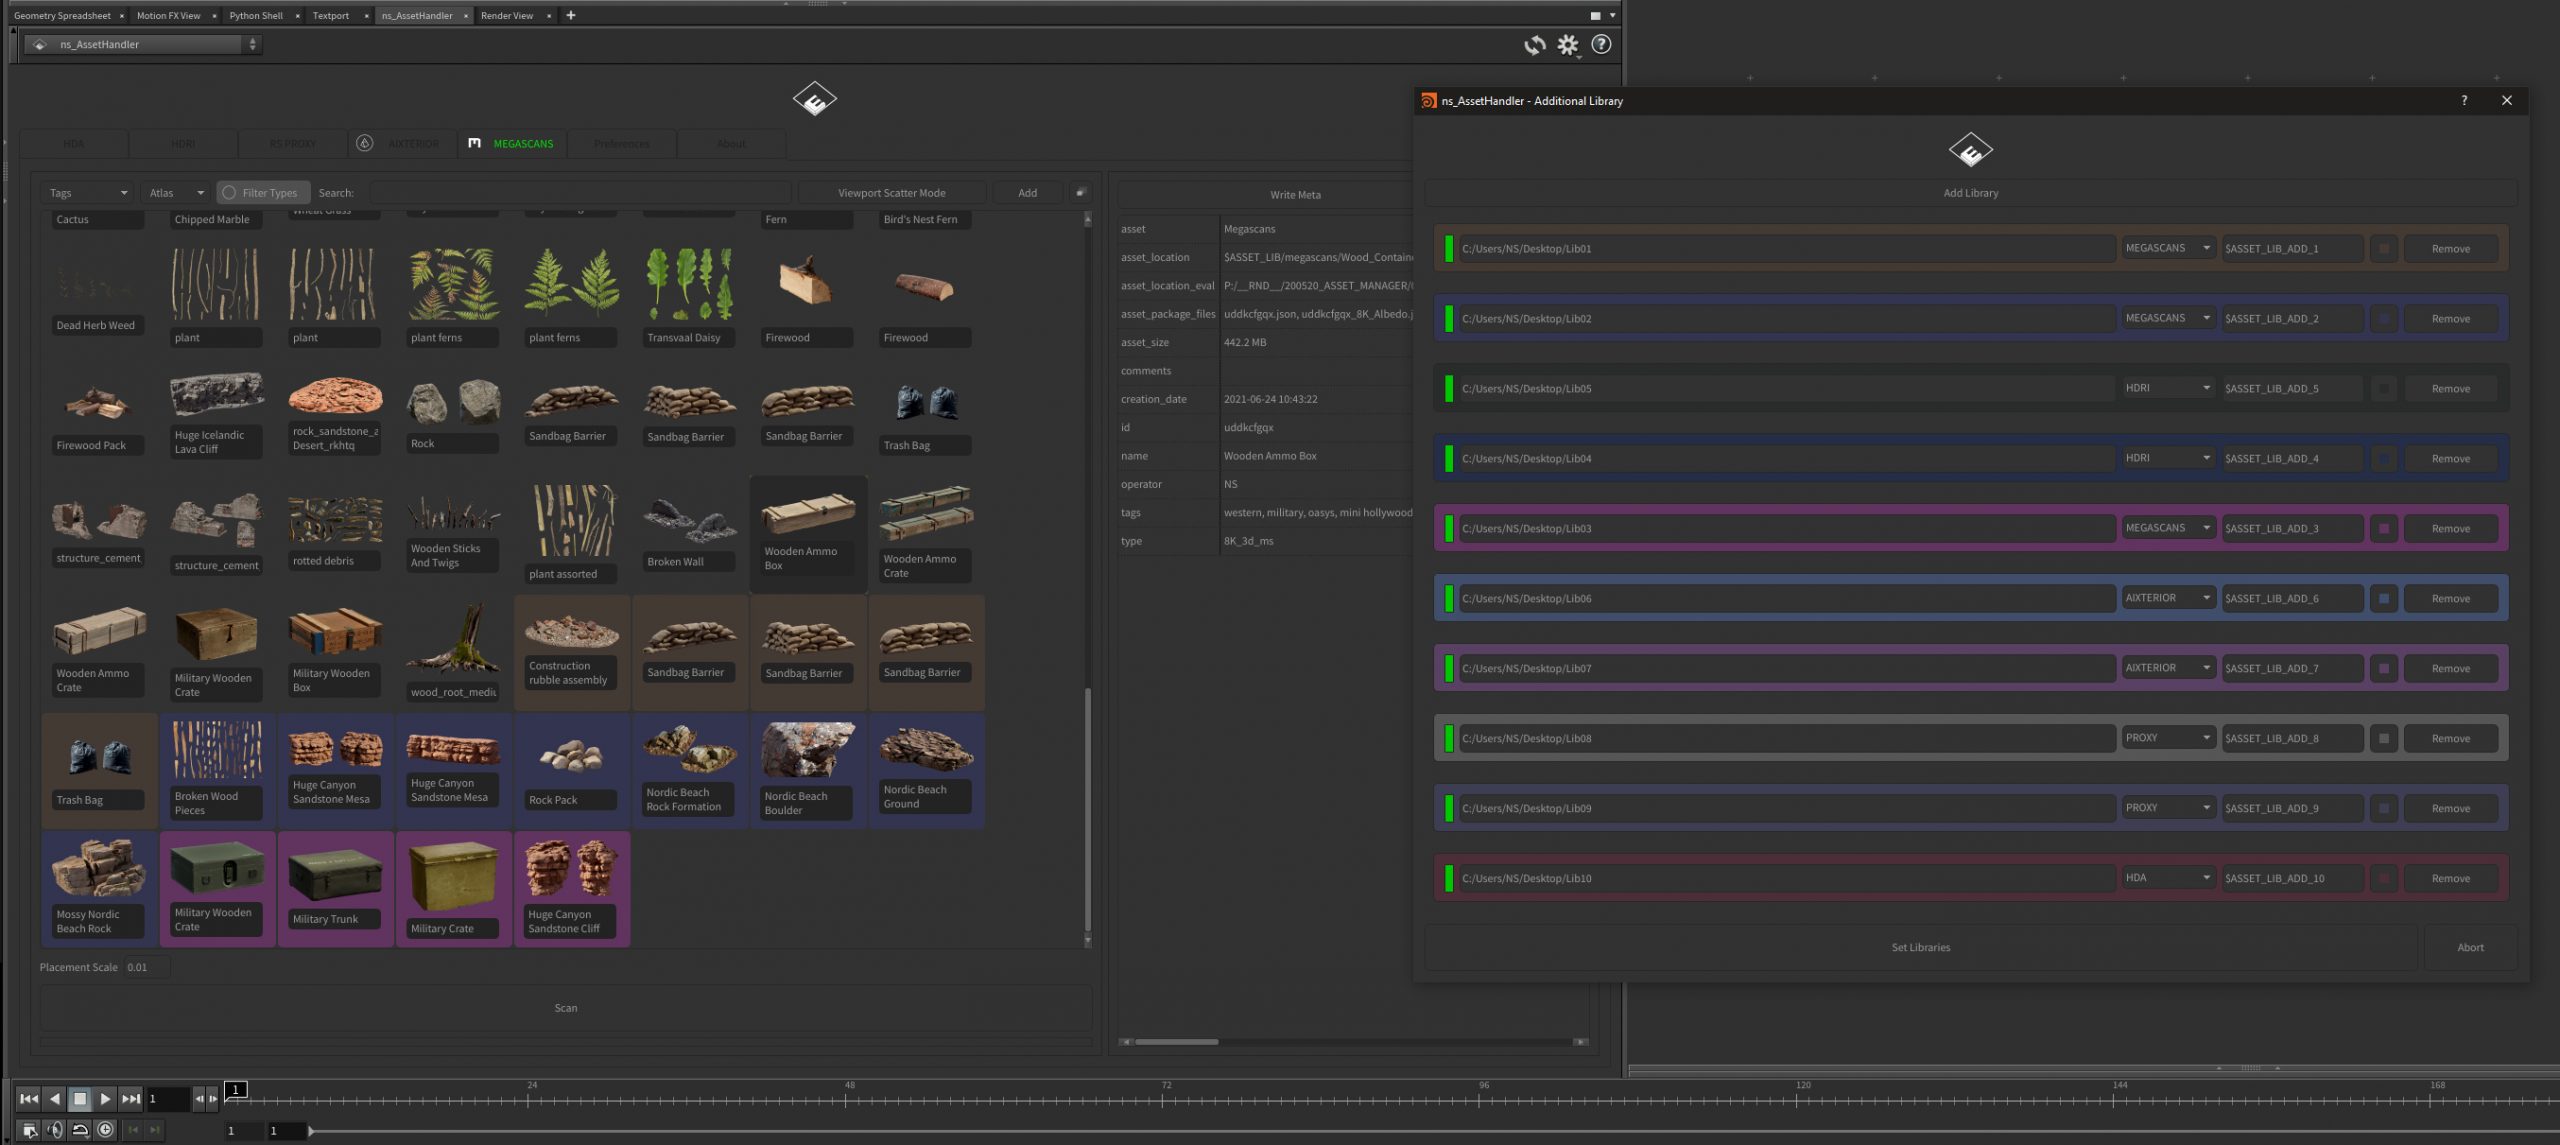
- Additional Libraries: you can beside the main other locations to scan. These are Color coded and highlighted in the scan result tabs. Every additional librarie has a own Houdini variable (e.g. $ASSET_LIB_ADD_1).
- “Renderer Preconfig”: related to the HDRI Lights and the auto. Shader (Env/Domelights supports Redshift/Arnold/Mantra Version 1.0) (auto. Shader only Redshift Version 1.0)
- “Use NetworkImages…”: Thumbnail shown and linked to the Node that dragged at the Network View
- “Copy external Files to Library”: will try to find all Inputs of the Geo Node you create a Asset/HDA from, and copy it to the Asset Folder
- “Set HDA to Embedded”: will set, after Drag & Drop the Asset to the Network View, to “embedded” (just exist in the Scene File)
- “Prompt for animation and ROP settings”: let you always choose between static and animated Proxies
- “Include all (unused) attributes while export”: Redshift related. (If you want , for example, unused UV Sets for Shader changes later. Redshift will be forced to export them.)
- “Rescan input files for existing…”: When you Drag & Drop an Asset, it will rescan input Files after a HDA is placed. (This is usefull when you append your asset with new Maps, Geo, etc.)
Meta Data
Some Notes about Meta Data & Thumbnail creation:
- HDA: on creation of the HDA (when you Drag & Drop a Node to the Asset Handler)
- HDRI: on first Read of the .hda/.exr file
- PROXY: on creation of the .rs files
- AIXTERIOR: on first Read of the Asset folder & creation of the HDA (the HDA will only be created or loaded when you Drag a Aixterior Asset to the Network View)
- MEGASCANS: on first Read of the Asset folder & creation of the HDA (the HDA will only be created or loaded when you Drag a Aixterior Asset to the Network View)
- Missing *_meta.json will be re-created. Thumbnails gets placeholder or re-created (HDRI).
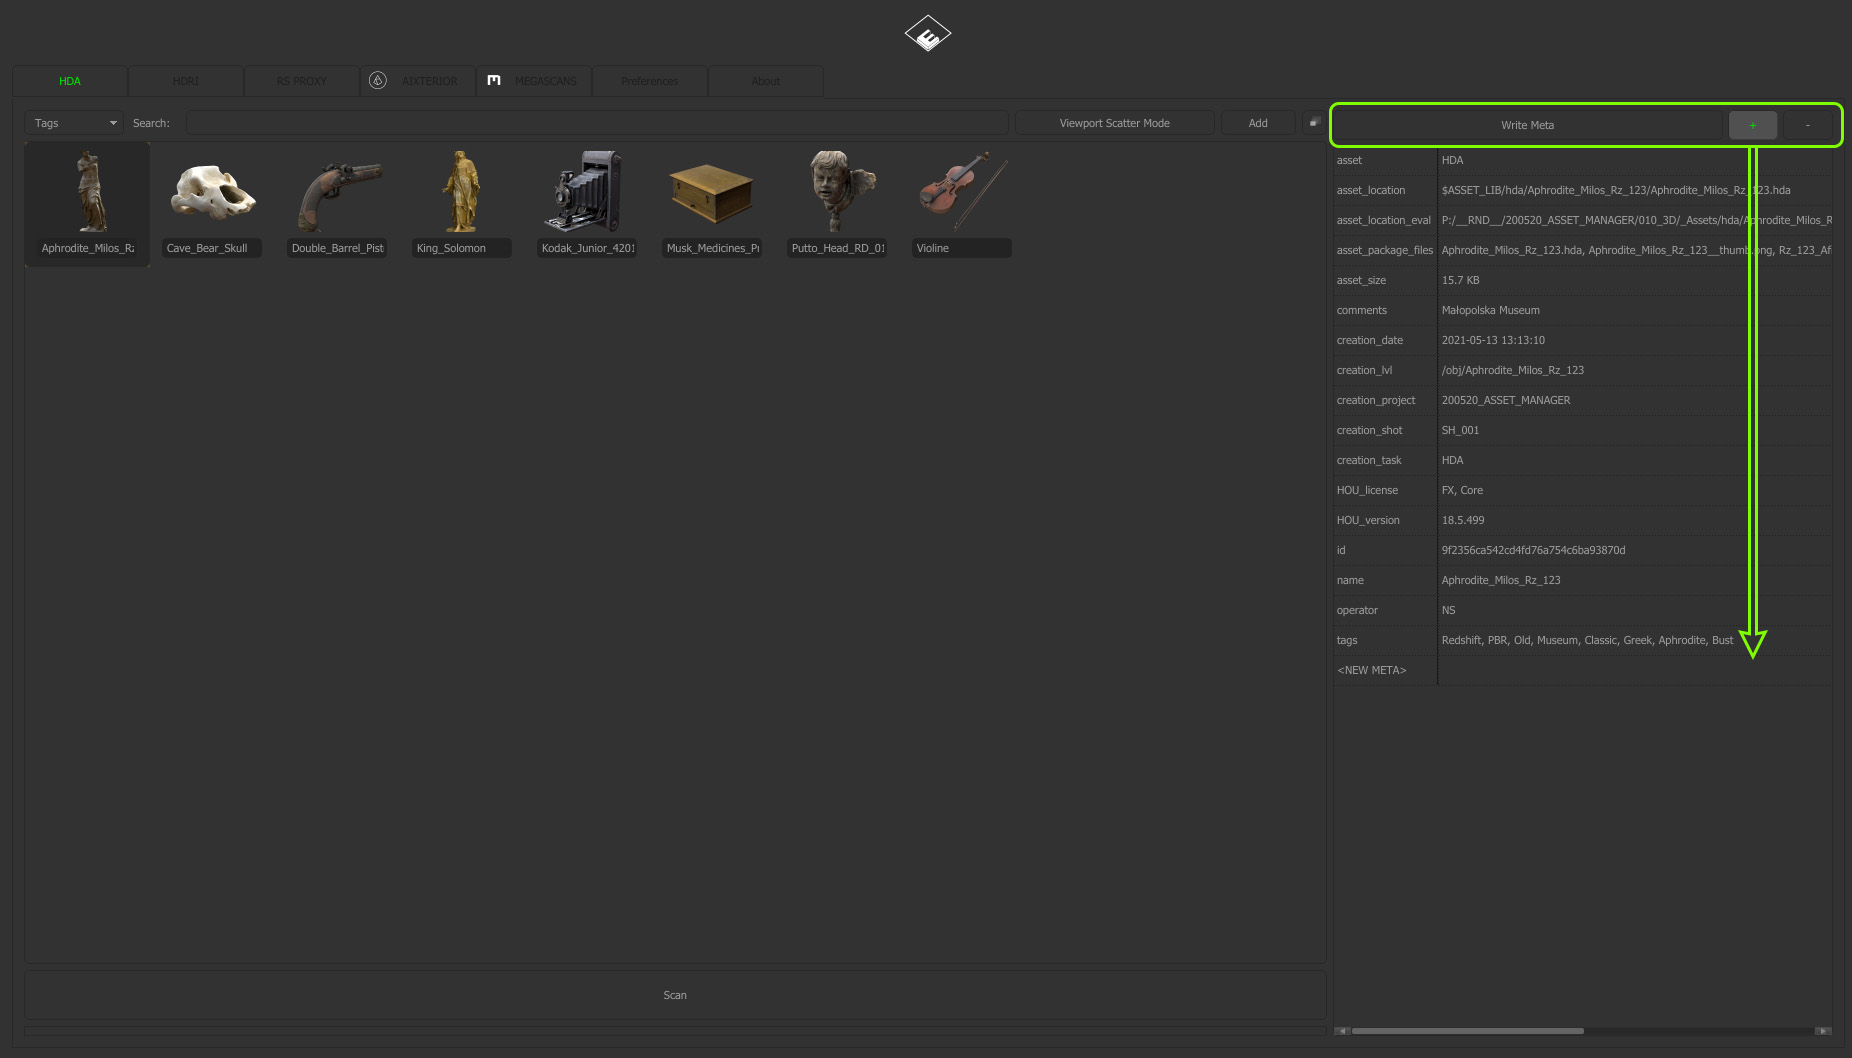
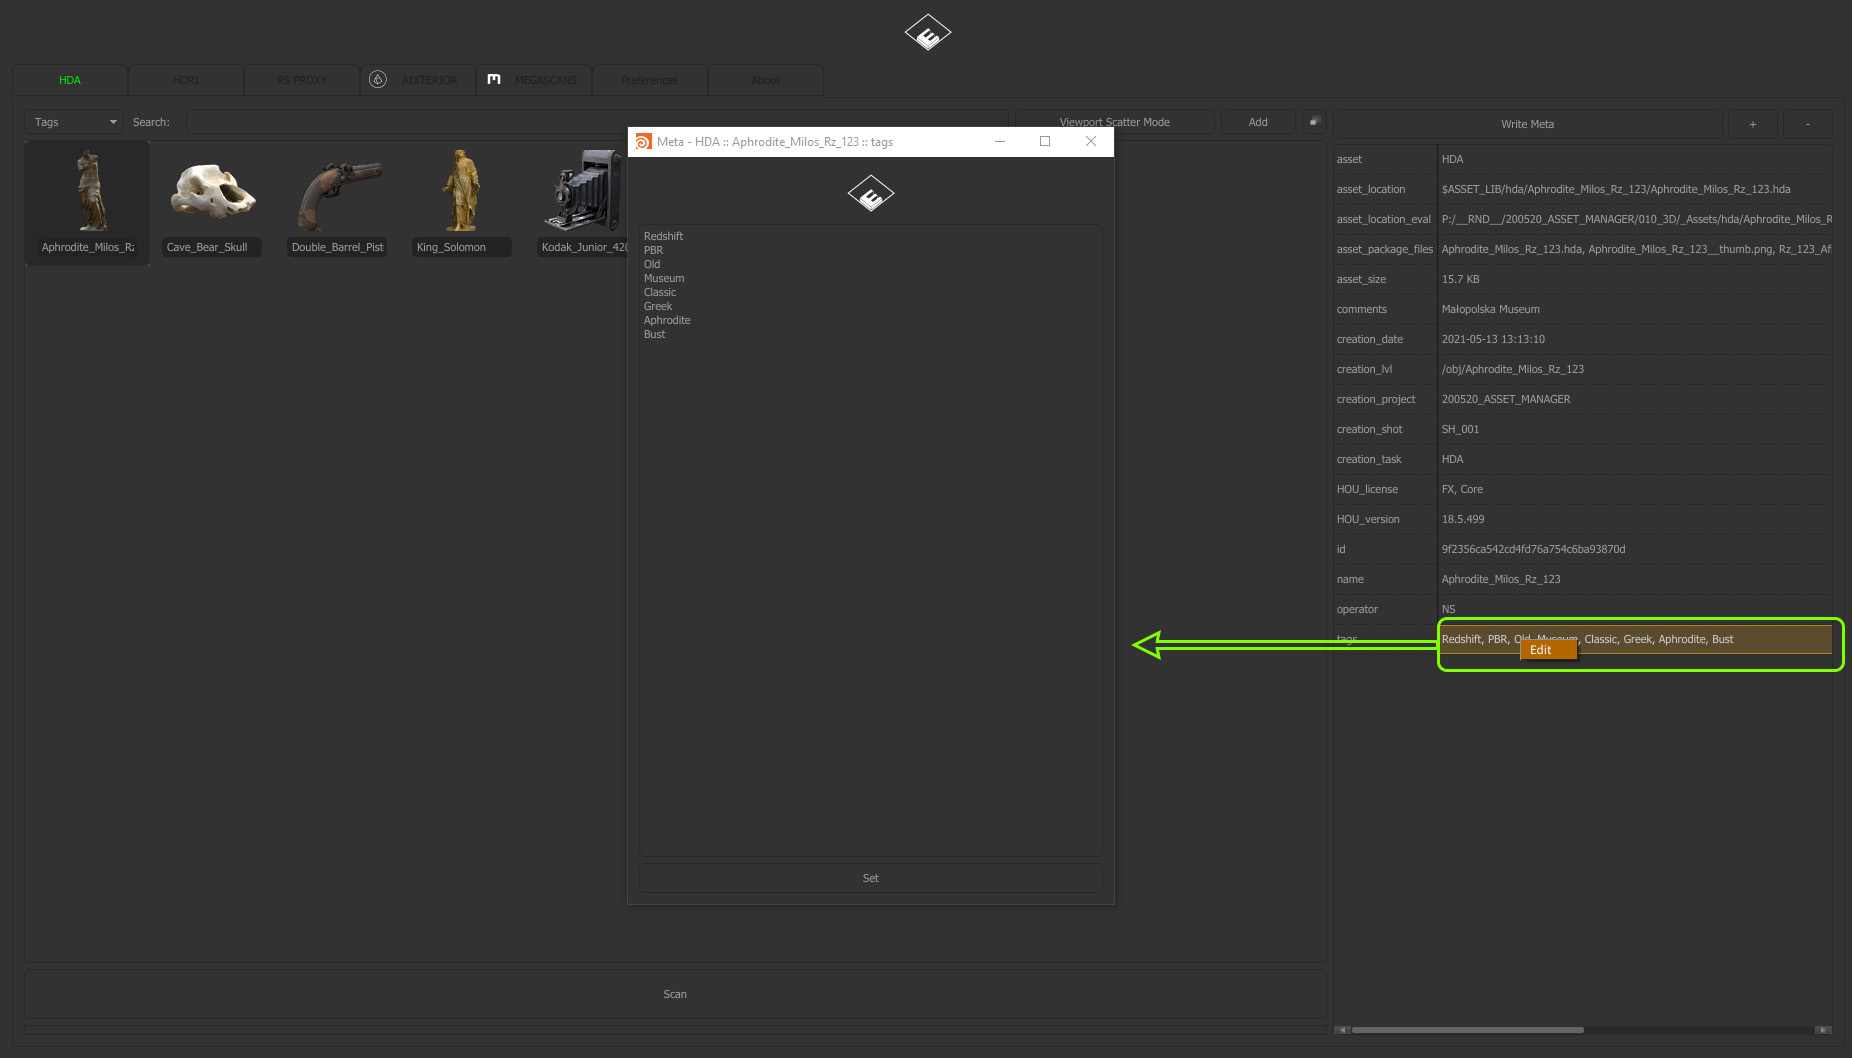
Some Meta Data are locked and not editable or deletable. After adding or change values you have to press the “Write Meta” Button to change the corrosponding .json Database.
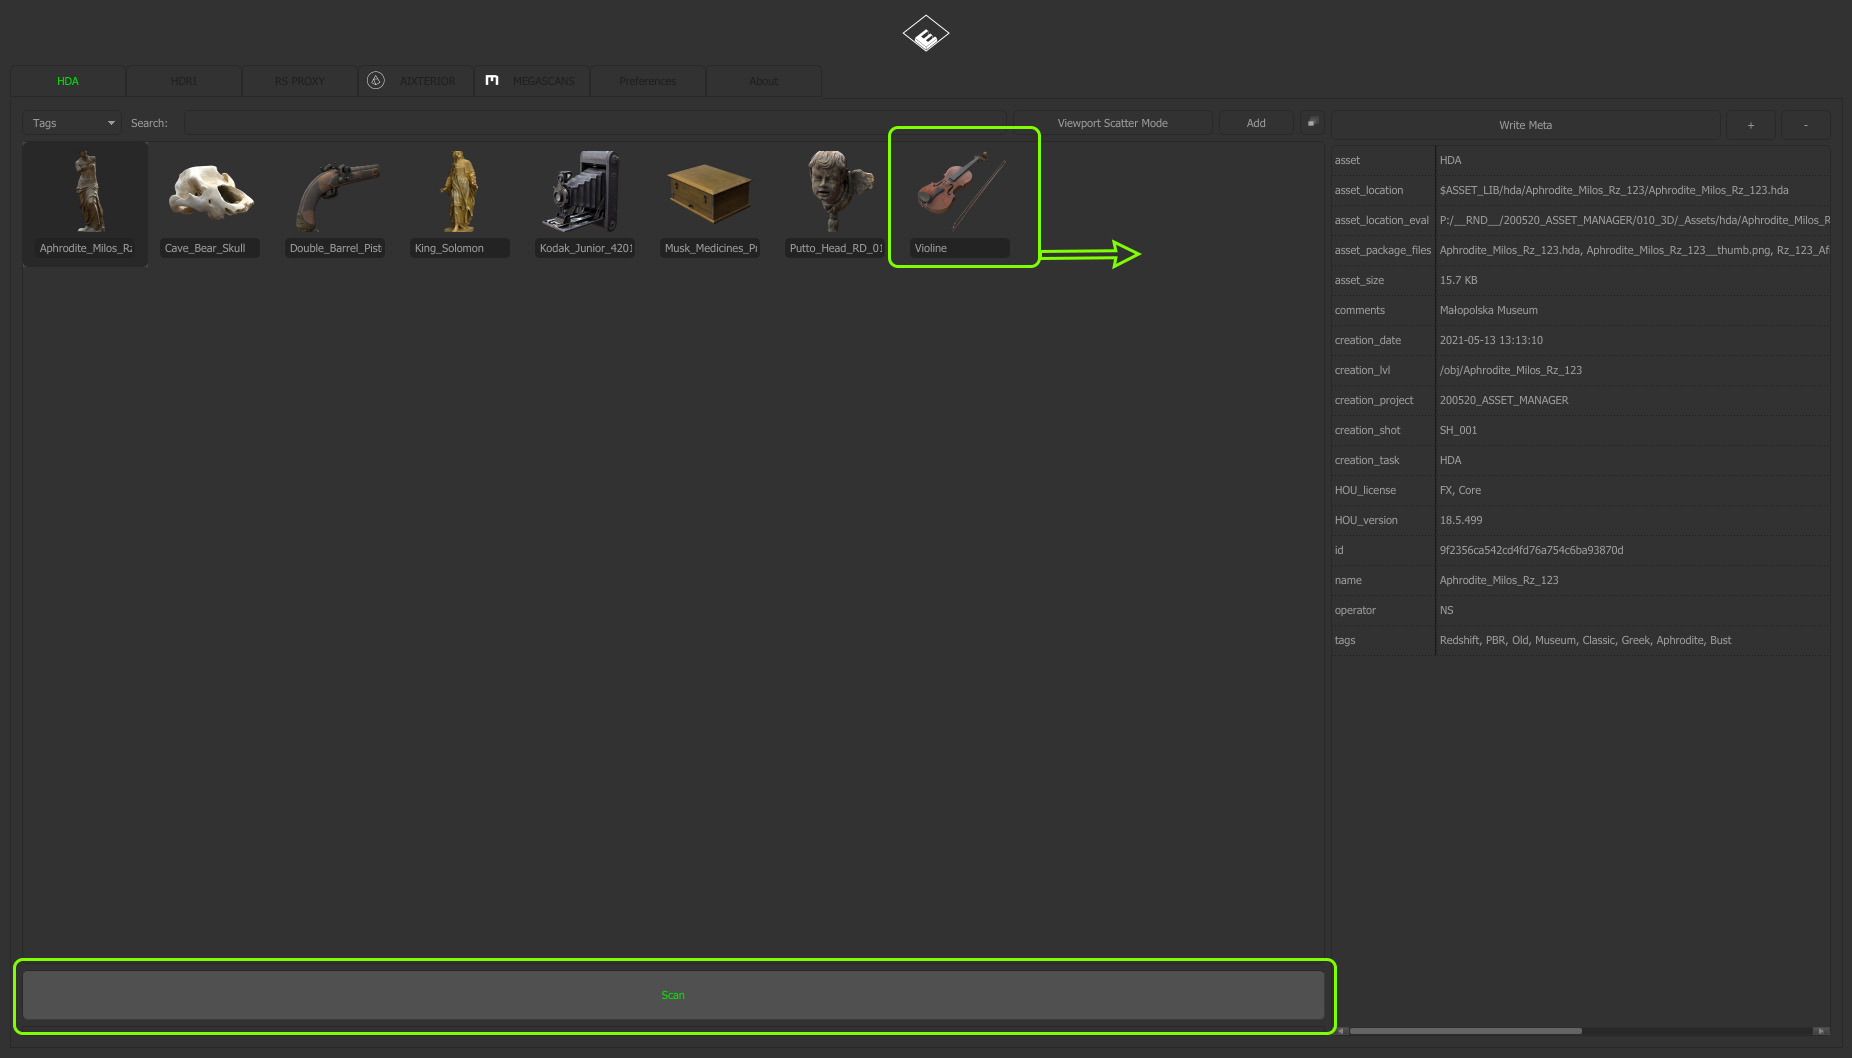
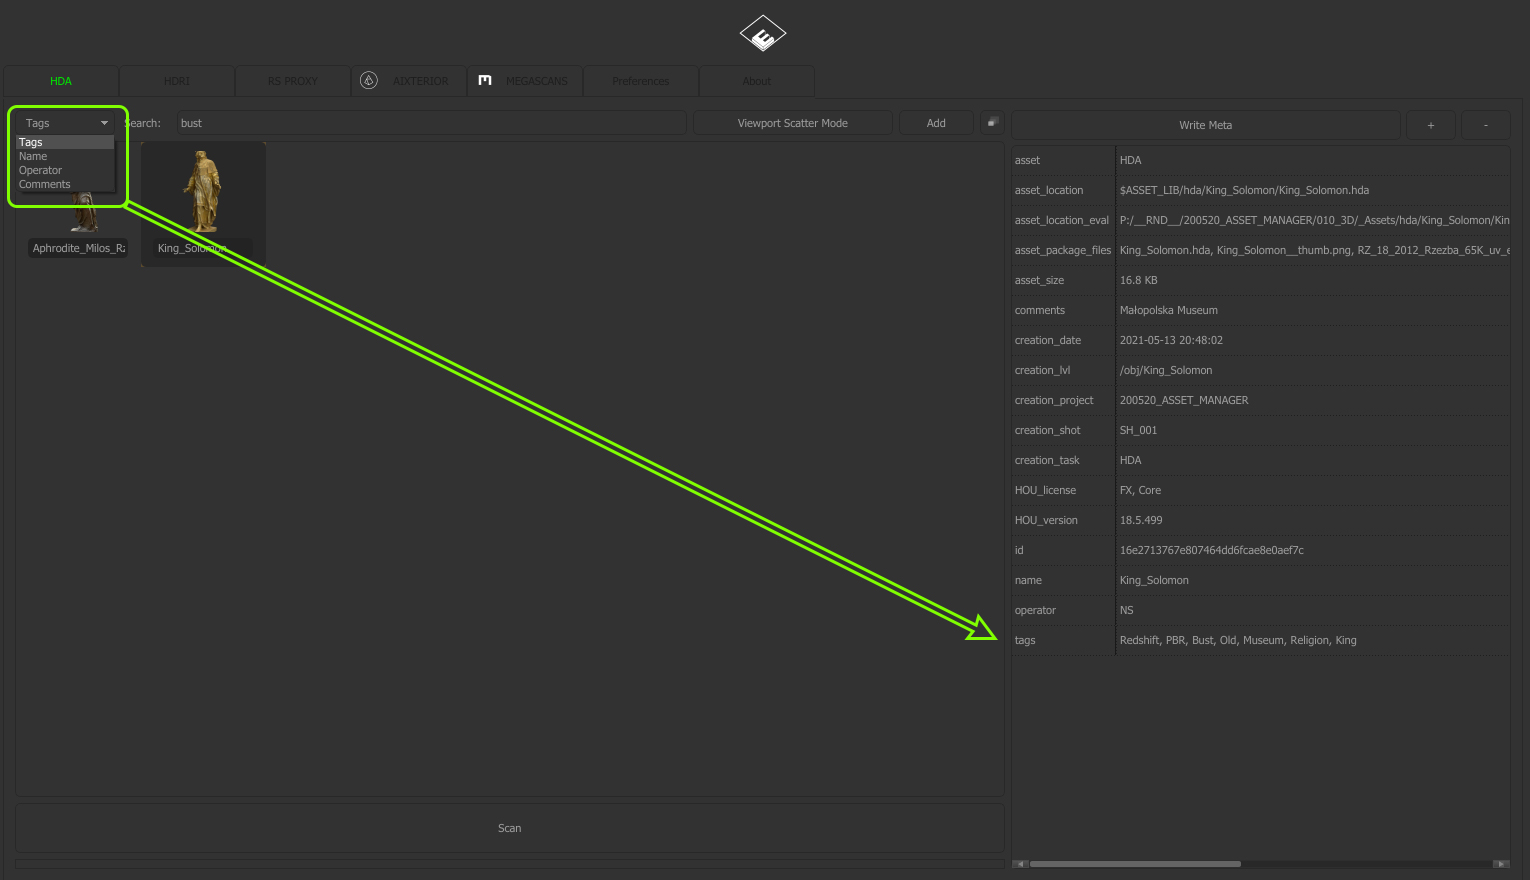
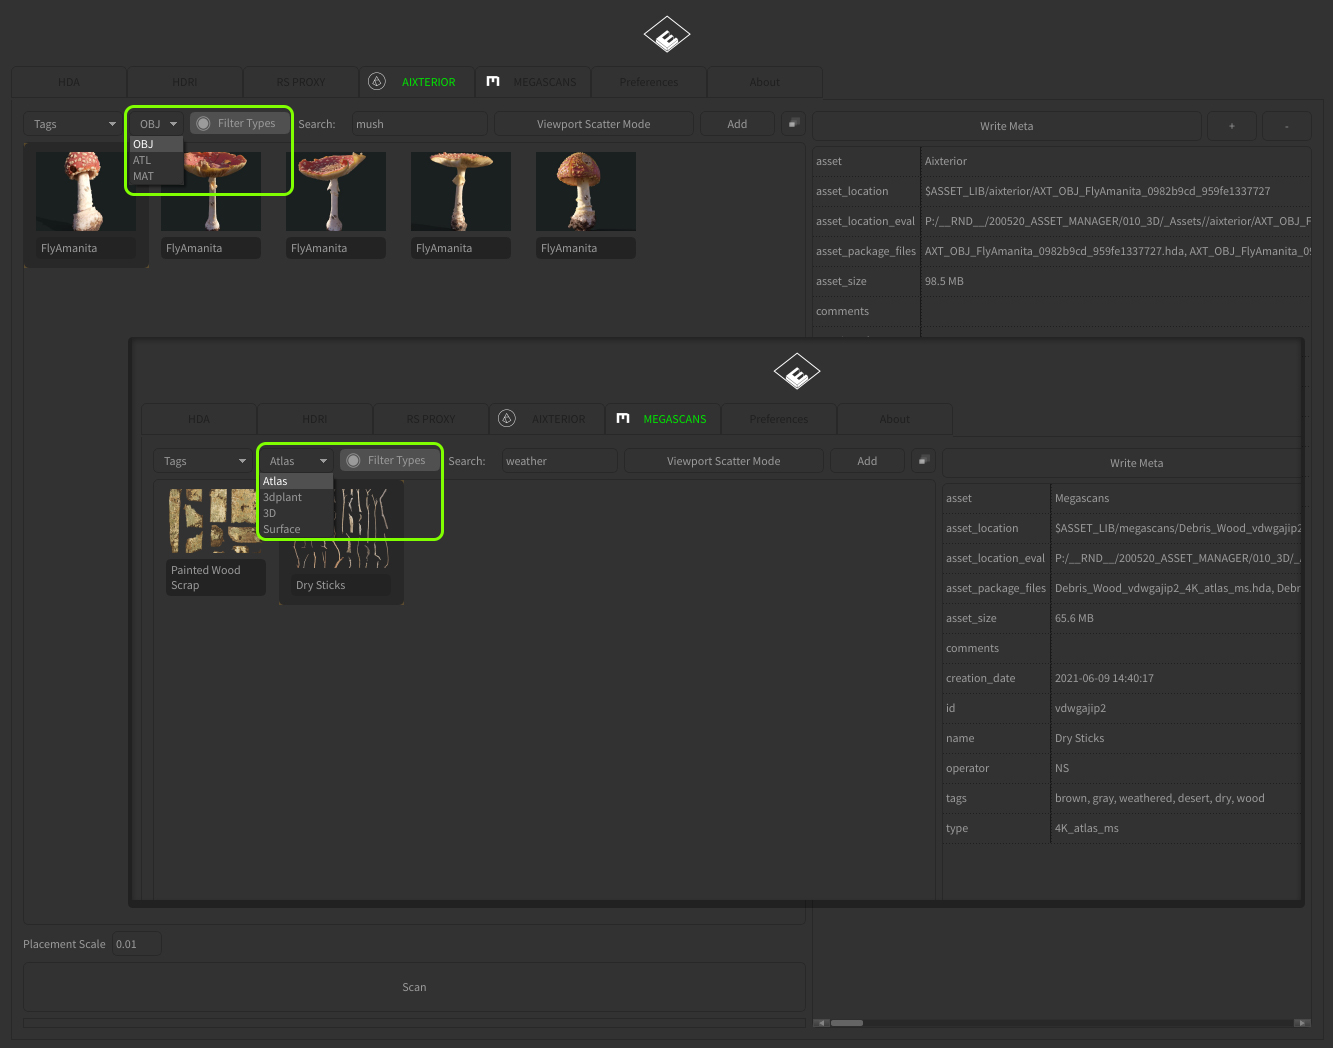
Searching
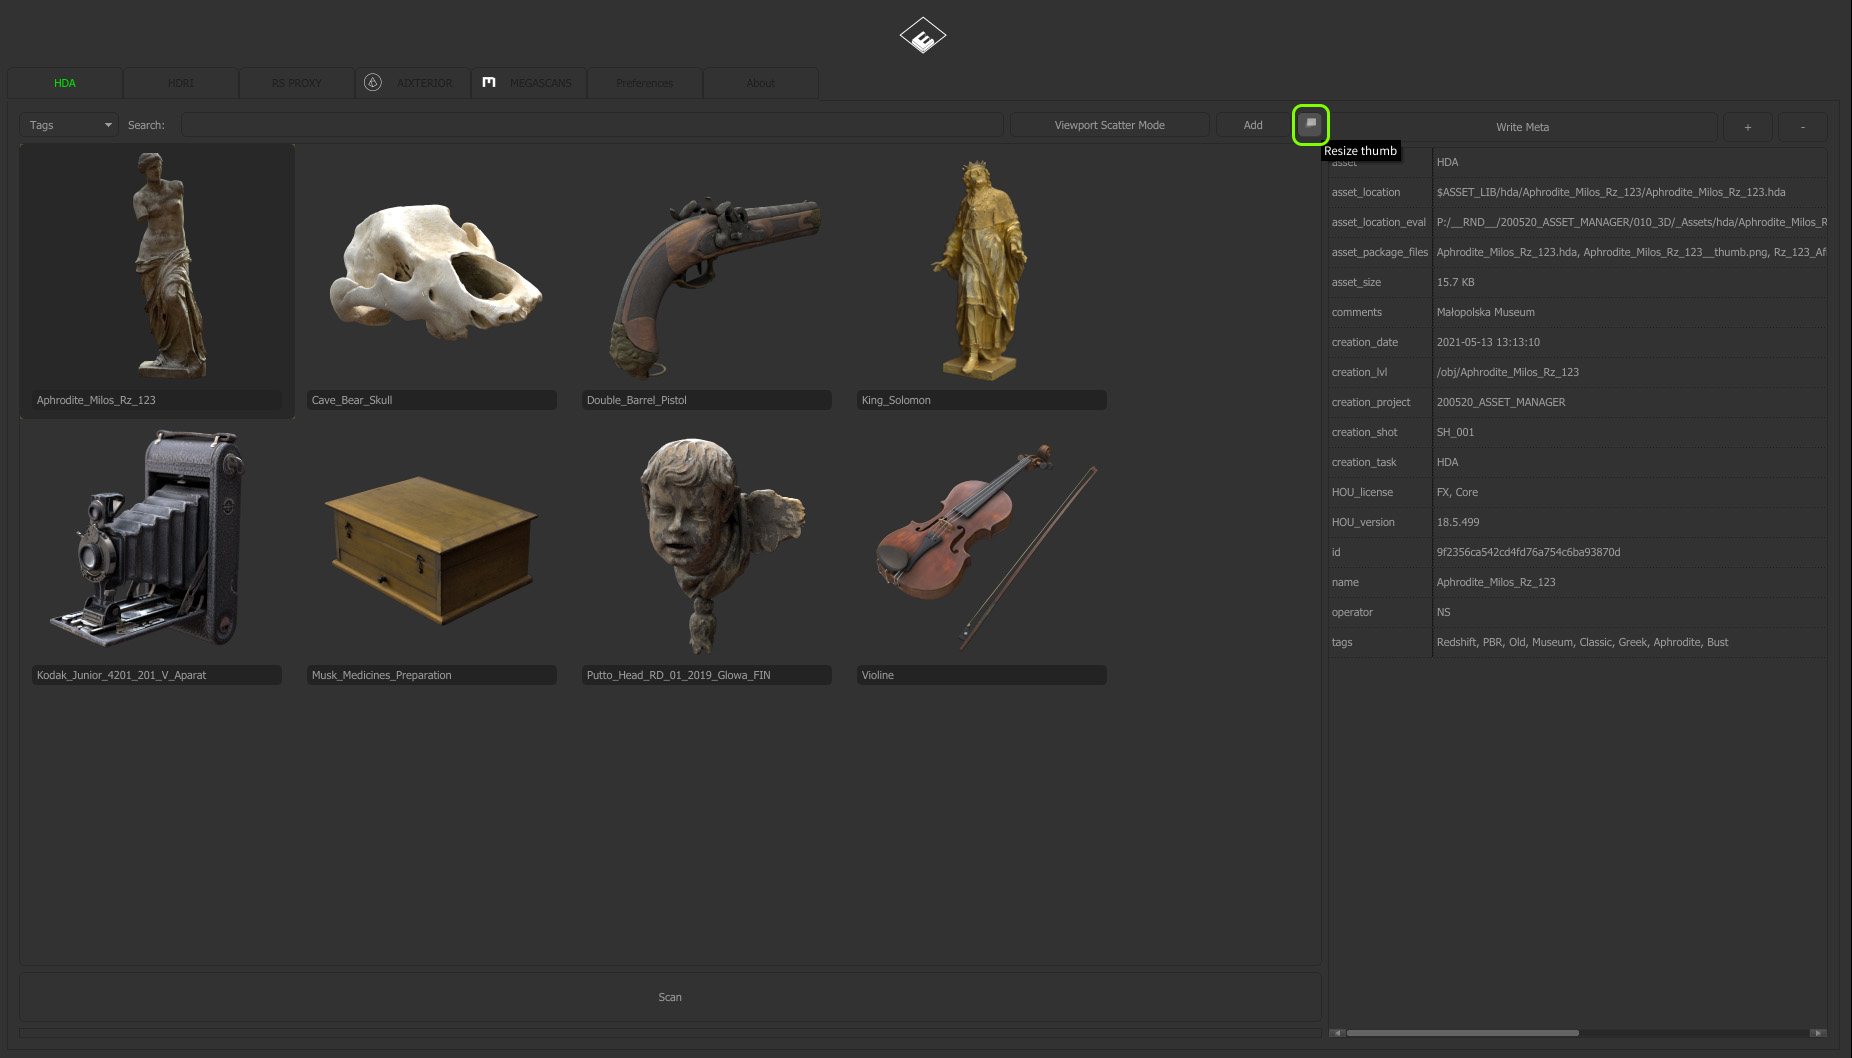
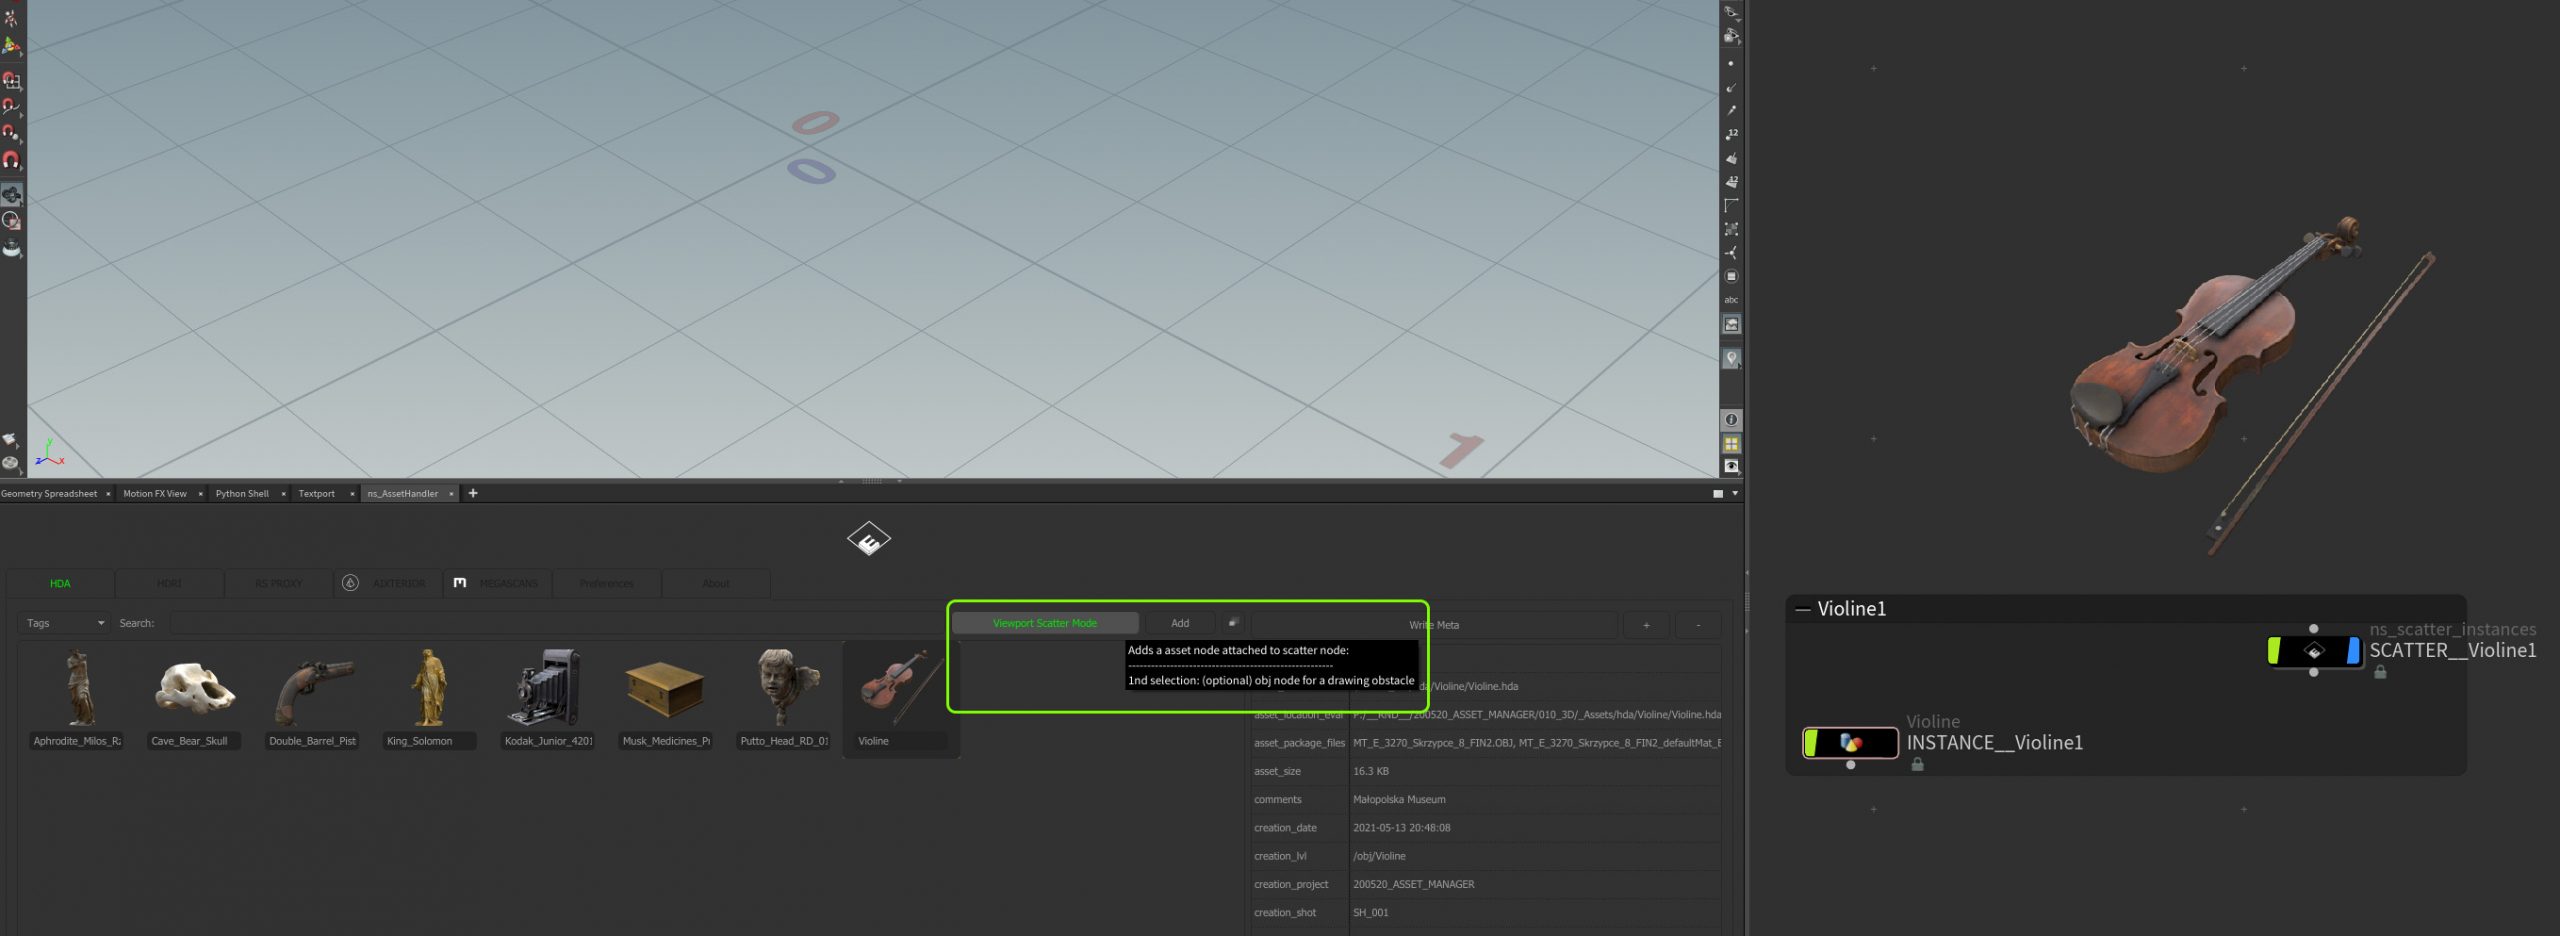
Thumbnails and Quick Scatter
Asset Handler Context (Right-Click)
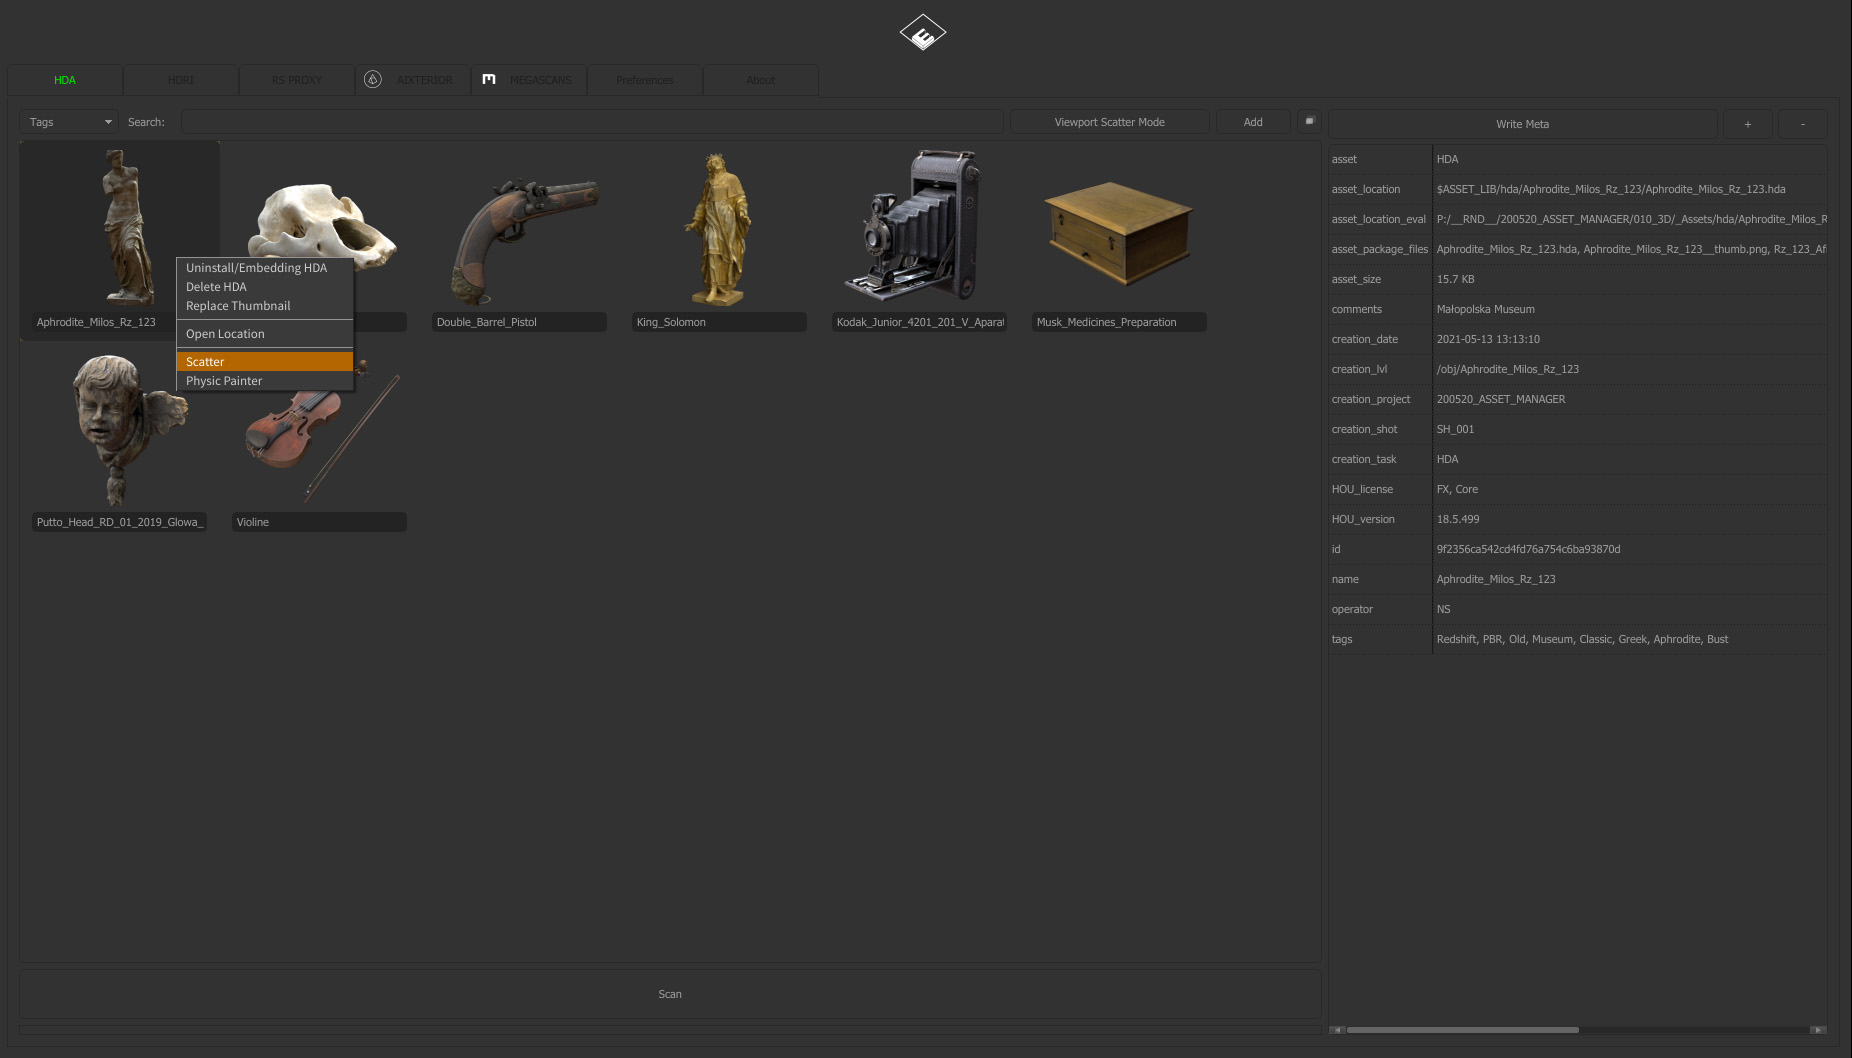
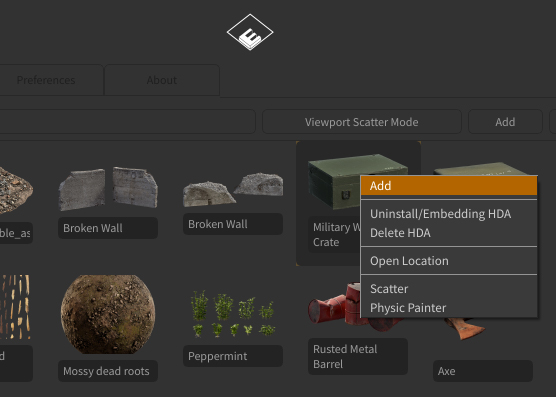
- “Add”: adds the Asset to Network View
- “Uninstall/Embedding HDA”: uninstall the HDA from the Scene and sets all Instances in the Scene to “embedded”
- “Delete HDA”: delete the Asset + HDA from the Library. Attention!
- “Replace Thumbnail”: Replace the Asset Thumbnail (With the creation of the Asset you get just a auto. Scene Viewer Capture as Thumbnail. Here you can it easily replace it with a rendered Thumbnail)
- “Open Location”: opens the asset/file Location
- “Scatter & Physic Painter”: adds a Scatter Setup with the Asset as Set Input to the Network View
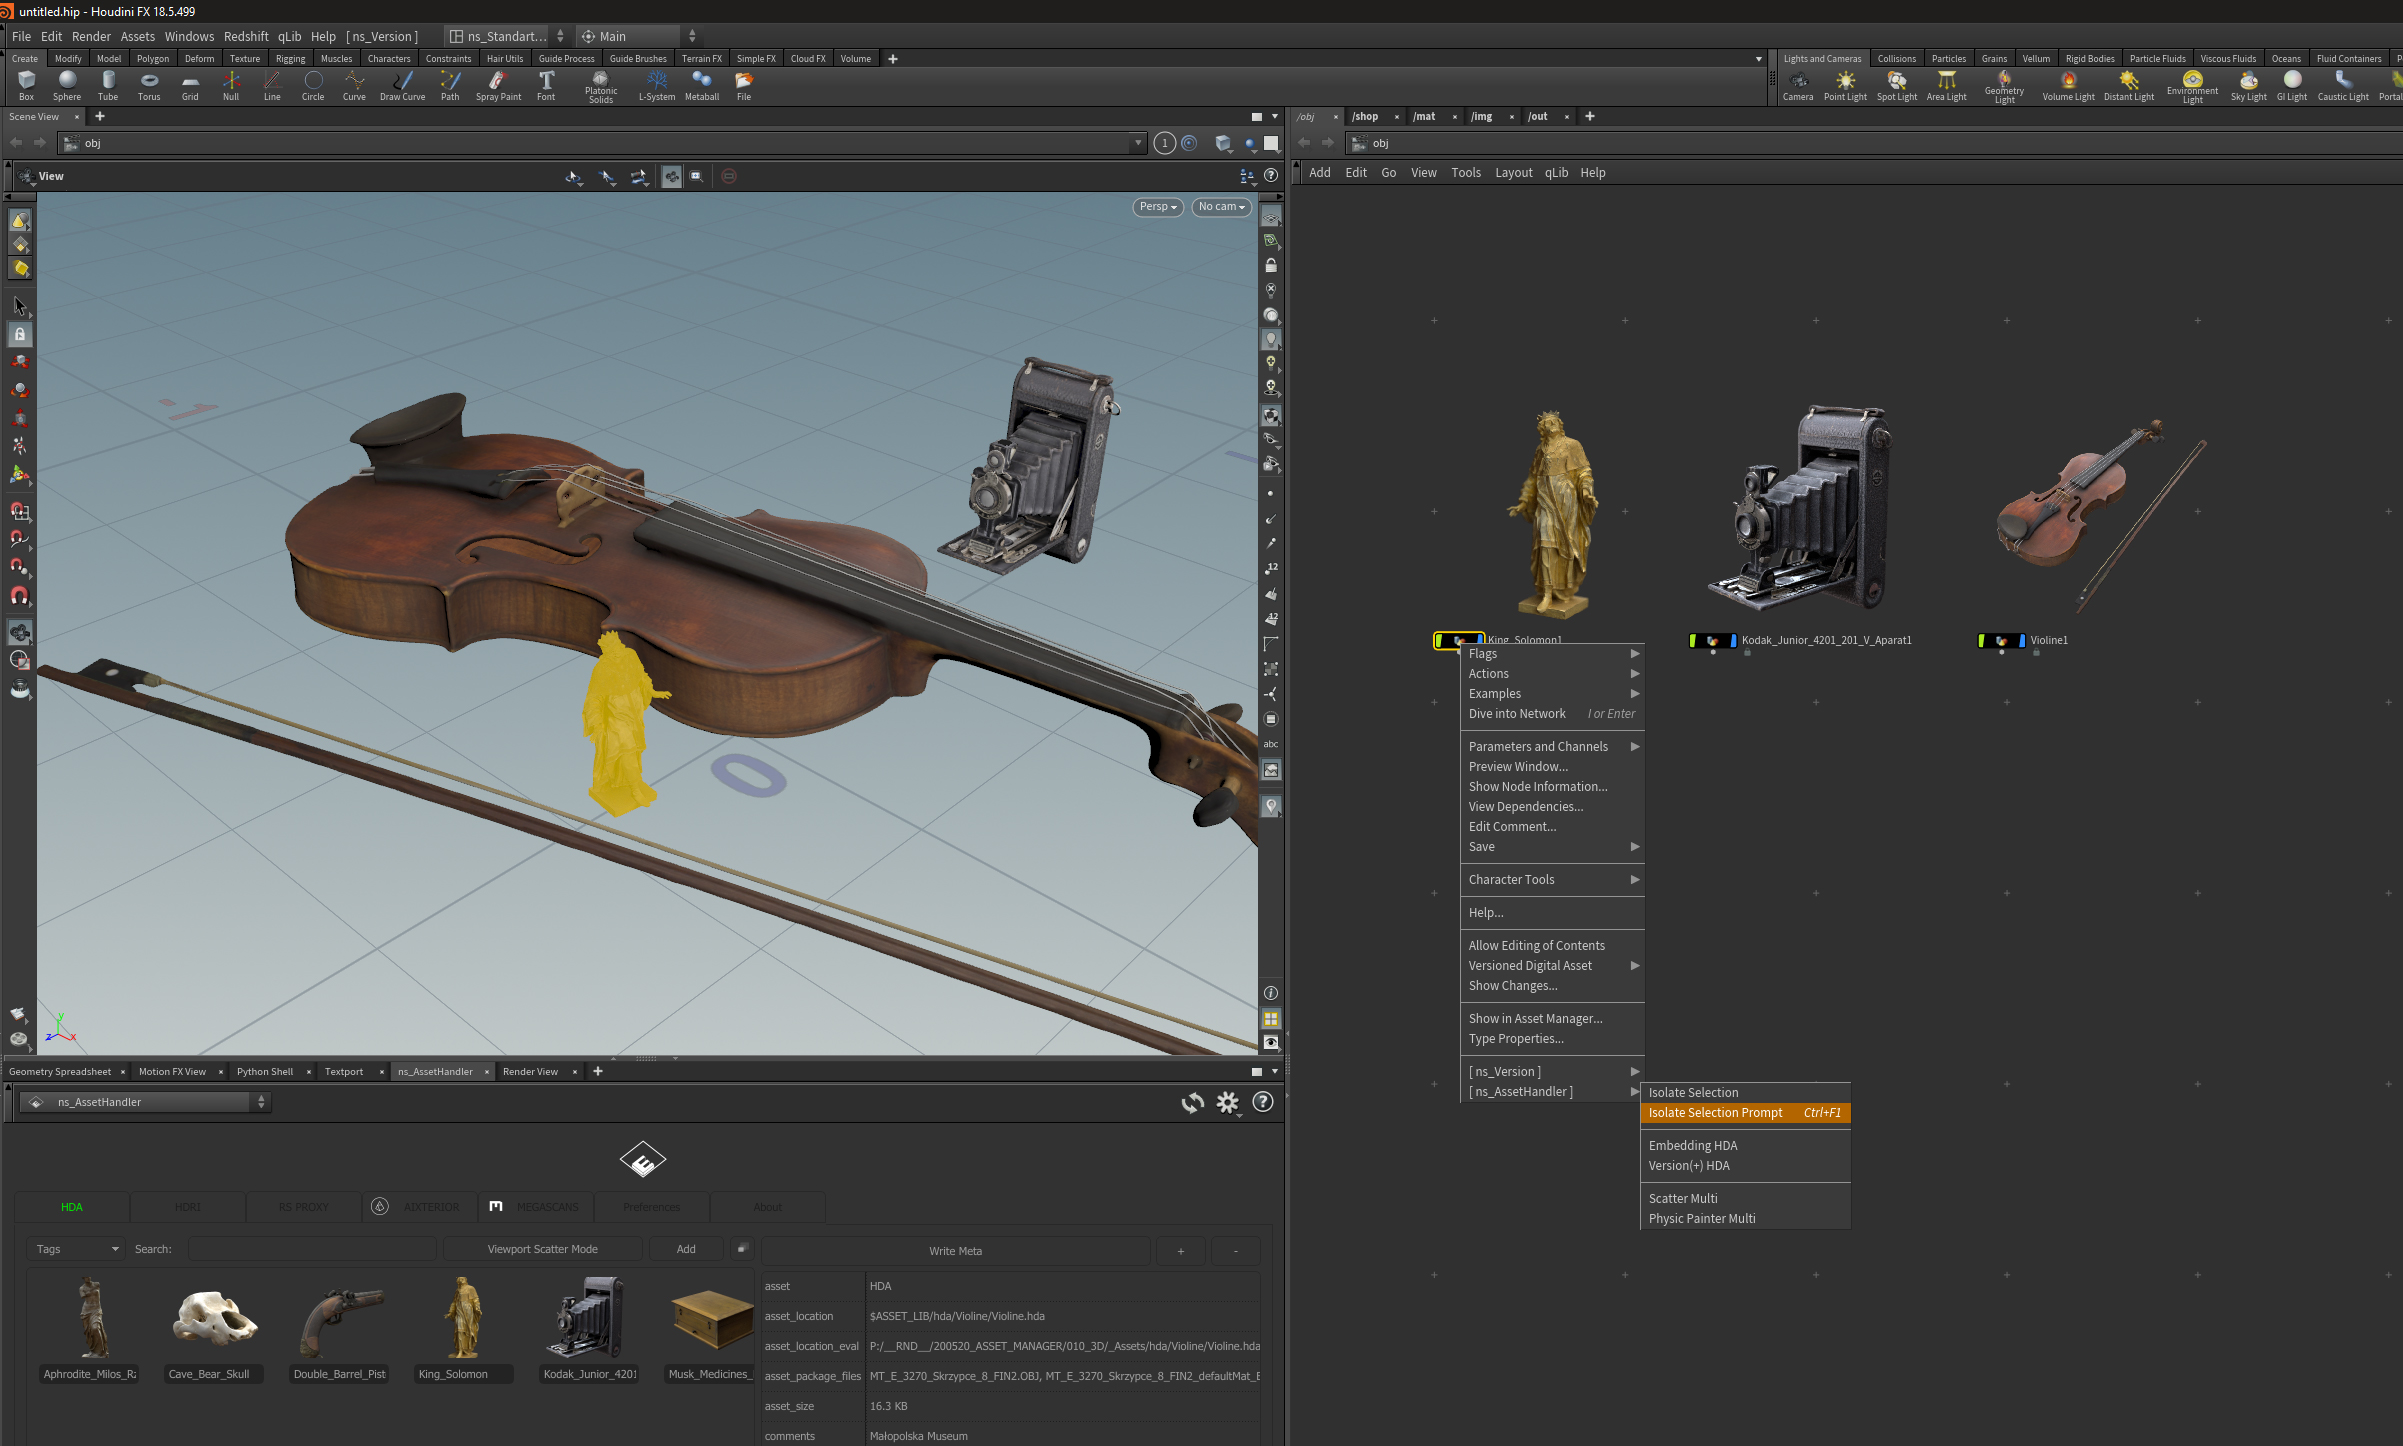
Network View Context (Right-Click)

Visibility Over Selection

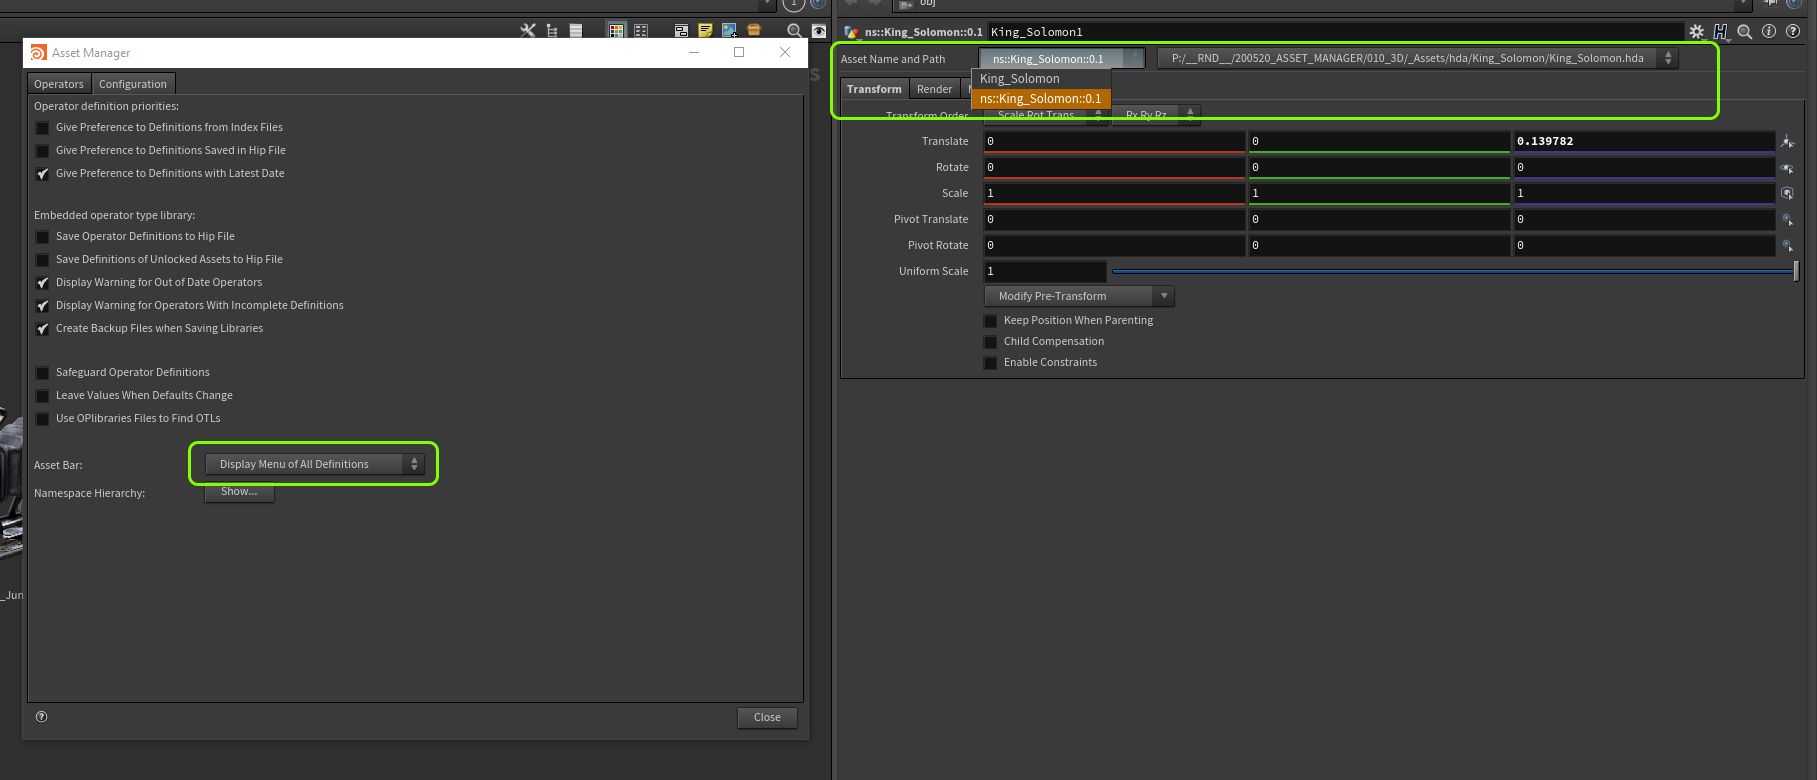
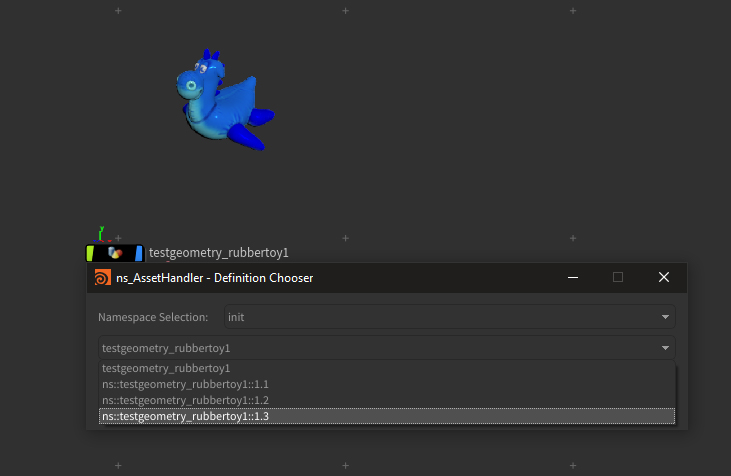
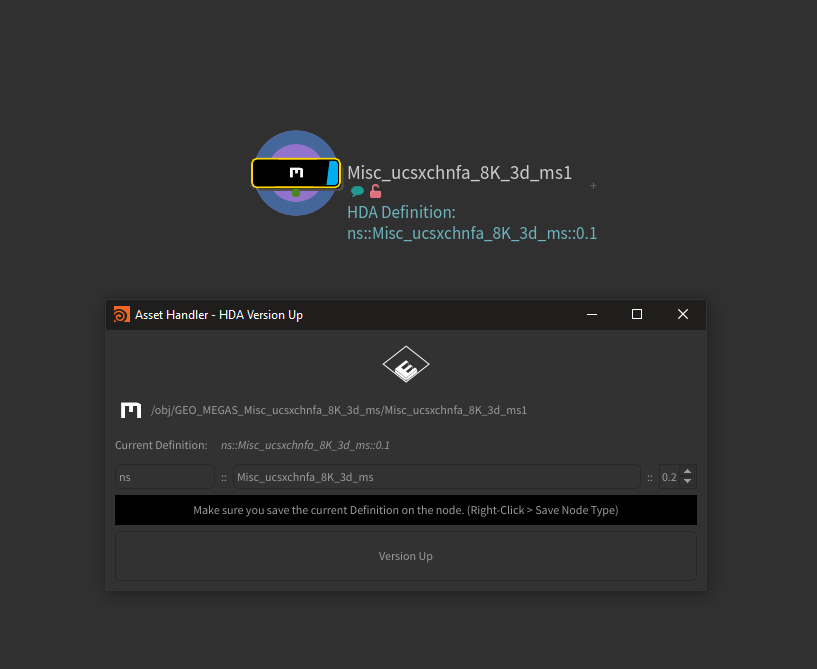
Versioning
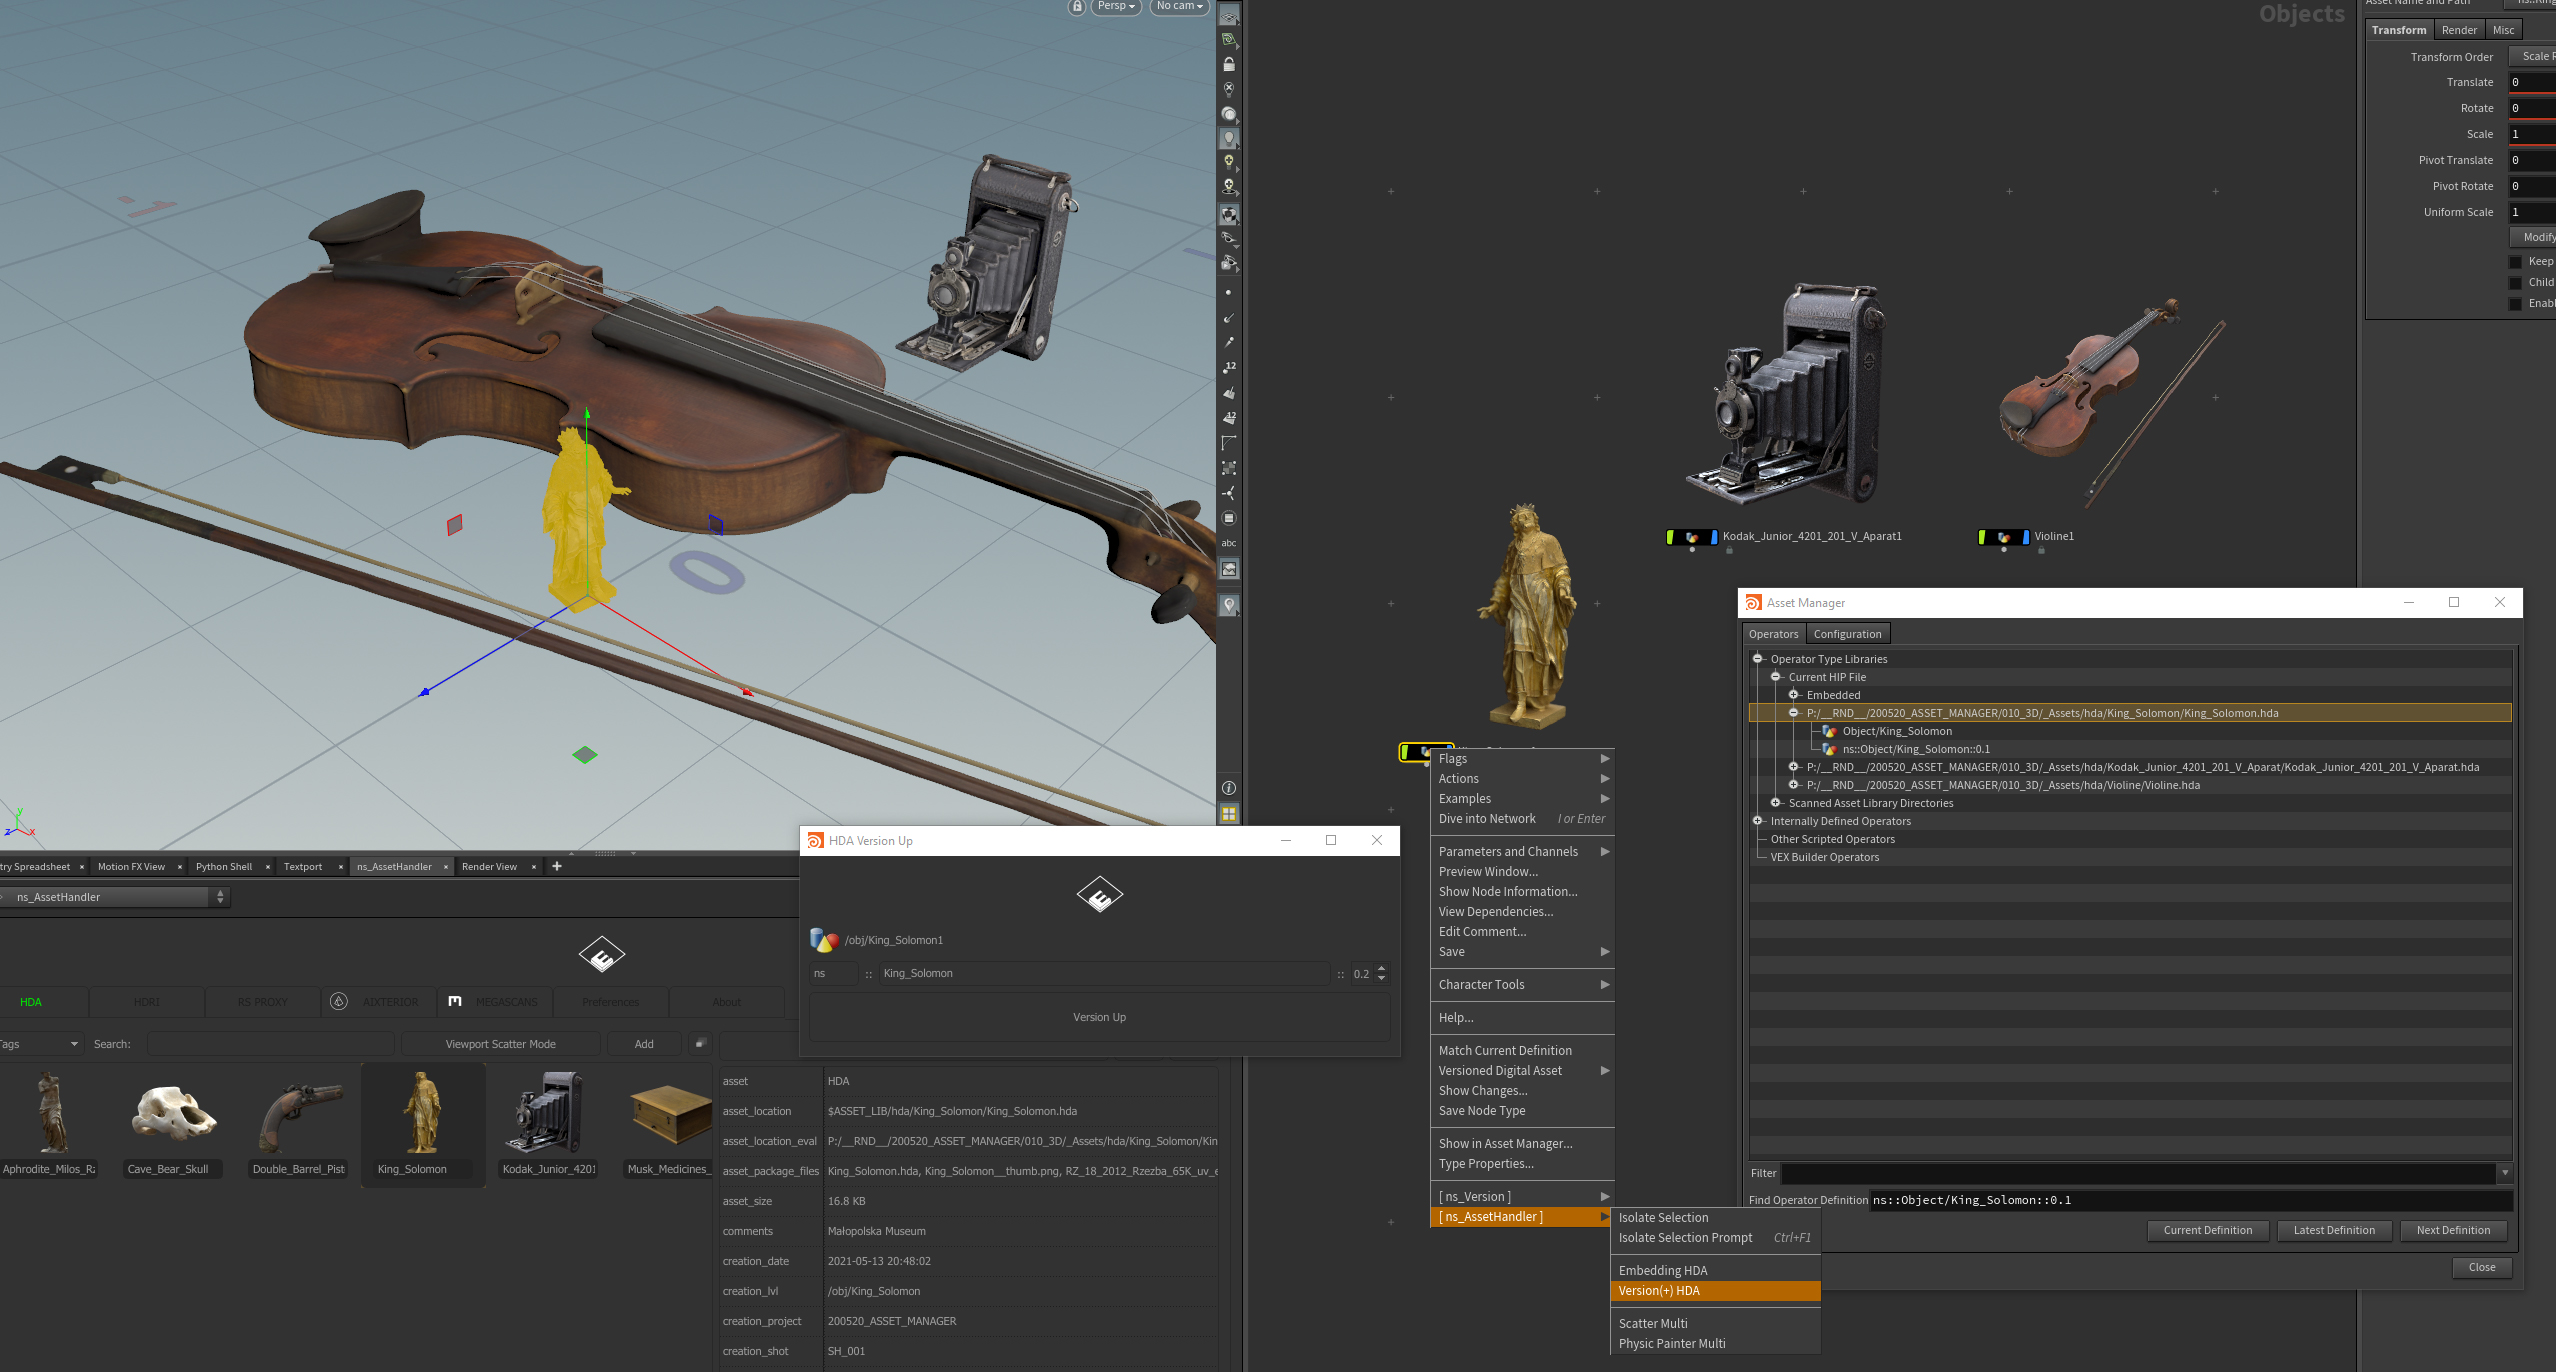
Activate in the Houdini Asset Manager > Configuration Tab > “Display Menu of All Definitions” to get quick Access on your HDAs.