» Workflows and Aspects of Small-Scale Object Scanning «
Content Index
- Challenges
- Focus Stacking
- Handling Speculars/Reflections & Cross-Polarization
- Workflows
- Lenses
- Setup and Automation
- Conclusion
1. Challenges
Achieving high-detail geometry and nice, continuous textures often involves overcoming certain challenges. Macro photography involves objects measuring between 0.5 and 5 cm. In this range, optics produce a large depth of field (DOF). Pictures with high DOF limiting your photogrammetry software, but a good solution can solve this issue. The best approach is to increase your Aperture to f/8 or higher and use bright light sources. Super high f-stop values lead to diffraction limitations, resulting in blurry images.
In most cases you need ‘Focus Stacking’.
The number of additional ‘focus planes’ and photo-sets you need, depends on the size of your object. I mostly used three focus planes. For very long or small objects, I use up to 5–7 additional focus planes.
Doing the maths, it’s clear that the amount of data you have to produce is increasing linearly (excluding additional compute power). Without focus stacking, the best-case scenario is two views/sets of 50 photos. With five focus planes, you would have instead of 100 photos, ultimately 500 photos. (20.2 MP cameras, ~25 MB per photo).
A good data structure is key.
Avoid cameras with super-high megapixel sensors; I would prefer 20–30 MP. You won’t produce noticeably better textures. The data overhead is not worth it.
Focus stacking needs a stable/consistent setup. You don`t need a motion/shutter controller but it saves a lot of time and you can do your photos-sets running in background.
Another problem is mostly material-related and the object that has to be scanned. Metallic, reflective, and transparent objects cause the most problems.
A Cross-polarization setup can be used to capture metallic/reflective objects or objects that produce strong specular highlights. Furthermore you get perfect Albedo-textures without speculars.
Transparent objects are tricky but can be handled with special powder and a more intense post-processing stage.
How to deal with the background?
Color profiles and matching colors for good textures is a different challenge.
2. Focus Stacking
An example of a shallow depth of field (DOF) with f/8 and a 90mm macro lens. The scanning result without focus stacking was decent, but had some issues with mesh topology. With focus stacking 2-views (side, top) the 3D solve was perfect. The sharper the image, the better the outcome, as the software can more consistently identify feature points across all images..
Notice the object has not that many contrast areas in color and luminance. Blurry areas make it even harder to solve.

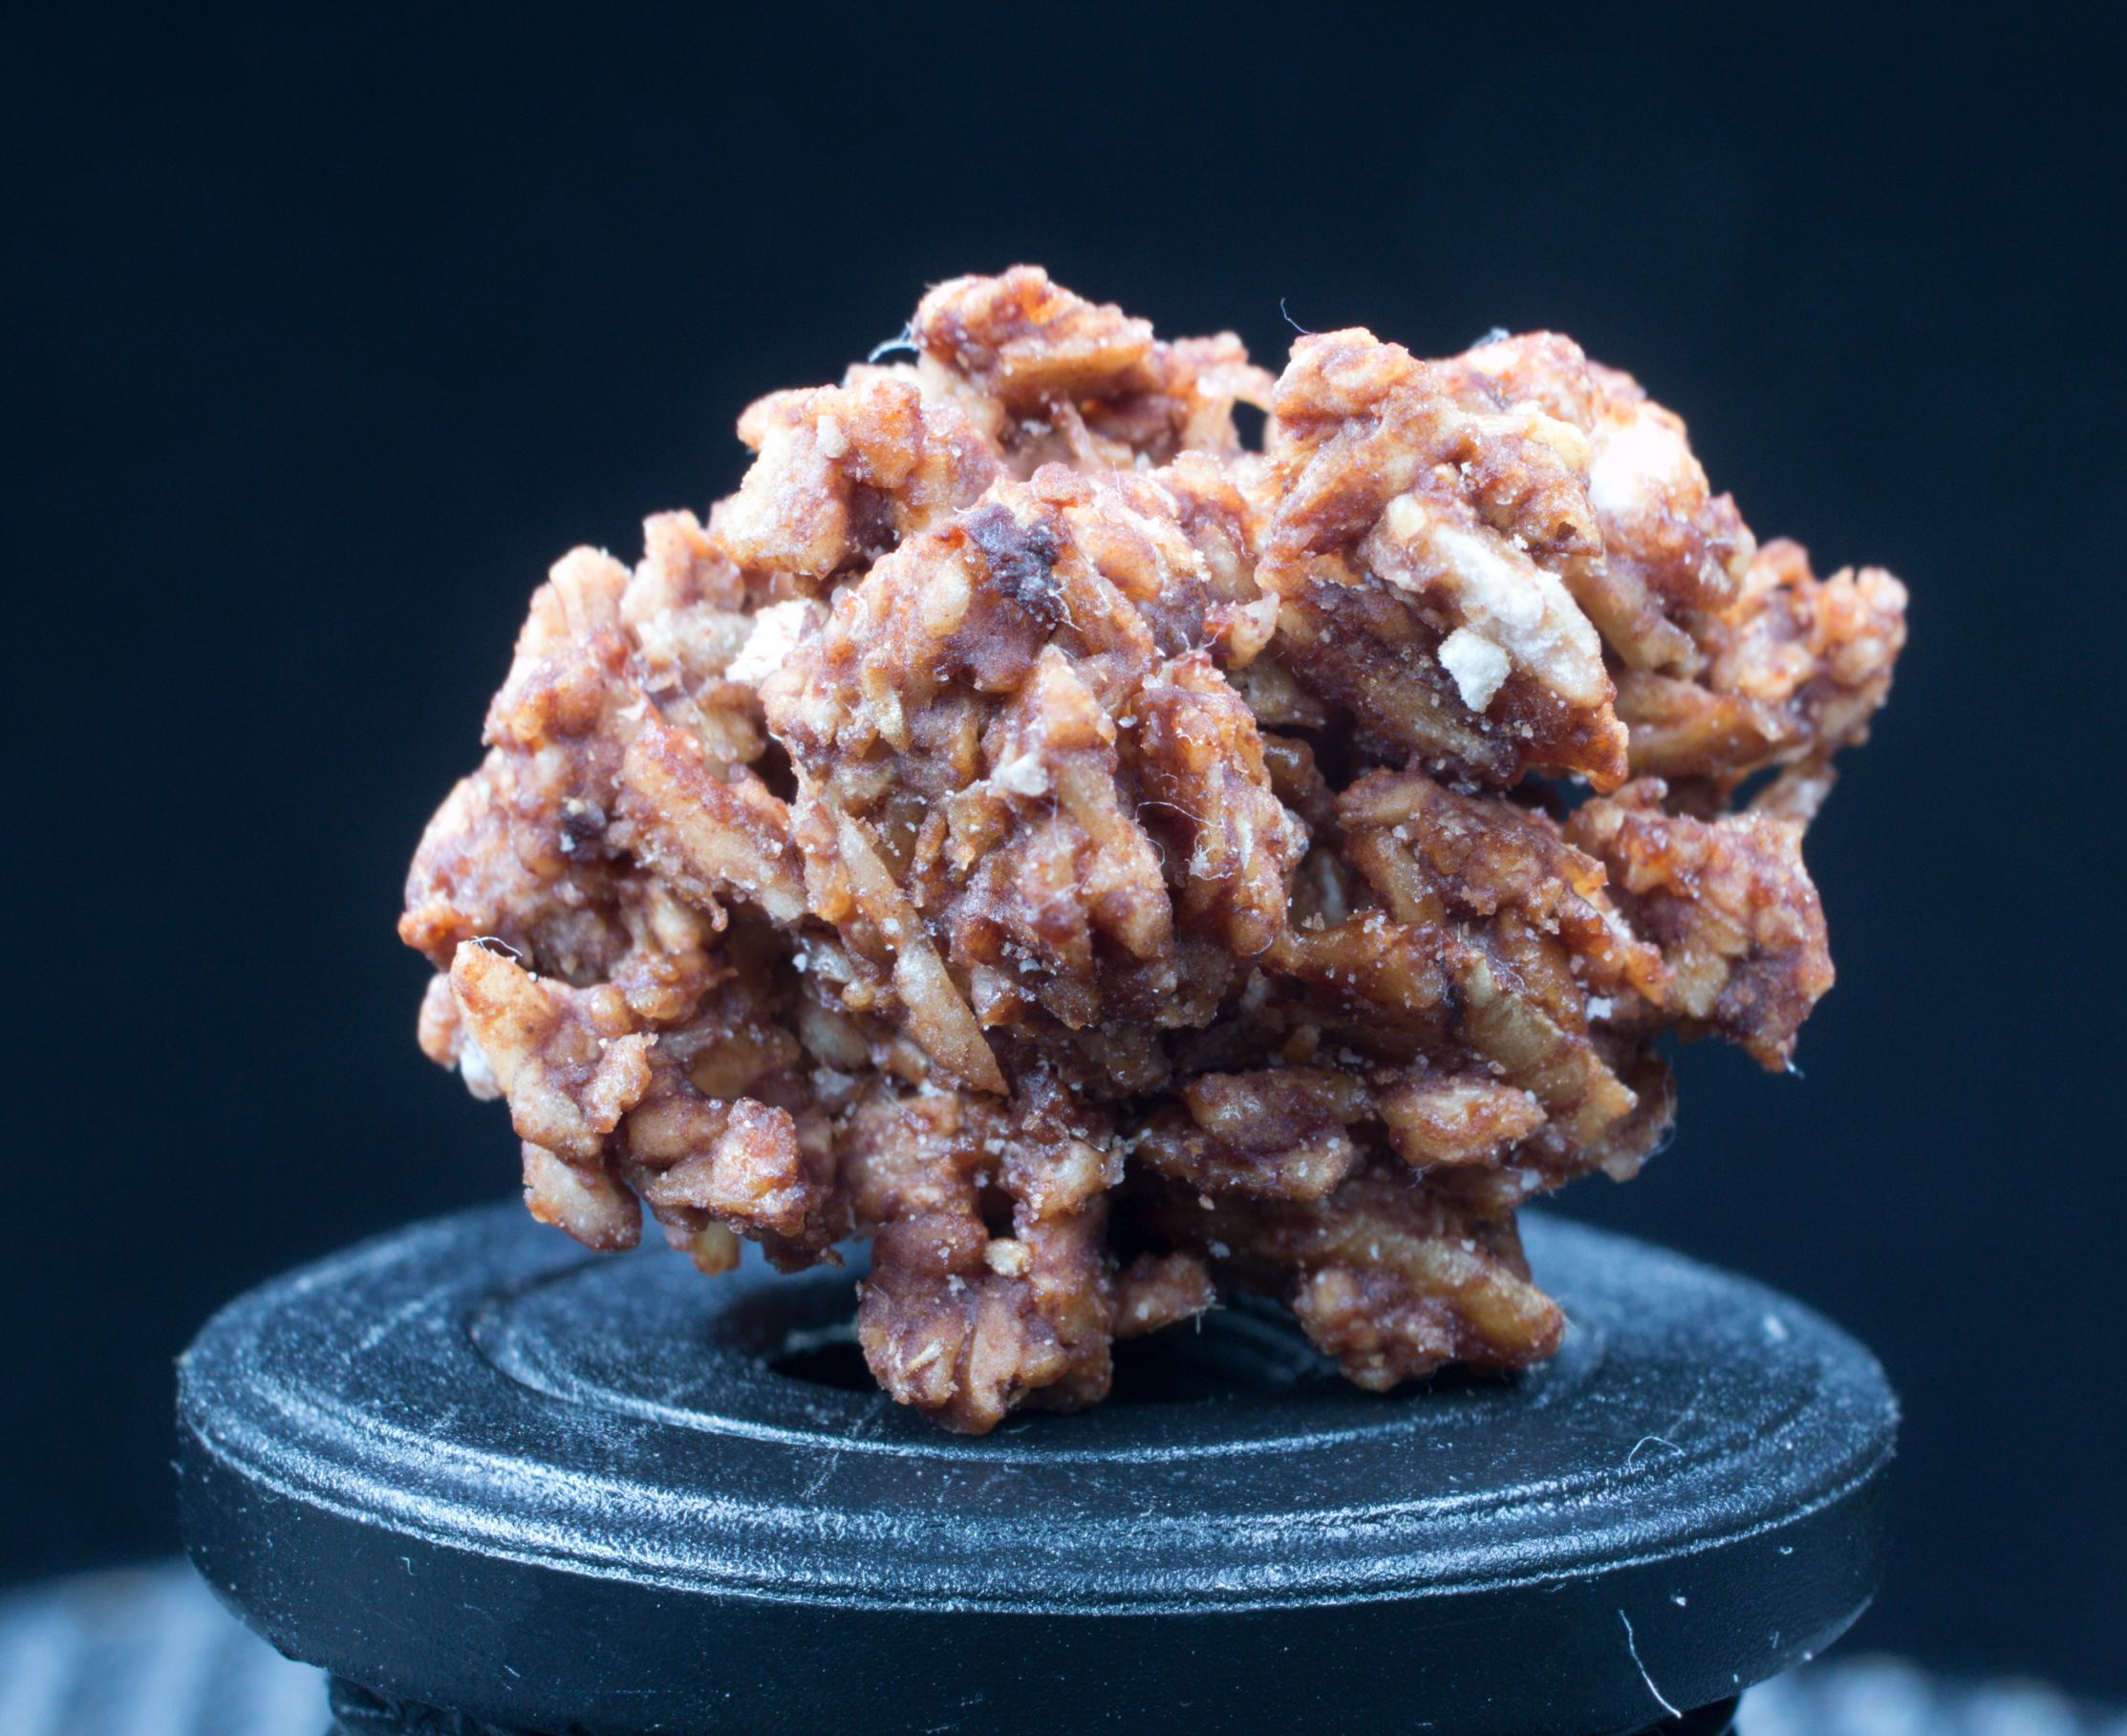
This example shows an oat and chocolate cereal chunk, which was way smaller ~1cm. I used here a different lens with spacer rings to get that close. The sharp areas are very shallow and you get more ‘focus-pumping’.

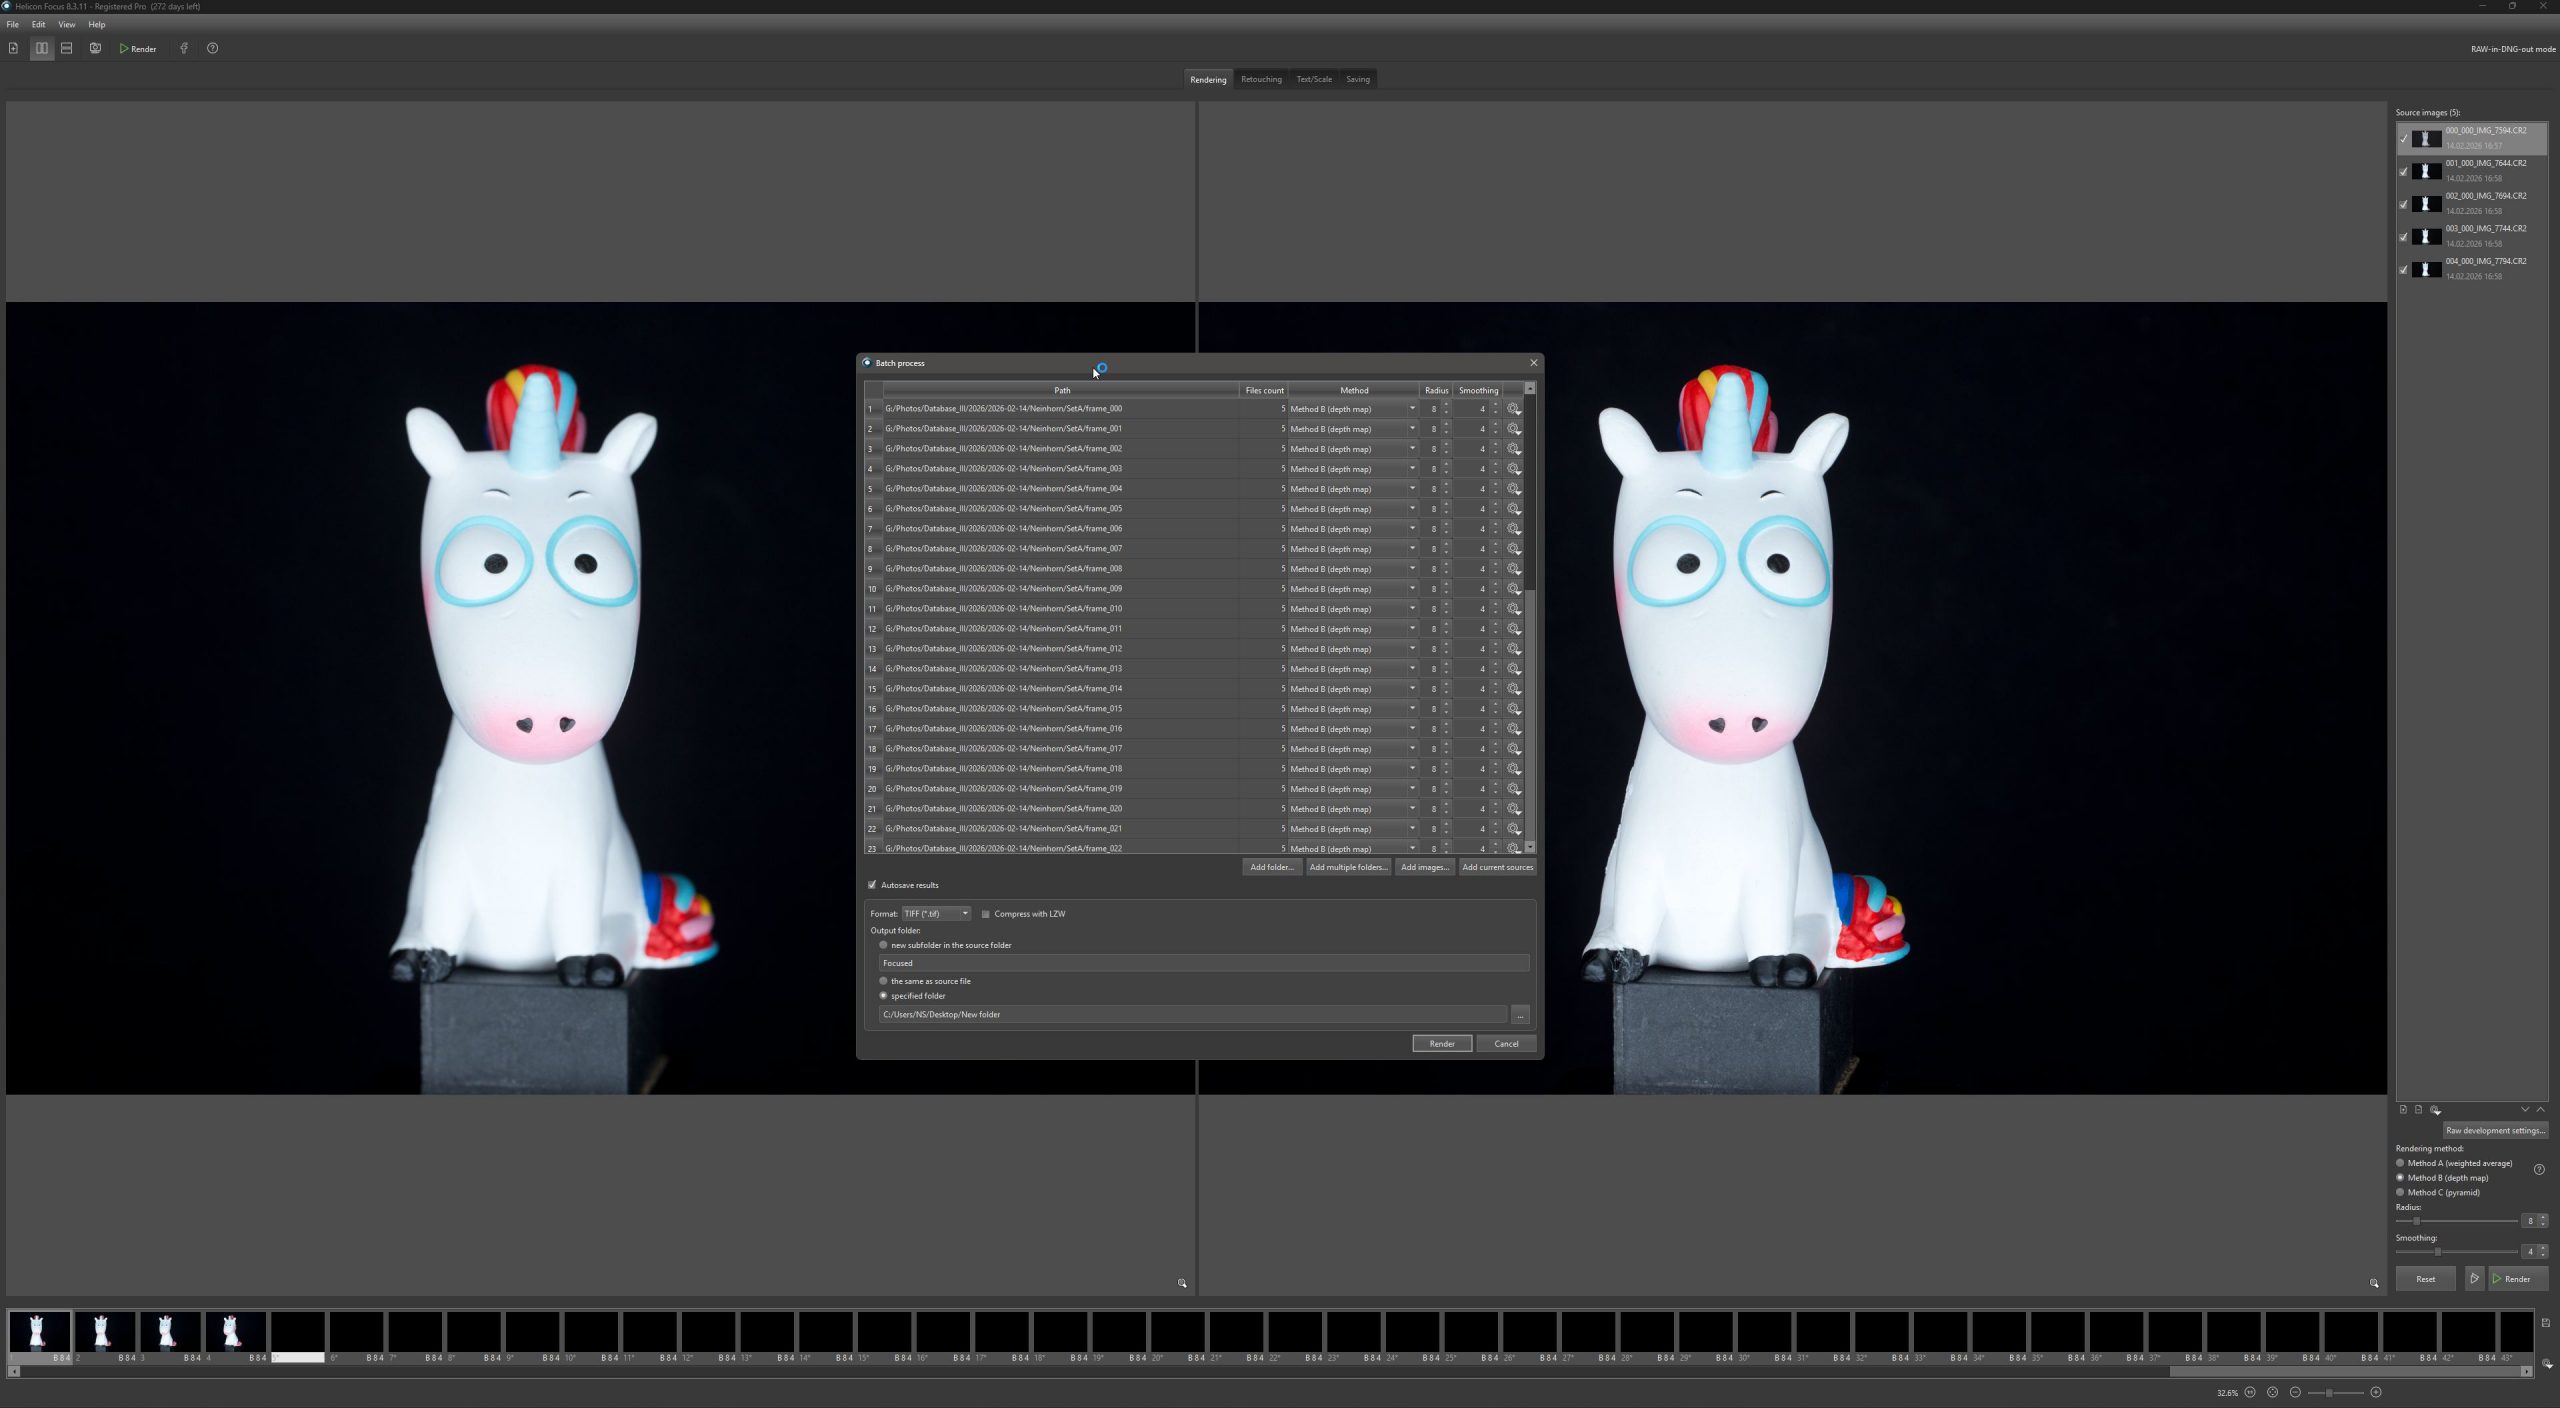
My weapon of choice for focus stacking is ‘Helicon Focus’. It has a super useful batch function with partitioning, which makes this task a no-brainer. You can do this in Photoshop as well, but not that comfortable.
3. Handling Speculars/ReflectionS & Cross Polarization
To get rid of specular and reflections (for clean Albedo-textures and a better 3D solve) you can use ‘Cross-polarization’.
Specular reflection (glare off shiny surfaces) preserves the polarization state of incident light, while diffuse reflection (the light that actually shows you what’s on the surface) scrambles it. This means a cross-polarized lighting setup can surgically remove glare while keeping the diffuse signal intact.
To achieve that put a circular polarizing filter on your lens and, the tricky part, a polarizing filter in front of your light sources. The most perfect scenario is also a dark room where you shoot your object, to avoid reflections.
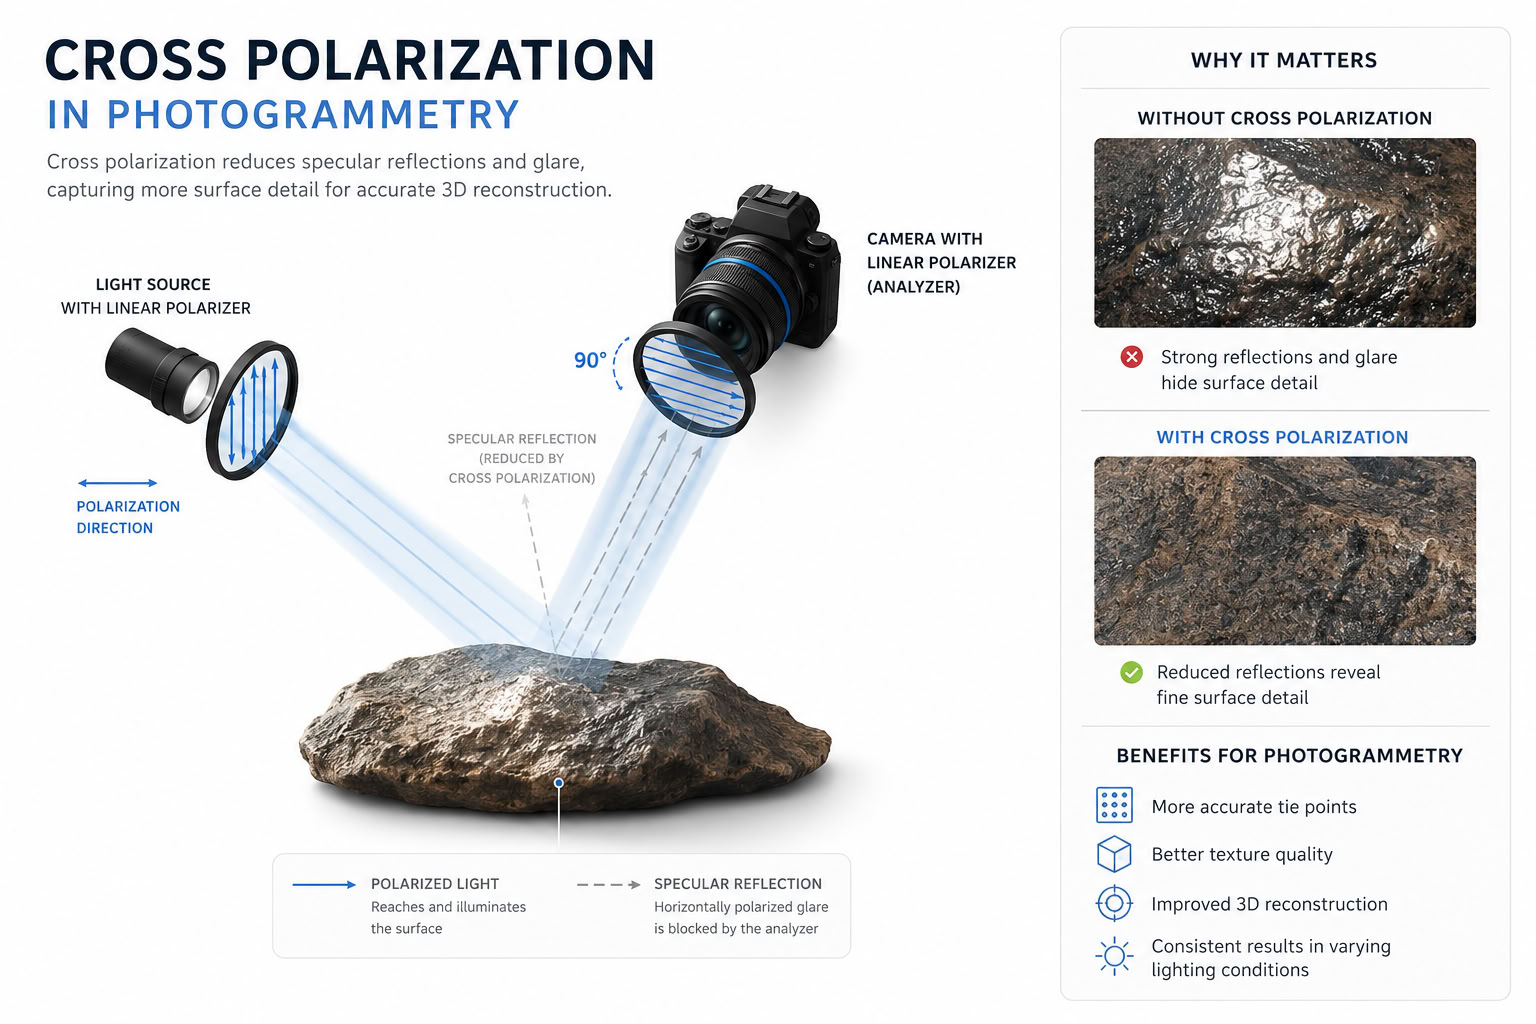
Specular reflection is essentially mirror-like — the photon bounces off the surface without penetrating it, so its polarization state is largely preserved (rotated by the geometry, but still coherent). The cross-oriented analyzer on the camera rejects it.
Diffuse reflection happens because light actually enters the material, scatters off internal microstructures, and exits in random directions. This multiple-scattering process randomizes the polarization completely, so roughly half of the scrambled diffuse light passes through the analyzer regardless of its orientation.
You can also use a polarizing filter on the camera lens only (linear & circular polarizing filter). The result will be acceptable, although not as effective as a full cross-polarized setup. For a Cross-polarized setup, i highly recommend a circular polarizing filter for your lens.
You will lose between a half up to one F-stop.
Note On Gaussian Splats
For Gaussian Splats this could be a step to avoid. In the training process, Gaussian Splats creates ‘Spherical Harmonics’ which can capture reasonable speculars and reflections, which are a nice and a preferred benefit.
‘The-Void’ background setup
Using a thick black velvet like fabric gives you a free masking of your object. The Cross-polarization turns the fabric to nearly complete black. The photogrammetry software will find no feature points and mask/ignores the background.
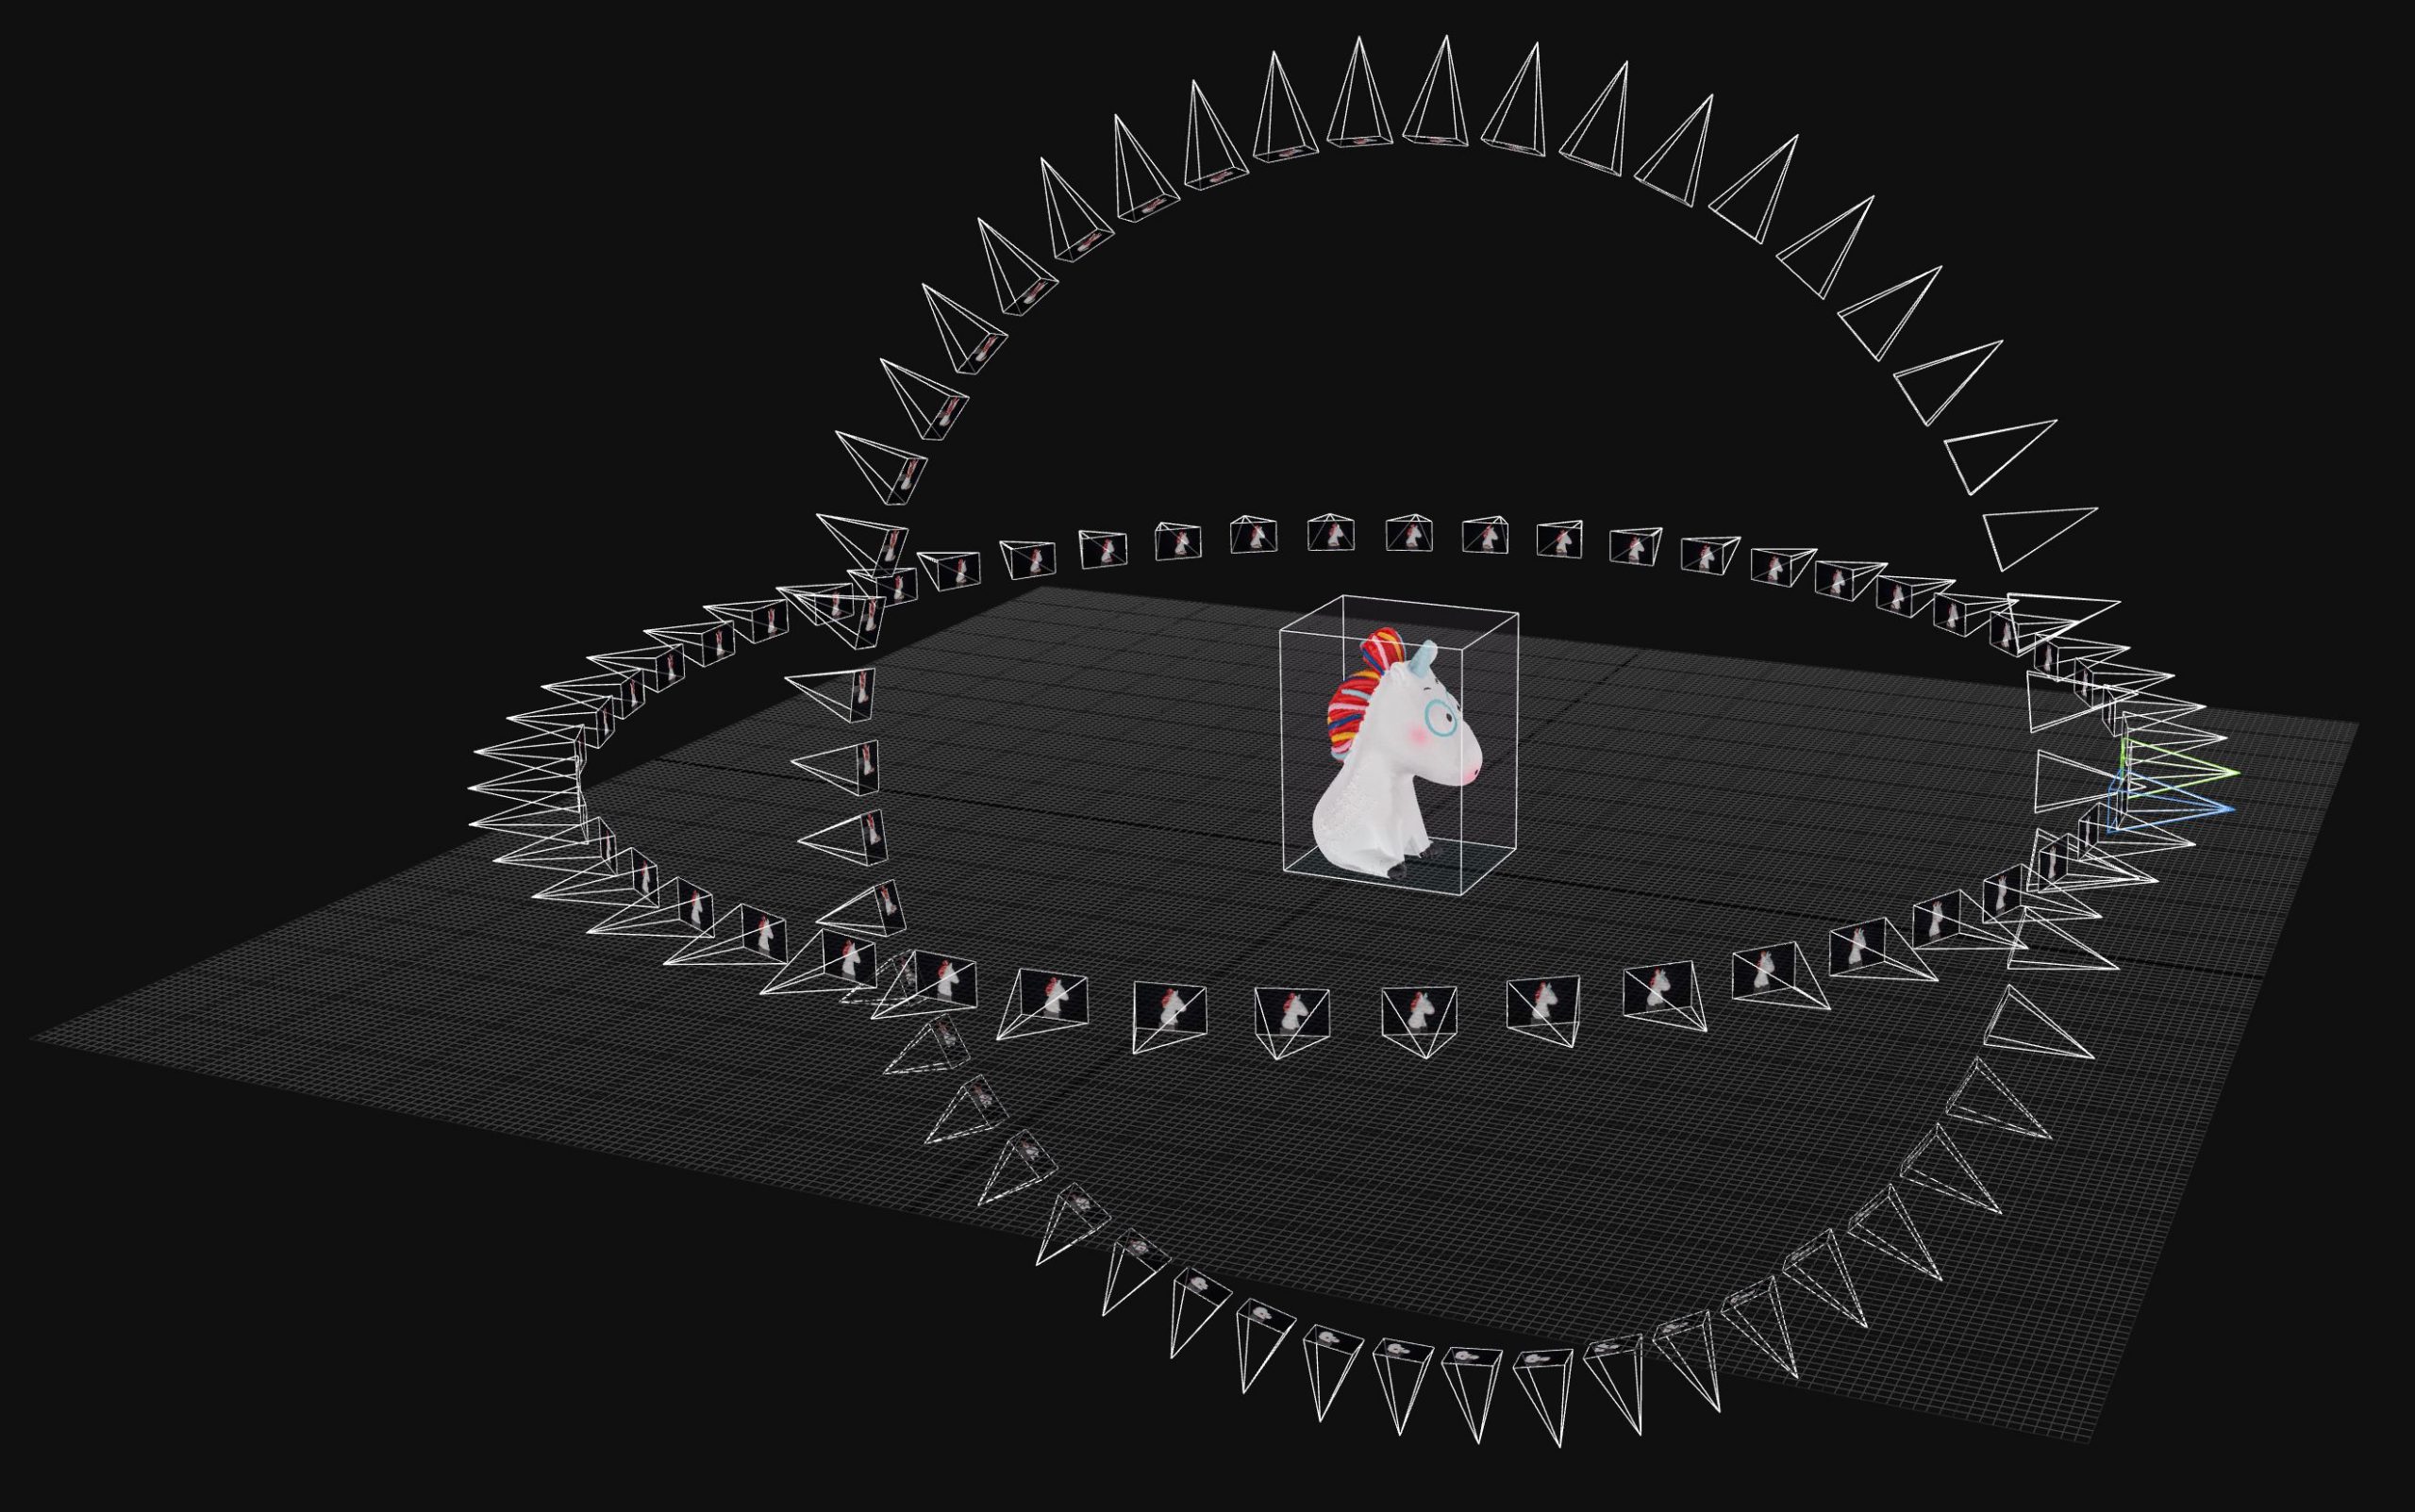
4. Workflows
Hard-/Software flowchart.
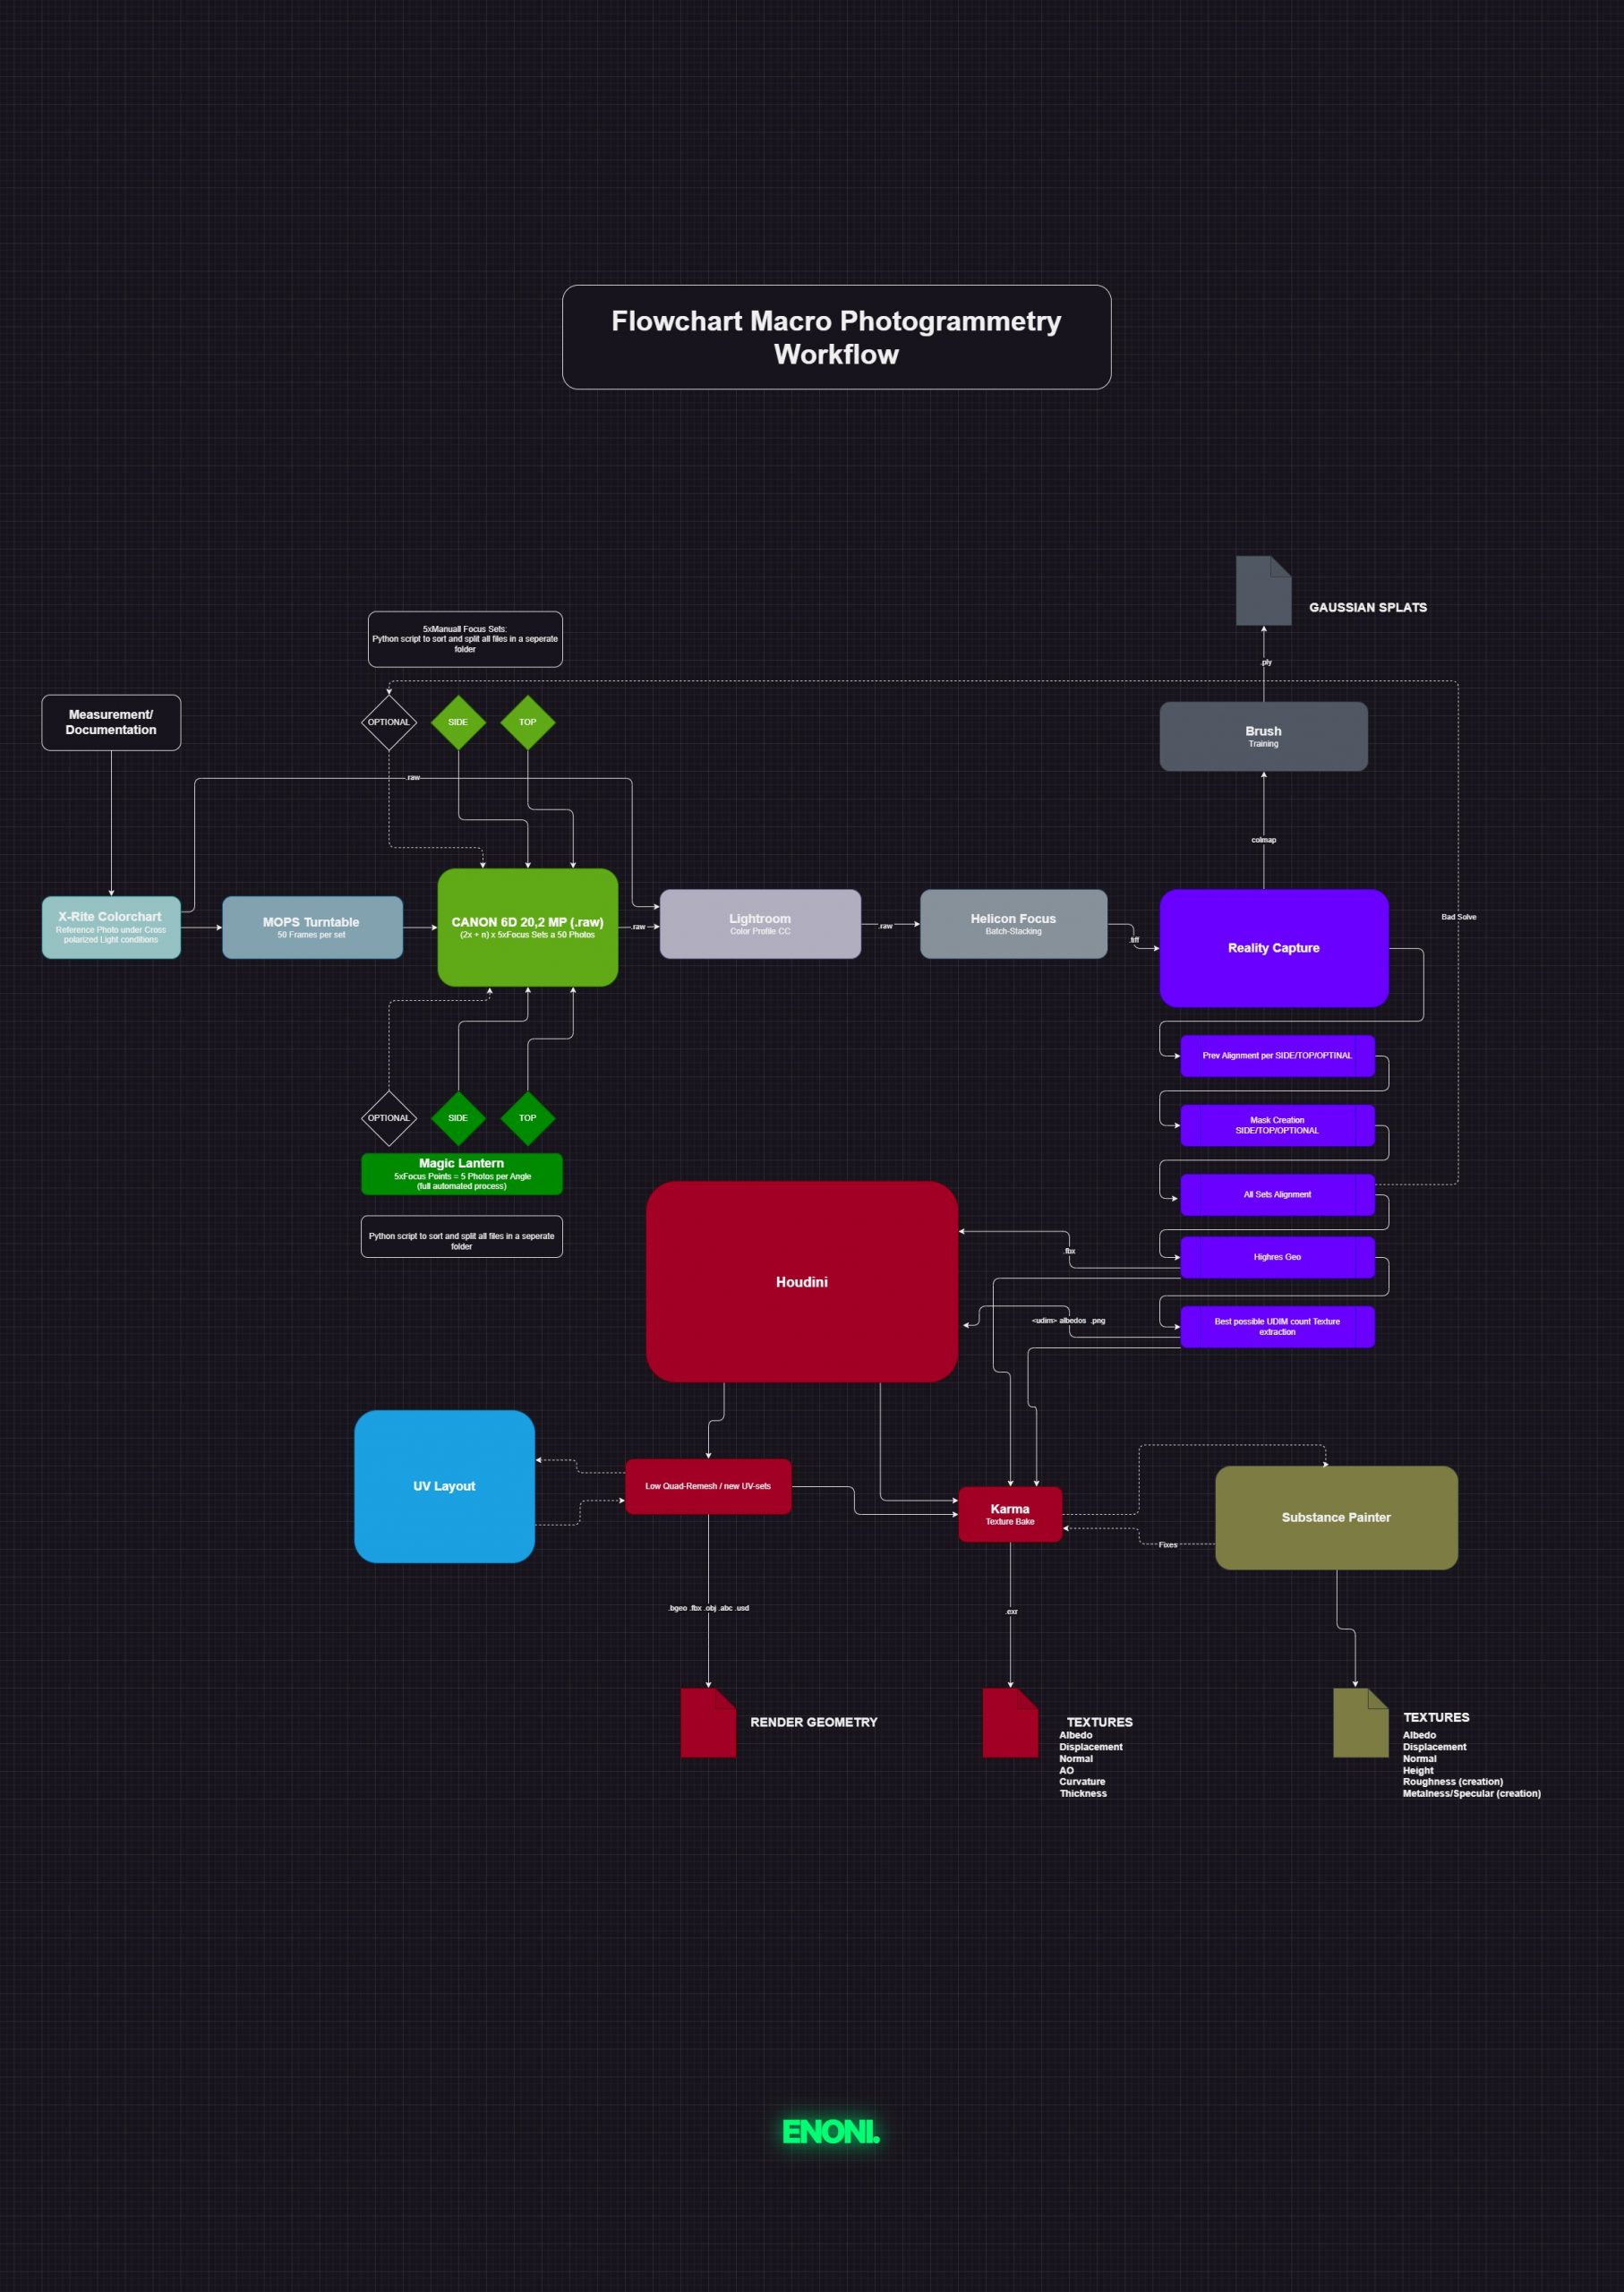
Workflow Protocol
- Object Measuring
- Test-chart reference photos
- Shooting photo sets (minimum two sets top/side)
- Python scripts sorting photos
- Color profiling
- Focus stacking
- Solving Cameras/Points/Meshes
- Retopology/UVs
- Bake textures
- Turntable / Post texture fixing / PBR / masks
- Export Assets/Gaussian Splats
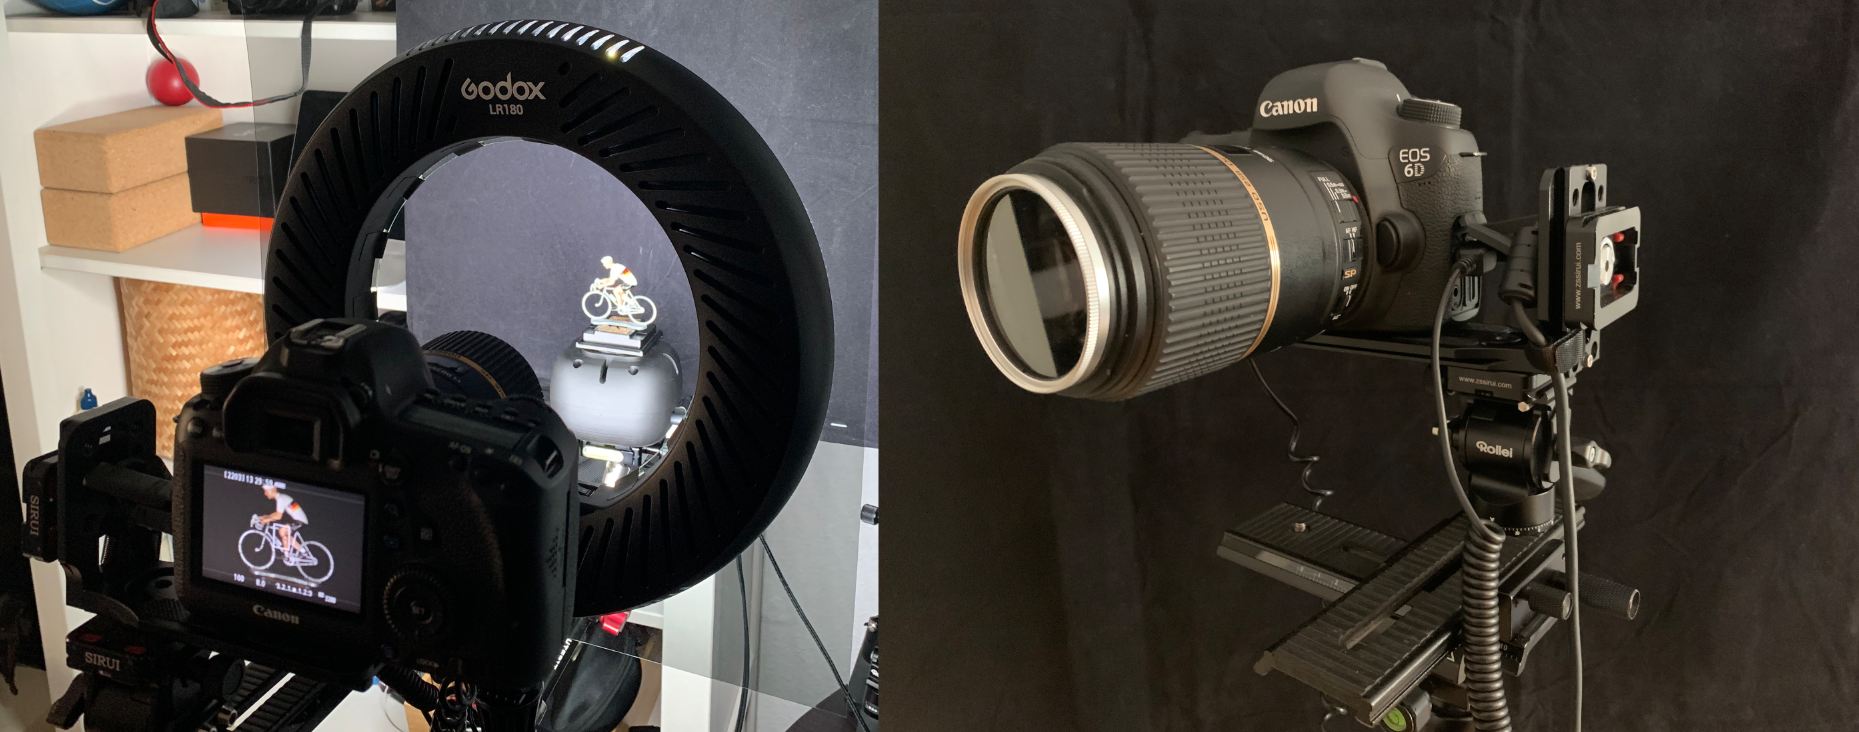
5. Lenses
Expensive equipment is not necessarily important for achieving good results. However, a good and sharp macro lens can help you a lot to achieve your wanted results. Older mirror camera systems and lenses are pretty cheap on the second-hand market right now. I use a Tamron 90 mm macro lens with a maximum aperture of f/2.8 and an older but versatile Canon 50 mm macro lens with a maximum aperture of f/2.5. Both with circular polarising filters.
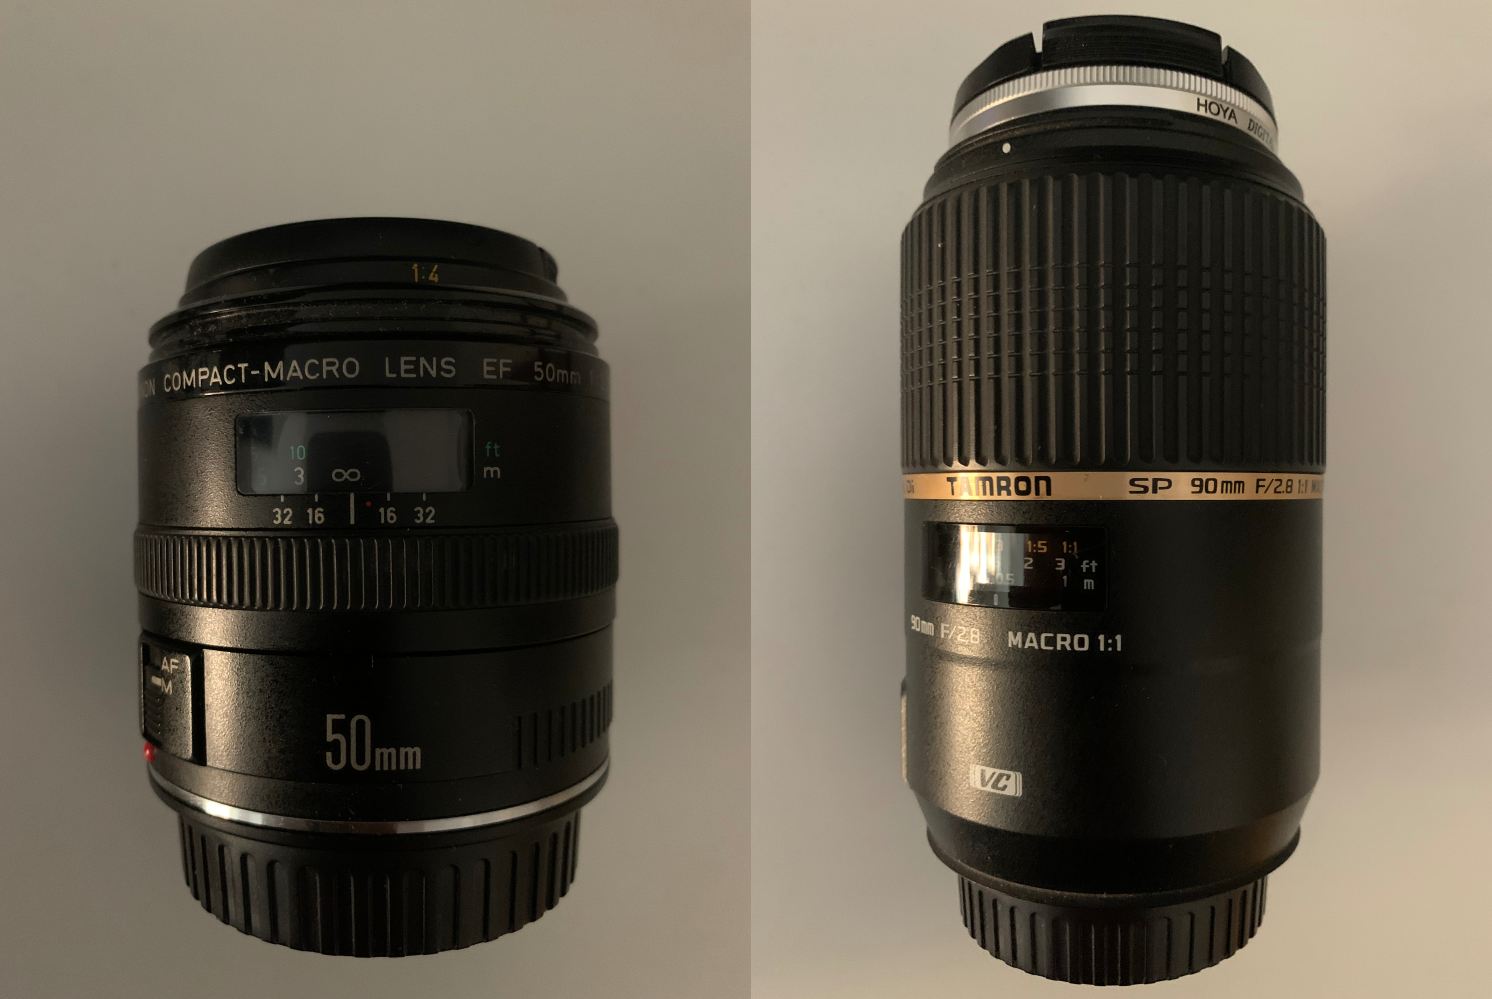
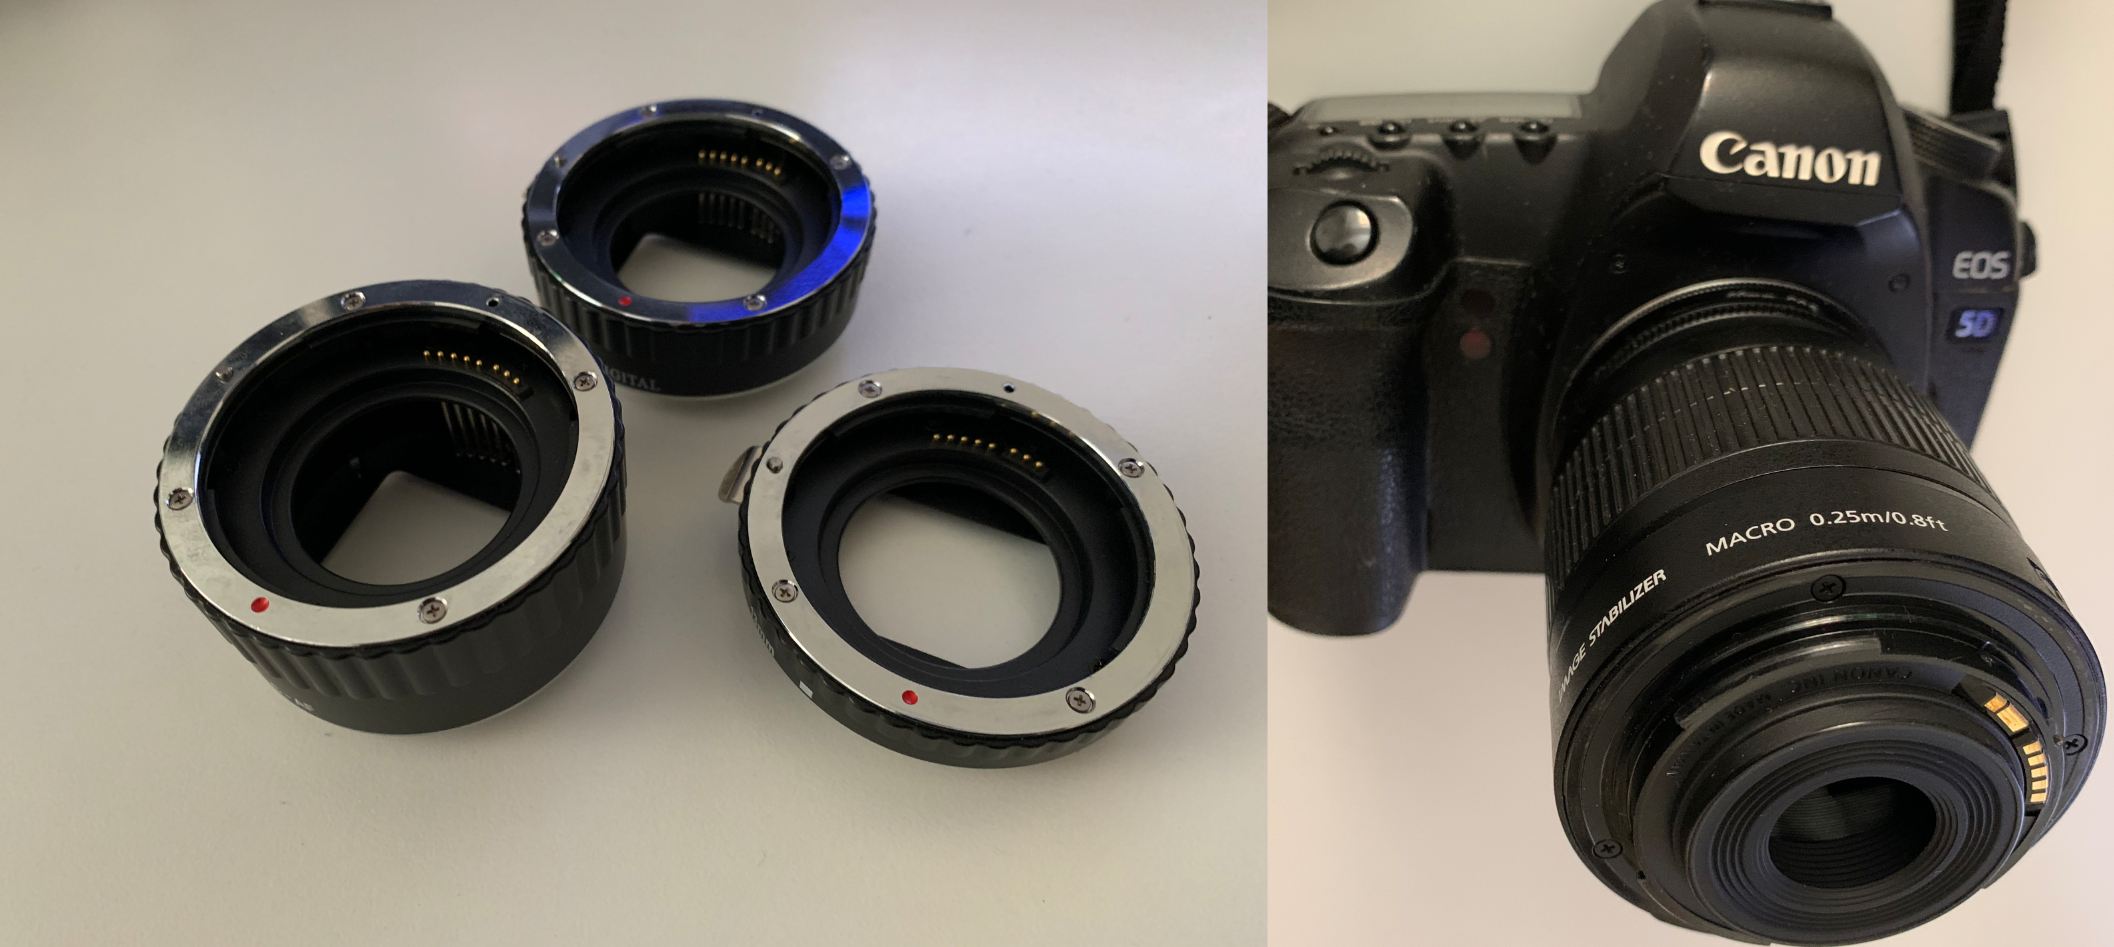
Cameras in general are not that important. I uses a full-frame camera. With a cropped sensor you would get some extra focal-length as an addition. It`s up to you what you can afford and what suits you.
For really small objects, I use extension tubes to crank up the focal-length and get closer to the object.
Another hacky solution is the Kit-lens invert method. A cheap lens turns into a macro monster. But it is tricky to handle the focus planes and the lens front gets super close to the object.
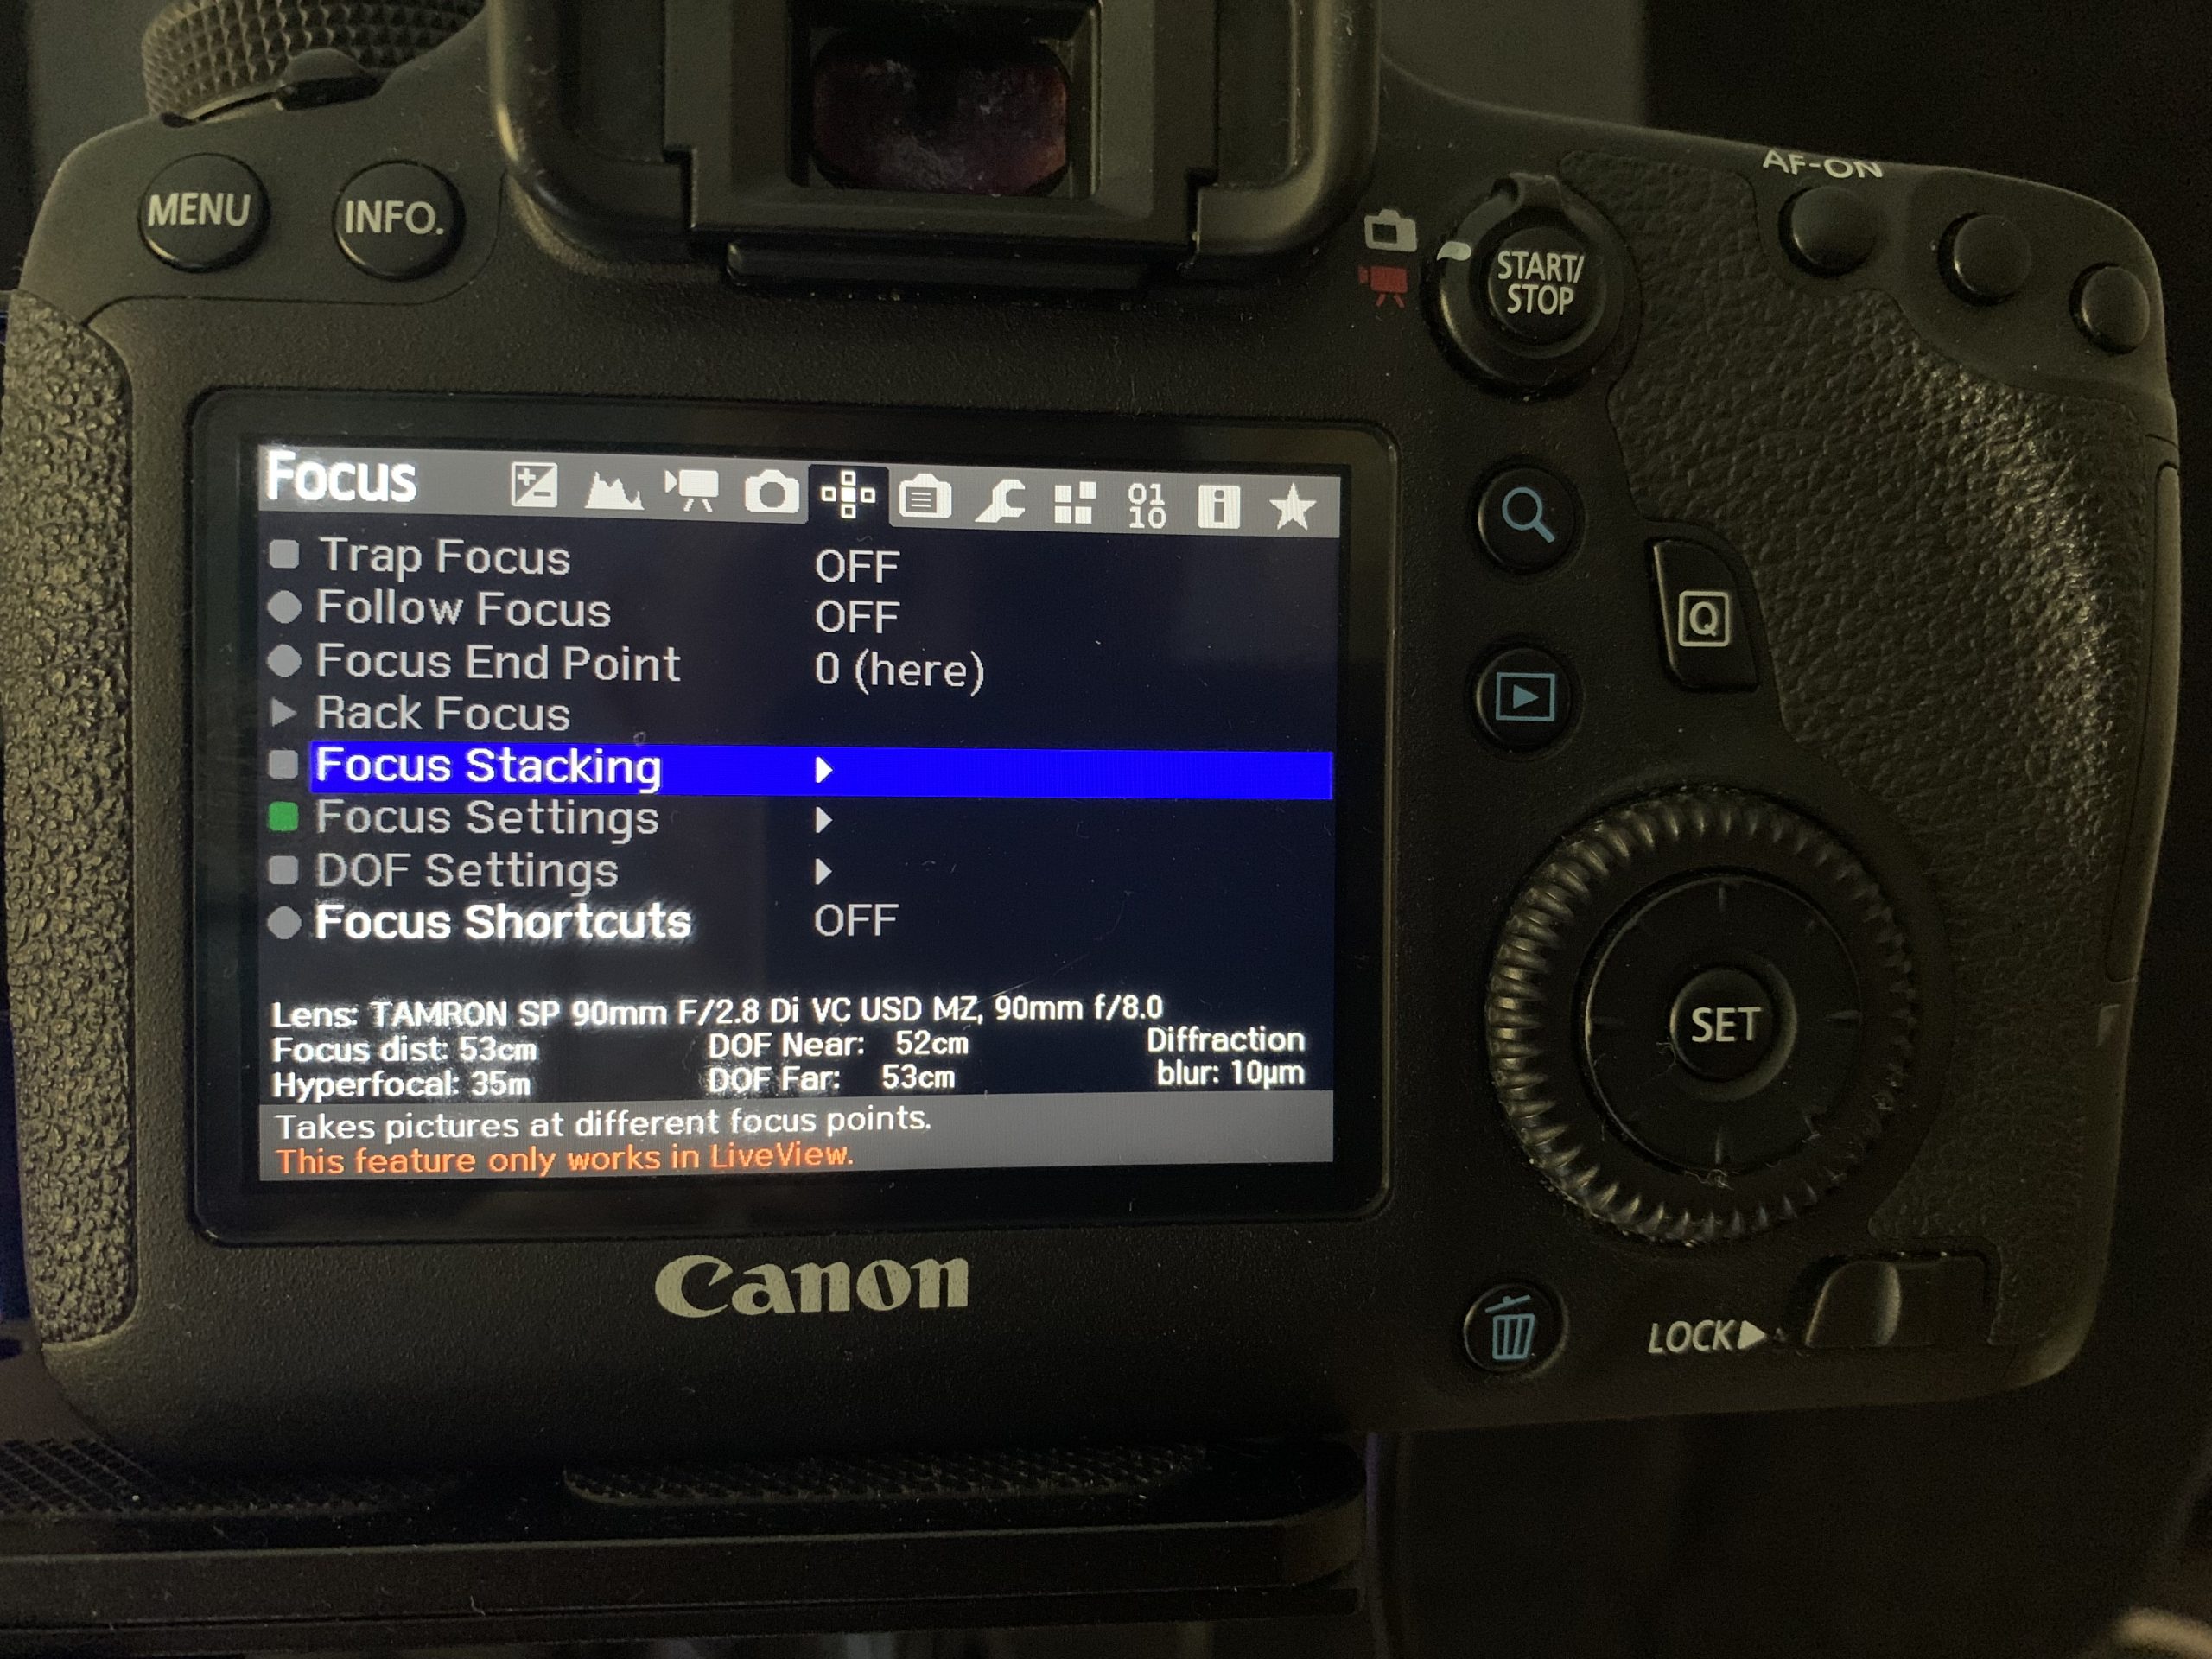
Magic Lantern
Magic Lantern is a Canon firmware jailbreak (for older mirror systems only), which gives you a ton of additional functions. One of these is ‘Focus Stacking’, where the camera automatically moves the lens motor to certain defined focal plane points. This allows you to automate the entire shooting process. However, there are some issues with cheap lenses and their motor step tolerances. If you use it, make sure you have a quality lens with a precise step motor.
6. setup and automation
The biggest time-safer and helper is the MIOPS controller. Strong, versatile and precise. It releases the shutter after one rotation-step and it has tons of other modes and options.
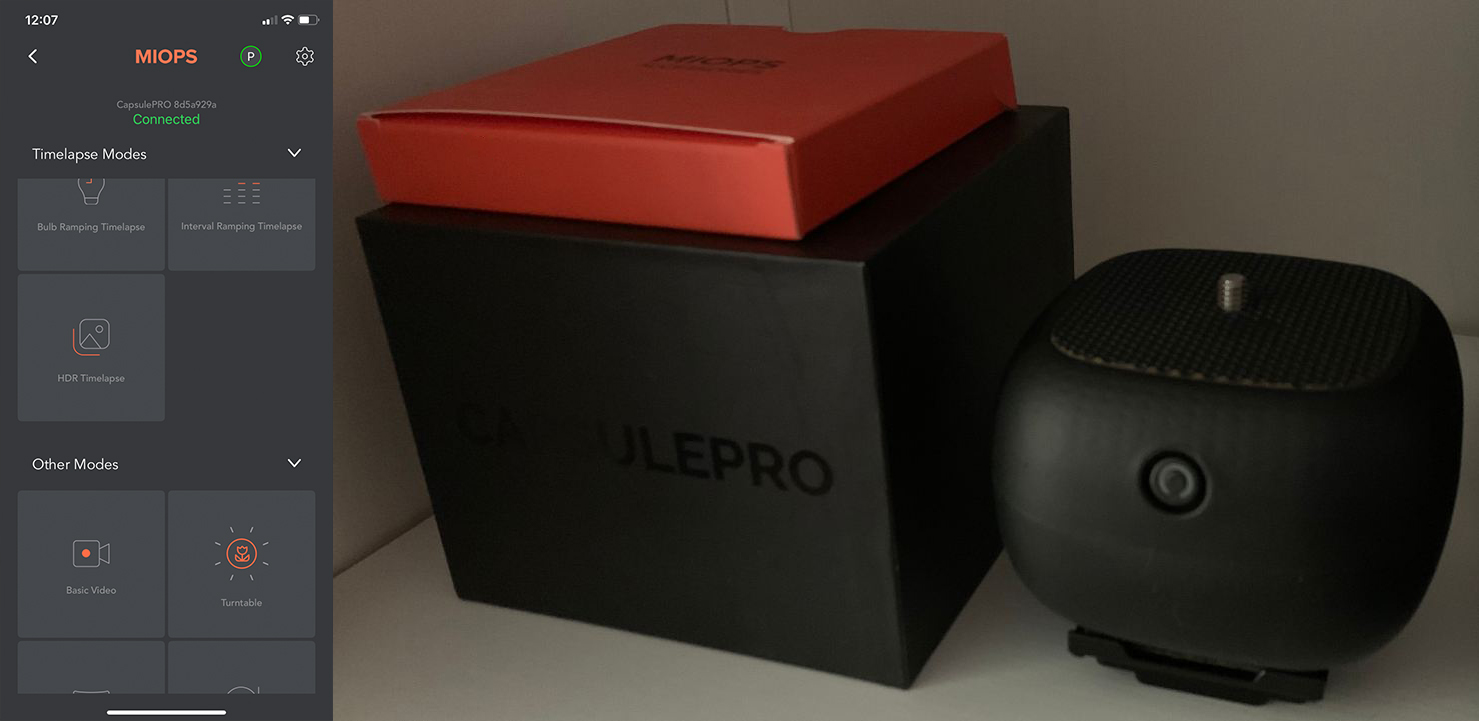
The controller is reverse mounted and with a clamp fixed on the Ringlight tripod, which is pretty solid.
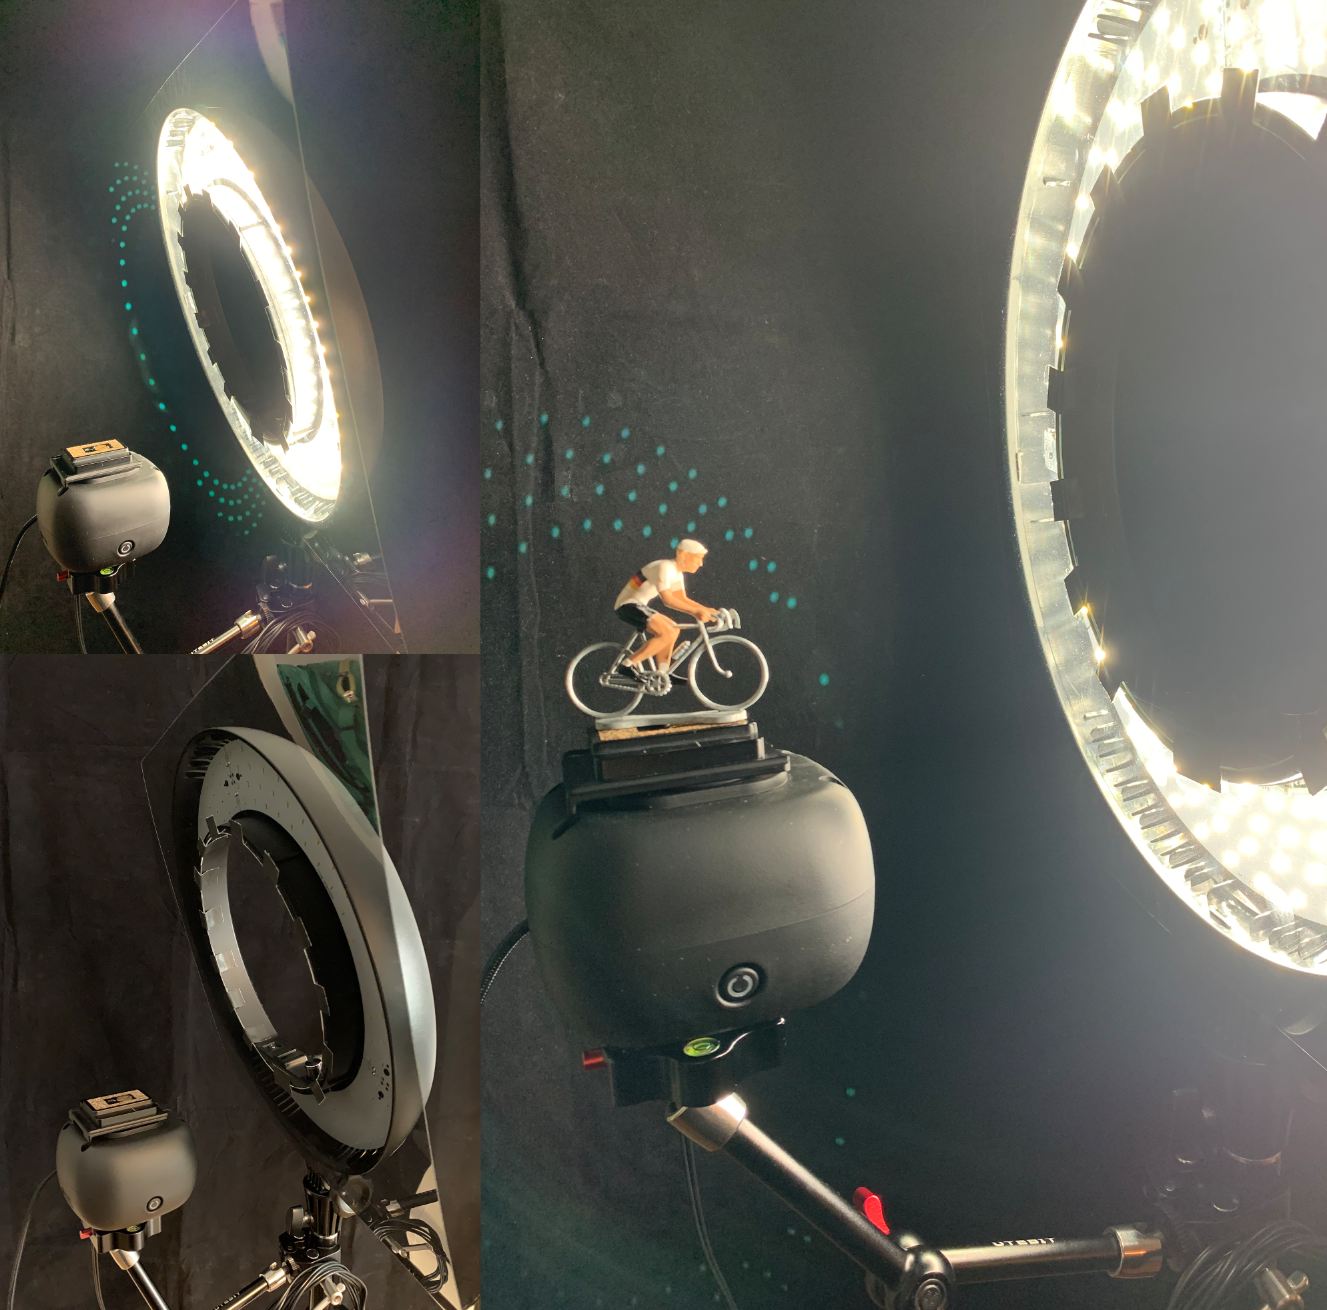
A good, natural light source is essential for achieving higher F-stops. The Godox 180 is a decent, affordable option (~600 Lux). There are some Godox’s Ring-flashlights, which are very bright and would be definitely an upgrade. They whould be especially useful for photogrammetry outside (all scales).
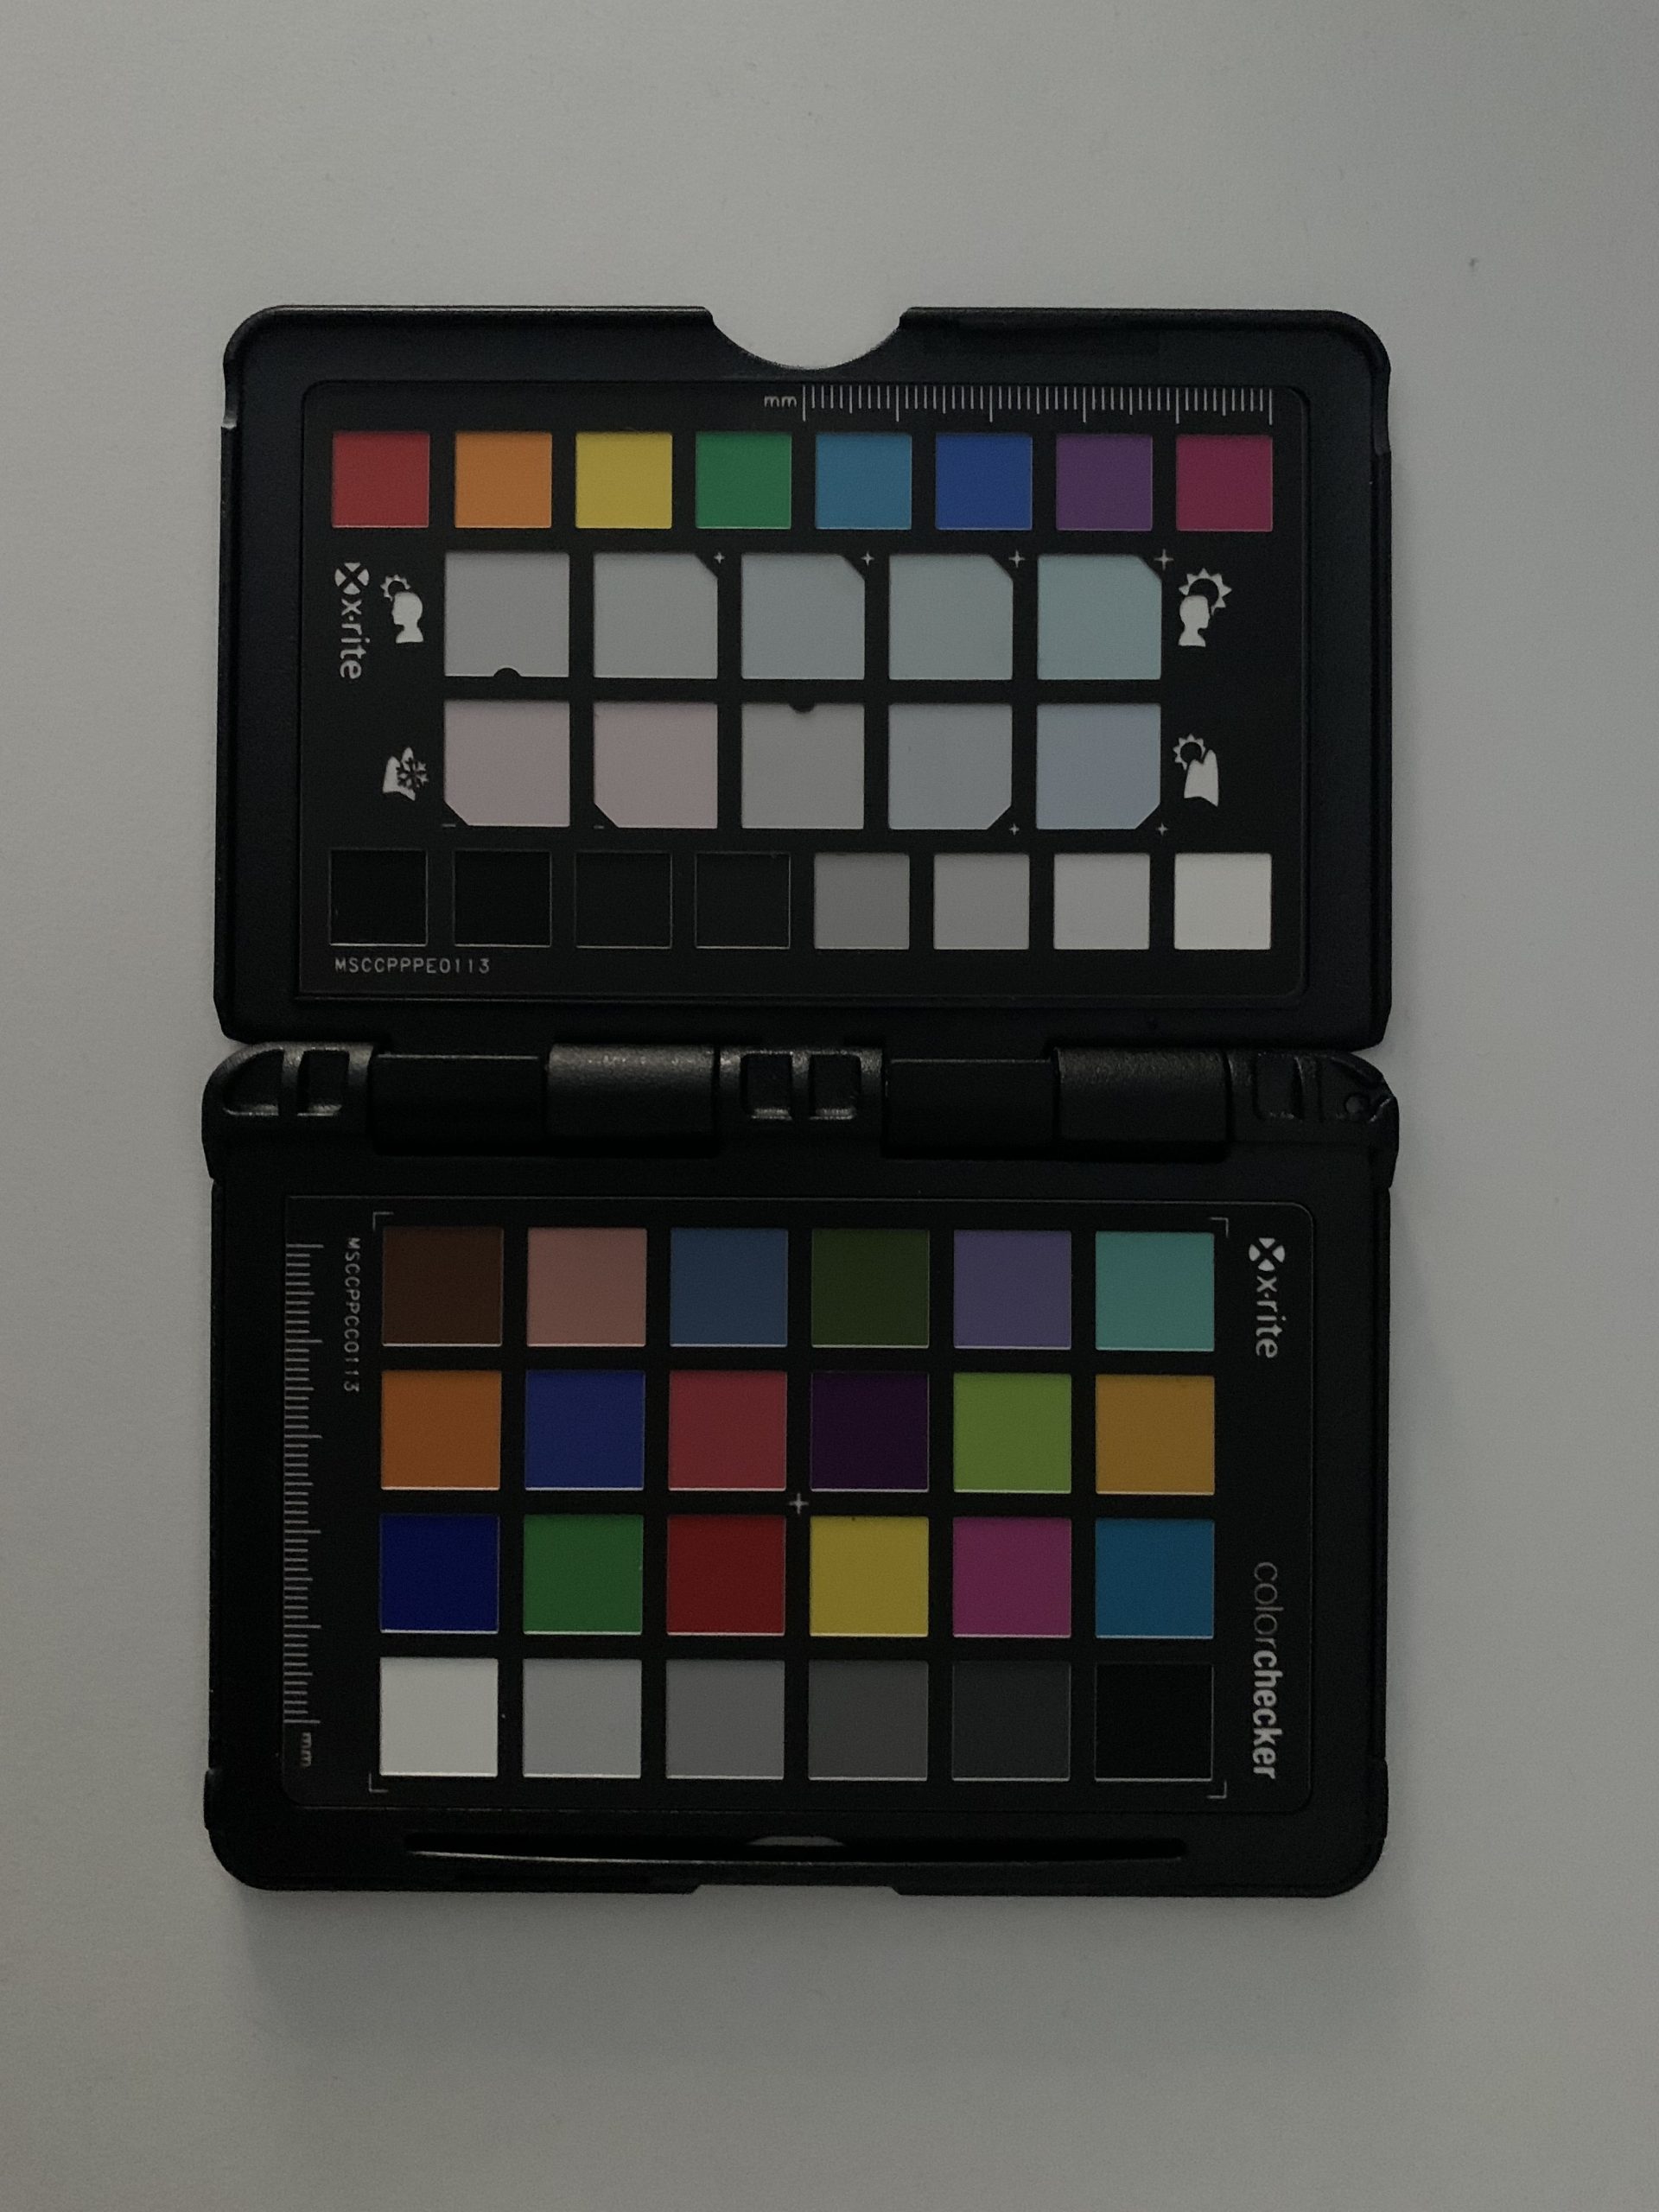
Works pretty nice with Lightroom, which i use for all my photo work. It detects the colors and creates a profile to match the reference color values. Therefore you need this plugin:
https://calibrite.com/de/software-downloads
Python Script
A simple Python script that puts the photos from the same angle but different focus planes in a subfolder.
import os
import shutil


def move_every_N_to_subfolder_with_offset(path: str, stacking_N: int, frame_count:int, start_pic: int, end_pic: int, ) -> None:
    '''Your Focus Stacking seq is focus plane 1111111111, 2222222222, 3333333333 .... to frame_count it will sort to 123..., 123..., 123... to frame count
    and put it in subfolders.
    The path folder should hold just the picture files!
    This is for Lenses where the reset of the ML focus stack to the start point is off.

    start_pic == -1 and end_pic == -1 tries to figure out the start and end pic
    '''


    cr2_files = sorted([d for d in os.listdir(path) if os.path.isfile(os.path.join(path, d))])

    if not cr2_files or len(cr2_files) == 0:
        print("No files in folder.")
        return

    if start_pic == -1 and end_pic == -1:
        start_pic = int(cr2_files[0].split("_")[1].split(".")[0])
        end_pic = int(cr2_files[-1].split("_")[1].split(".")[0])

    if (end_pic + 1) - start_pic != stacking_N*frame_count:
        print("Something is wrong with the sequence:")
        print(f"end_pic (+1 inkl.) {end_pic} - start_pic {start_pic}: {(end_pic + 1) - start_pic}")
        print(f"stacking_N {stacking_N} * frame_count {frame_count}: {stacking_N*frame_count}")
        return


    for i in range(frame_count):
        try:
            if not os.path.isdir(f"{path}/frame_{str(i).zfill(3)}"):
                os.mkdir(f"{path}/frame_{str(i).zfill(3)}")
                print(f"created folder: {path}/frame_{str(i).zfill(3)}")
        except Exception as e:
            raise e

    counter = 0
    bracket_counter = 0

    cr2_by_number = {}
    for cr2 in cr2_files:
        cr2_number = int(cr2.split("_")[-1].split(".")[0])
        cr2_by_number[cr2_number] = cr2

    for i in range(start_pic, end_pic + 1):
        cr2 = cr2_by_number.get(i)
        if cr2:
            try:
                shutil.move(f"{path}/{cr2}", f"{path}/frame_{str(counter).zfill(3)}/{str(bracket_counter).zfill(3)}_{str(counter).zfill(3)}_{cr2}")
                print(f"Move: {path}/{cr2} to: {path}/frame_{str(counter).zfill(3)}/{str(bracket_counter).zfill(3)}_{str(counter).zfill(3)}_{cr2}")
                counter += 1
            except Exception as e:
                raise e

            if counter == frame_count:
                counter = 0
                bracket_counter += 1


if __name__ == '__main__':
    move_every_N_to_subfolder_with_offset("../PhotoDrive/100CANON/", stacking_N = 5, frame_count = 50, start_pic = -1, end_pic = -1)
Reality Capture Steps
For every single photo-set i do a quick pre-run alignment, to generate mask files of the object. After that follows the main run, with all sets aligned together. From there i generate the highress geo and textures (.colmap export for Gaussian Splats).
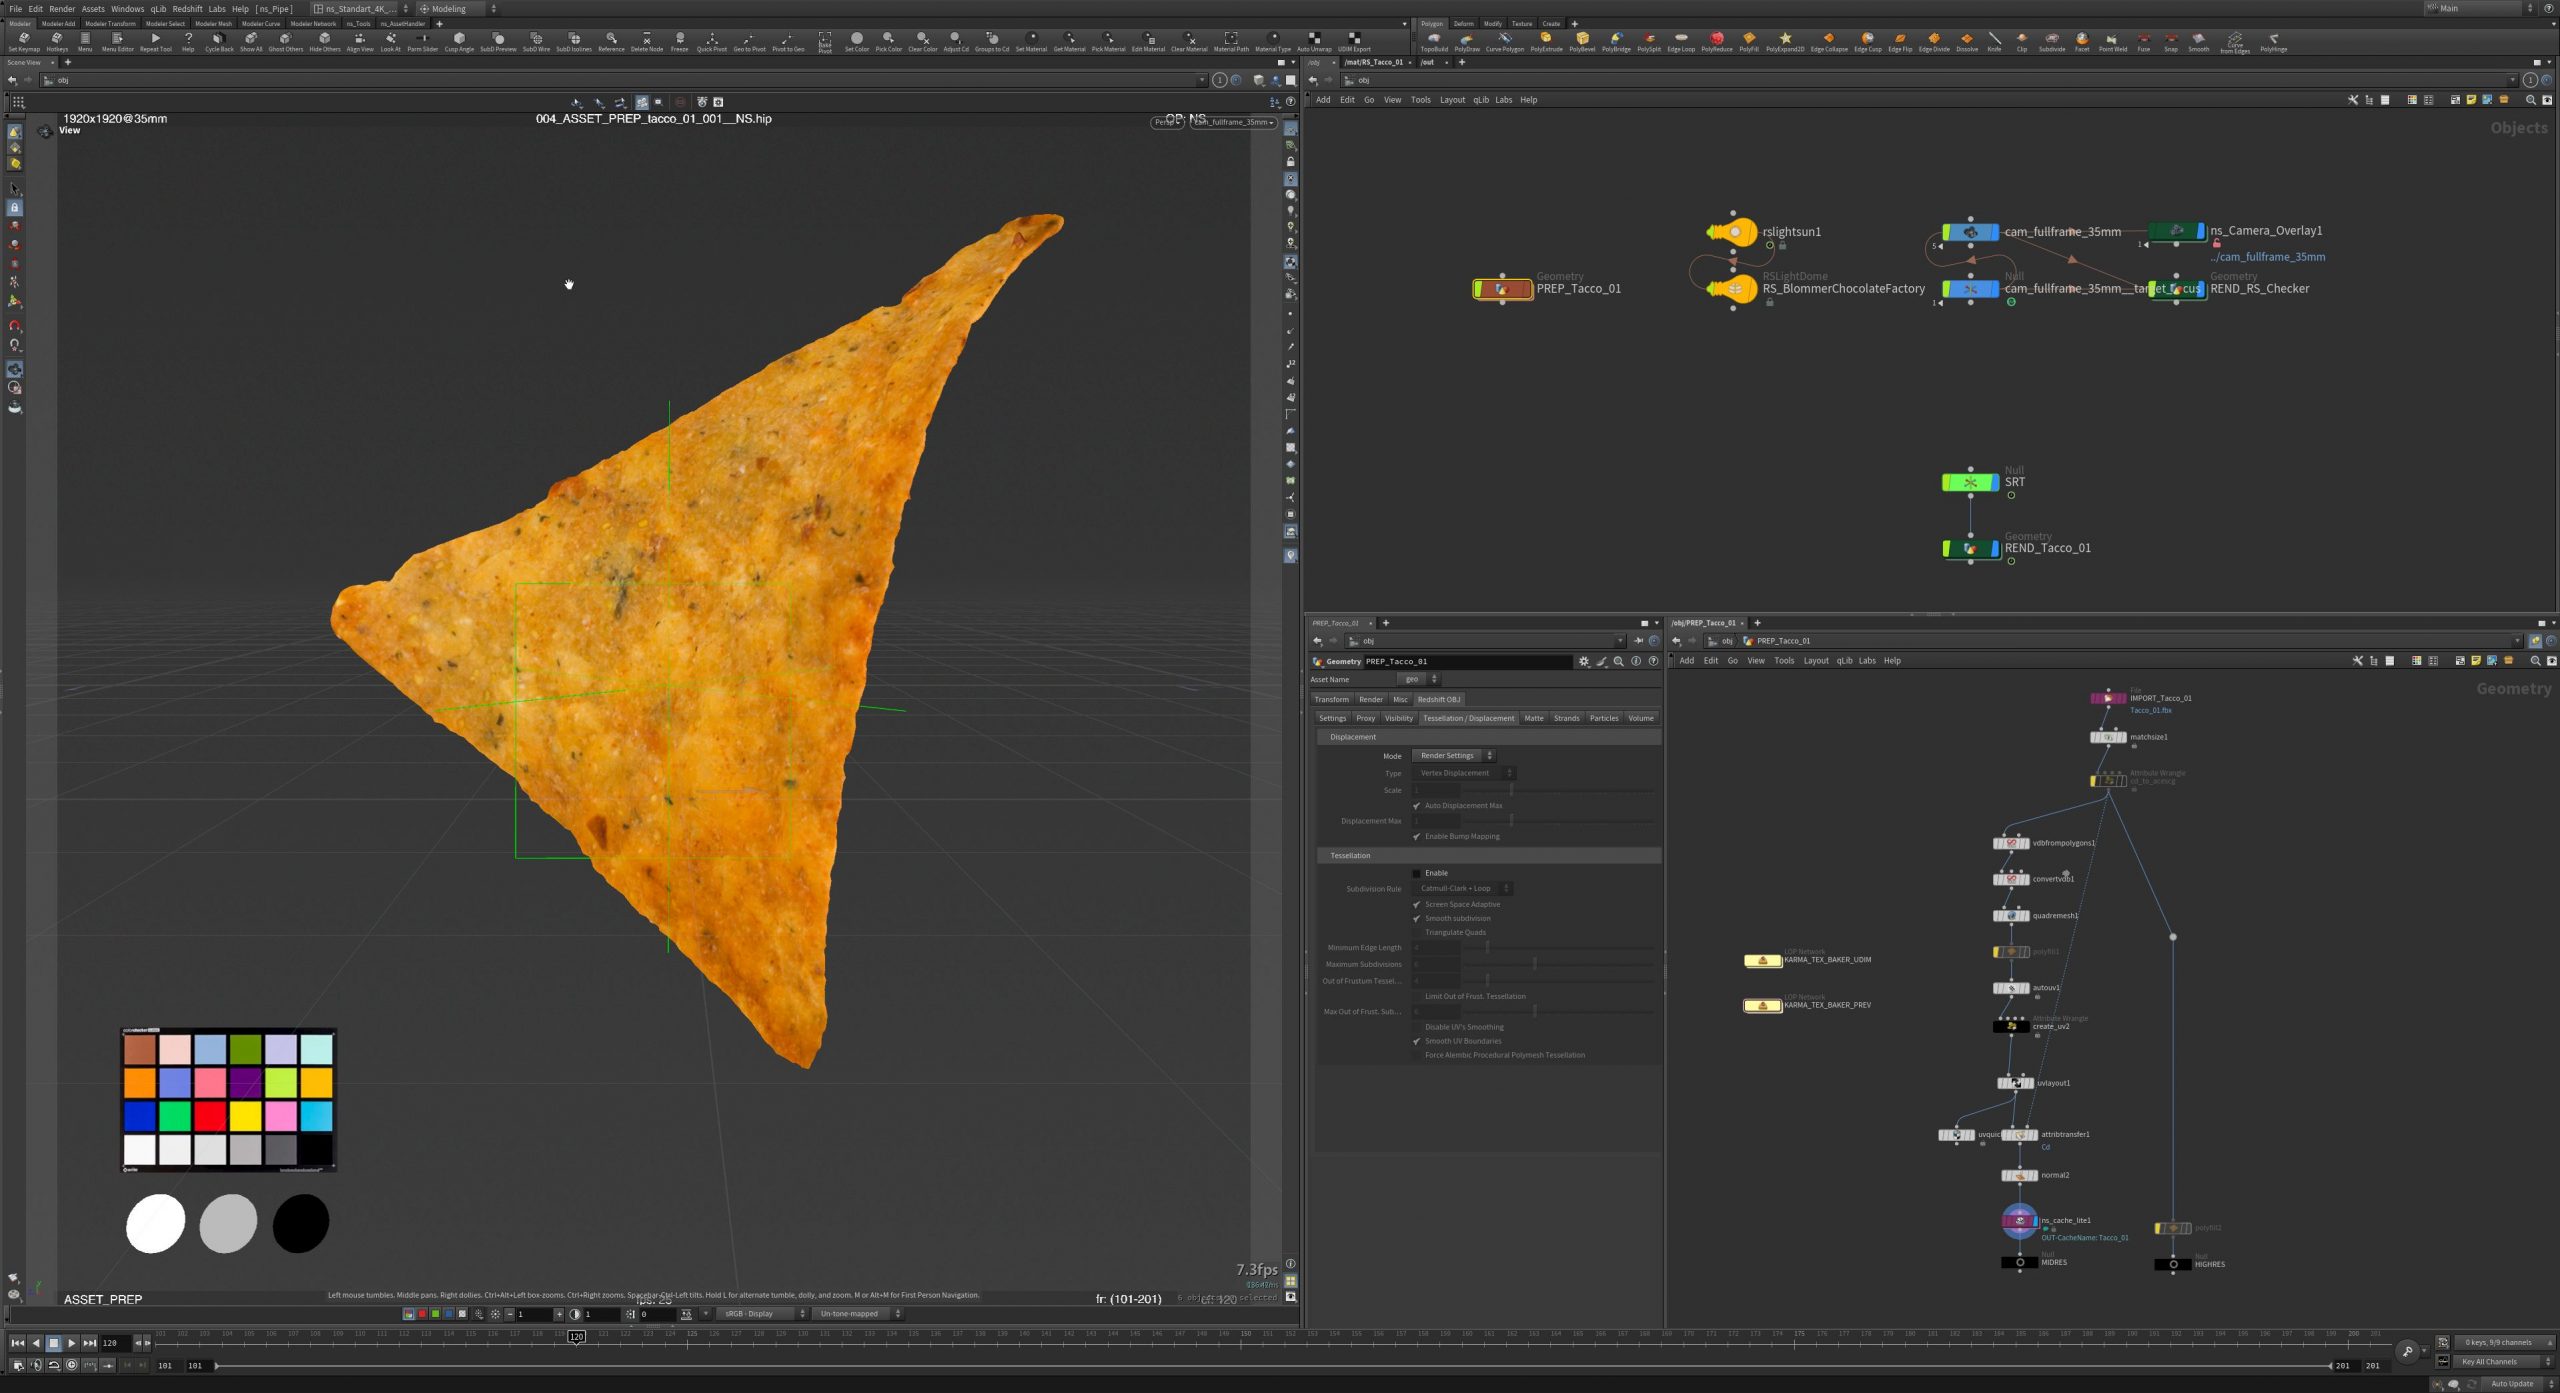
Houdini Setup
Here it all comes together. Using the “quadremesh”-SOP node and “autouv”-SOP nodes. In difficult situations i use UV-Layout to build the uv-sets manually. In most cases i use UDIMs for the best texture resolution outcome. After that, Karma is rendering the texture(s) to the new uv-sets. Therefore i use a simple setup with the “karmatexturebaker”-LOP in Solaris. Post work, including rebuilding transparent/opacity parts and PBR maps in Substance Painter.
Further recommended hardware/SoftwaRe
- solid tripod(s)
- camera macro-rail`s for doing position adjustments /pitch handle
- USB battery replacer for the camera / USB charger multi-port
- external cable for shutter release which goes from the camera to the MIOPS controller.
- external USB cable which connecting the camera via e.g. EOSUtility and the workstation (photos where transferred direct to it)
- thick black “velvet” fabric as background (holder/clamps)
- bright/neutral ringlight or ringflash with a quality polarization foil > 0.5mm.
- colorchart for profiling & color management
- EOSUtility or a equivalent software for your camera
- Substance Painter/Mari/etc. (post work/fixes/PBR)
7. Conclusion
With this setup, producing a clean scan and a rendered turntable takes approximately 1–2 hours with some practice. Depends on the post work (…and your available compute power).
Nowadays Gaussian Splatting is the new thing in town, and it fits very well in that workflow.