» A Houdini TOPS recipe for creating wedges for simulations and other purposes. «
I never really get used to the TOP’s context (PDG). I mostly wrote Python scripts tailored to my needs. However, I wanted to streamline my caching and wedging workflow. And it should work distributed with Deadline. The LAB’s caching node incorporates some TOP mechanics, but I don’t like the way it’s implemented. Here is a simple approach that I used in this demo with the AXIOM solver. I used this ‘module’ as a recipe, which also works pretty well for other caching tasks.
Simulating things on the GPU requires some attention. You often need to set the work order of the work items to ‘All Frames in One Batch’ to avoid losing performance or simulating the same frames repeatedly. Debugging is important here.
Houdini comes with its own useful deadline scheduler. However, as always, there are some issues of which you should be aware. One issue I encountered is that the Inherited Environment Variables option is missing from the scheduler. I was unable to inherit the AXIOM env variables. The submitter.py script sets the environment variables in the wrong order.
To solve that, you have to edit the Houdini Deadline Submitter in the file (windows example):
C:\Program Files\Side Effects Software\Houdini 21.0.729\houdini\pdg\plugins\PDGDeadline\PDGDeadline.py
This file gets copied and used for every TOP/Deadline scheduler entry thats cooked.
Another issue is that sometimes work items that have already been processed are processed again and are not skipped.
The great thing is that you can instantly deploy the TOP network on Deadline and let the ‘farm’ do its thing. This is really useful if you have a large farm with computing power and lots of licences available. Deadline starts a Hython instance per job, so you need an Engine/Indie/FX licence.
I only have one FX licence, but I have two decent GPUs. This means I can run AXIOM/GPU on an idle device and work on other things besides the caching process.
My goal was to automate the caching process and obtain a preview of the different versions with an overlay of the wedge attribute(s), as well.
Flow: Cache -> Flipbook(OpenGL/Vulkan/Karma) -> Flipbooks_overlay (COP) -> Montage (ImageMagick) -> FFmpeg (.mp4) -> Delete_tmp_files
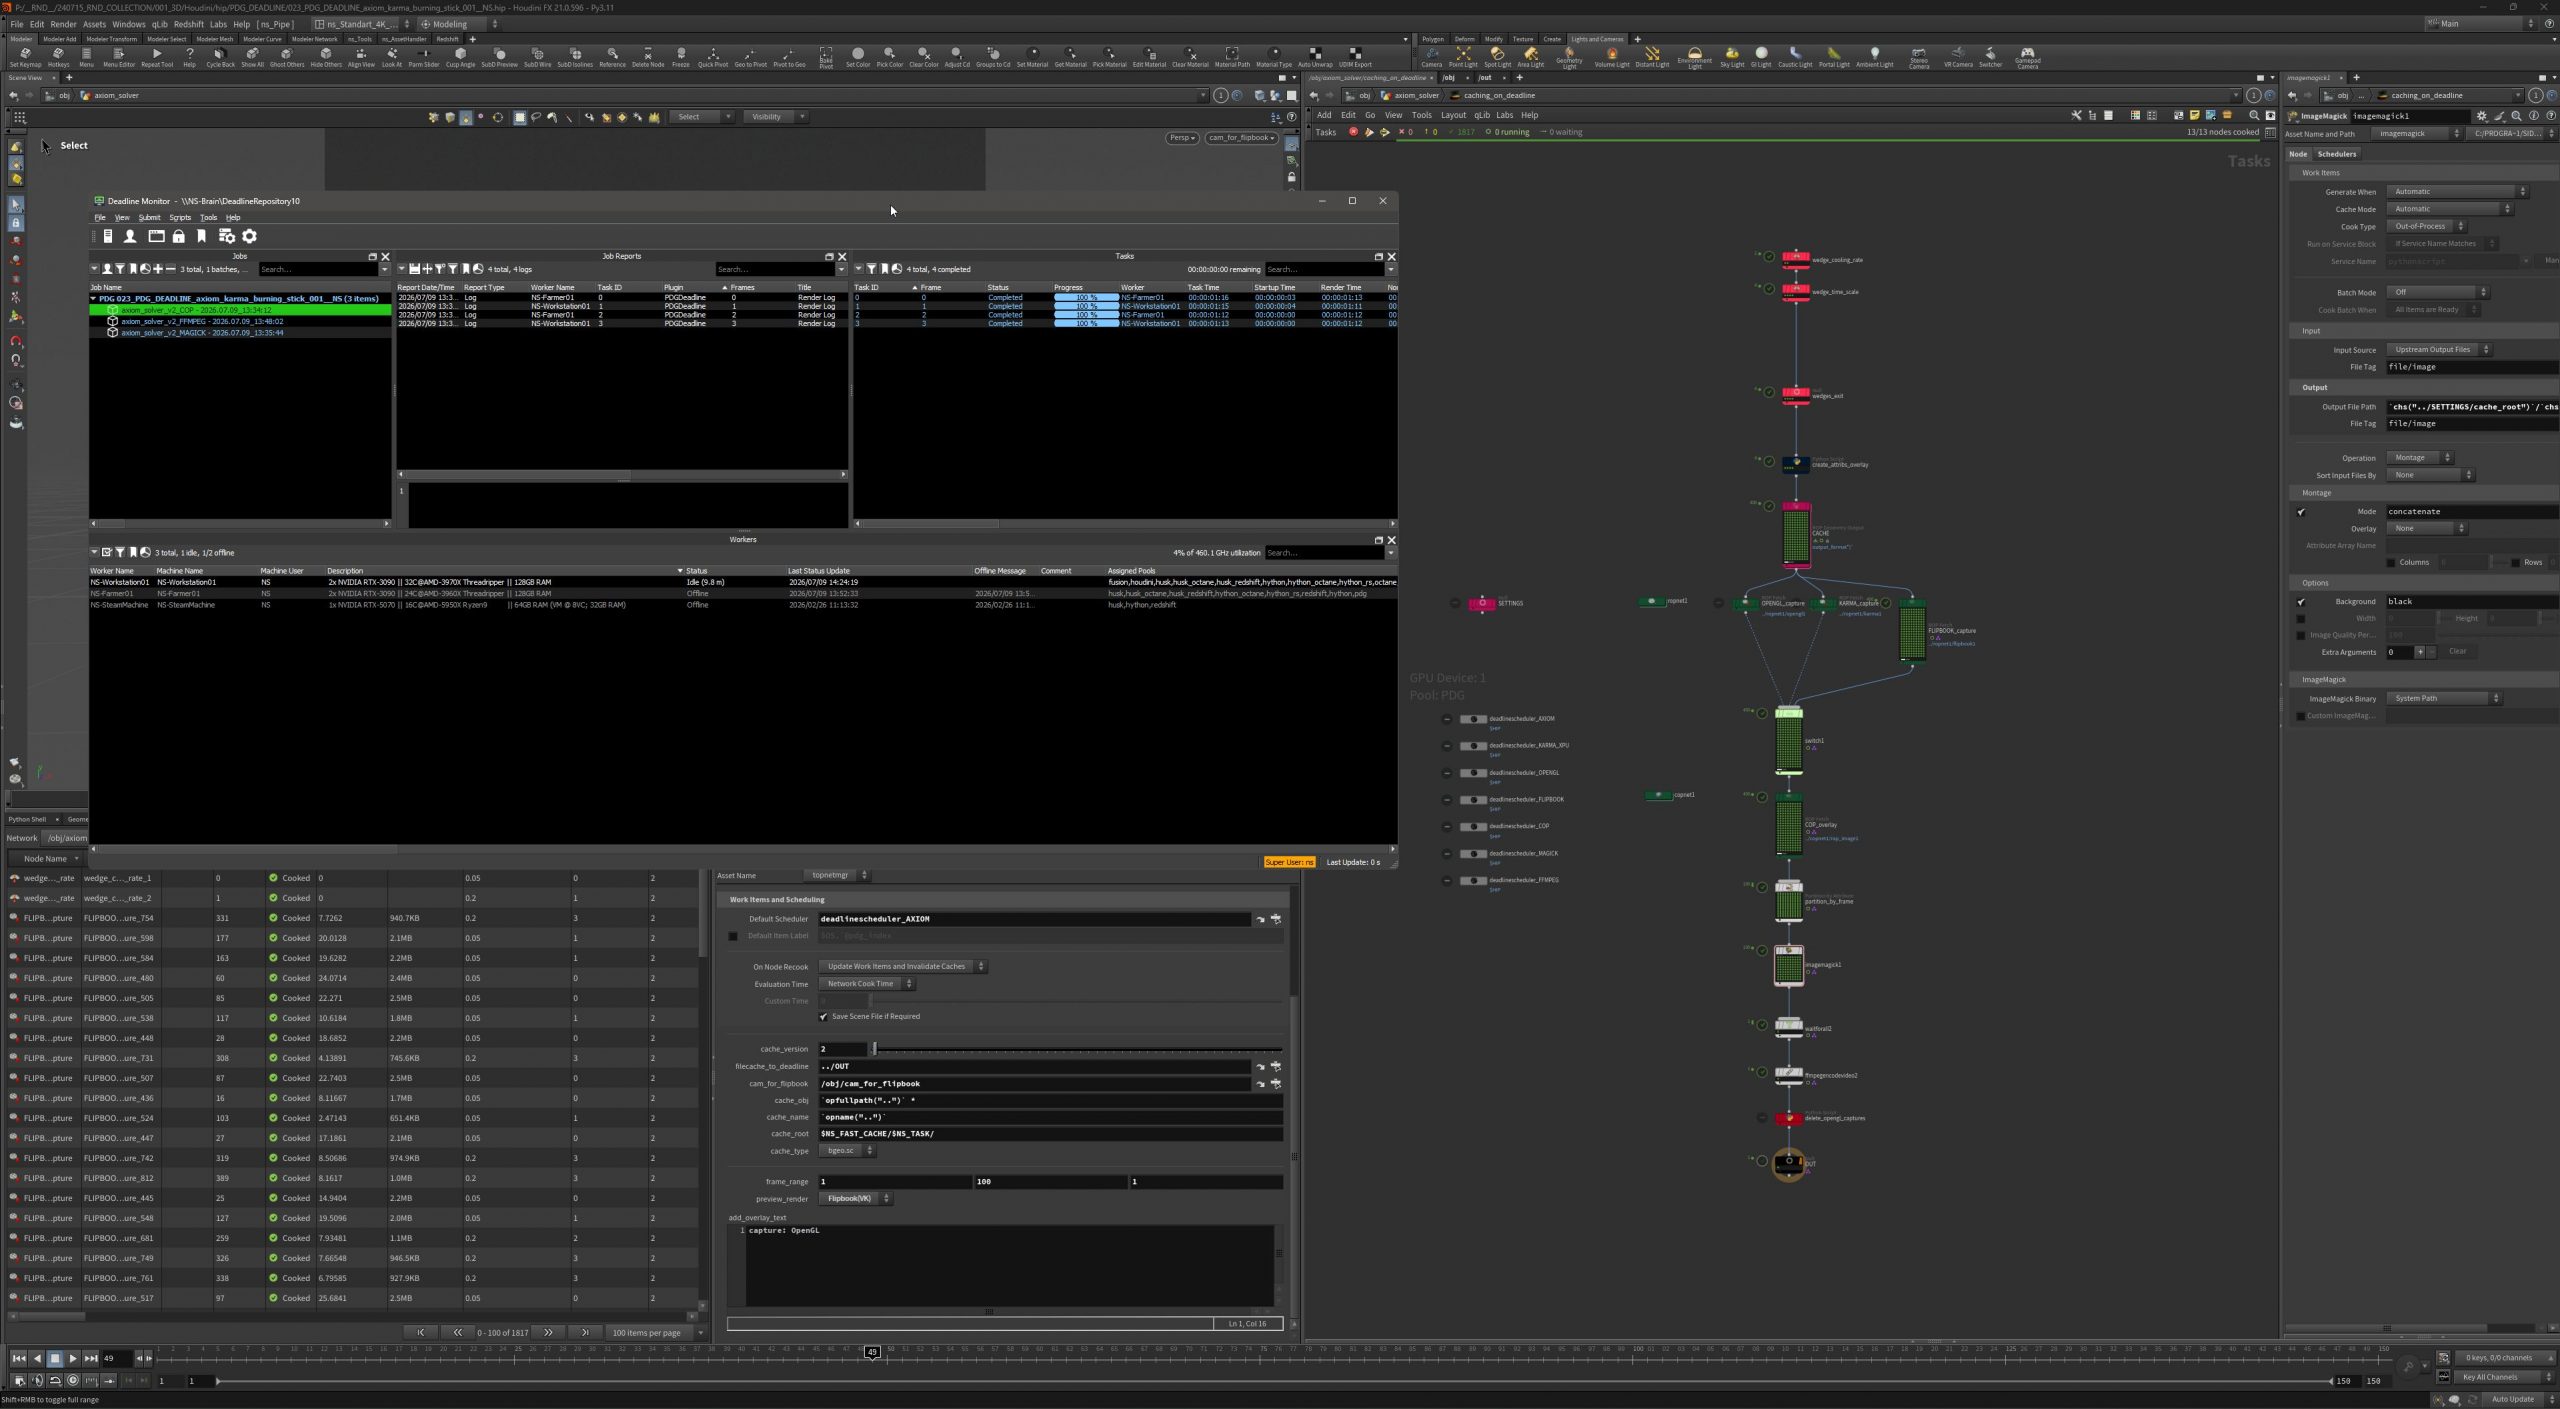
I have provided the .hip file below, but I will highlight some steps here and there.
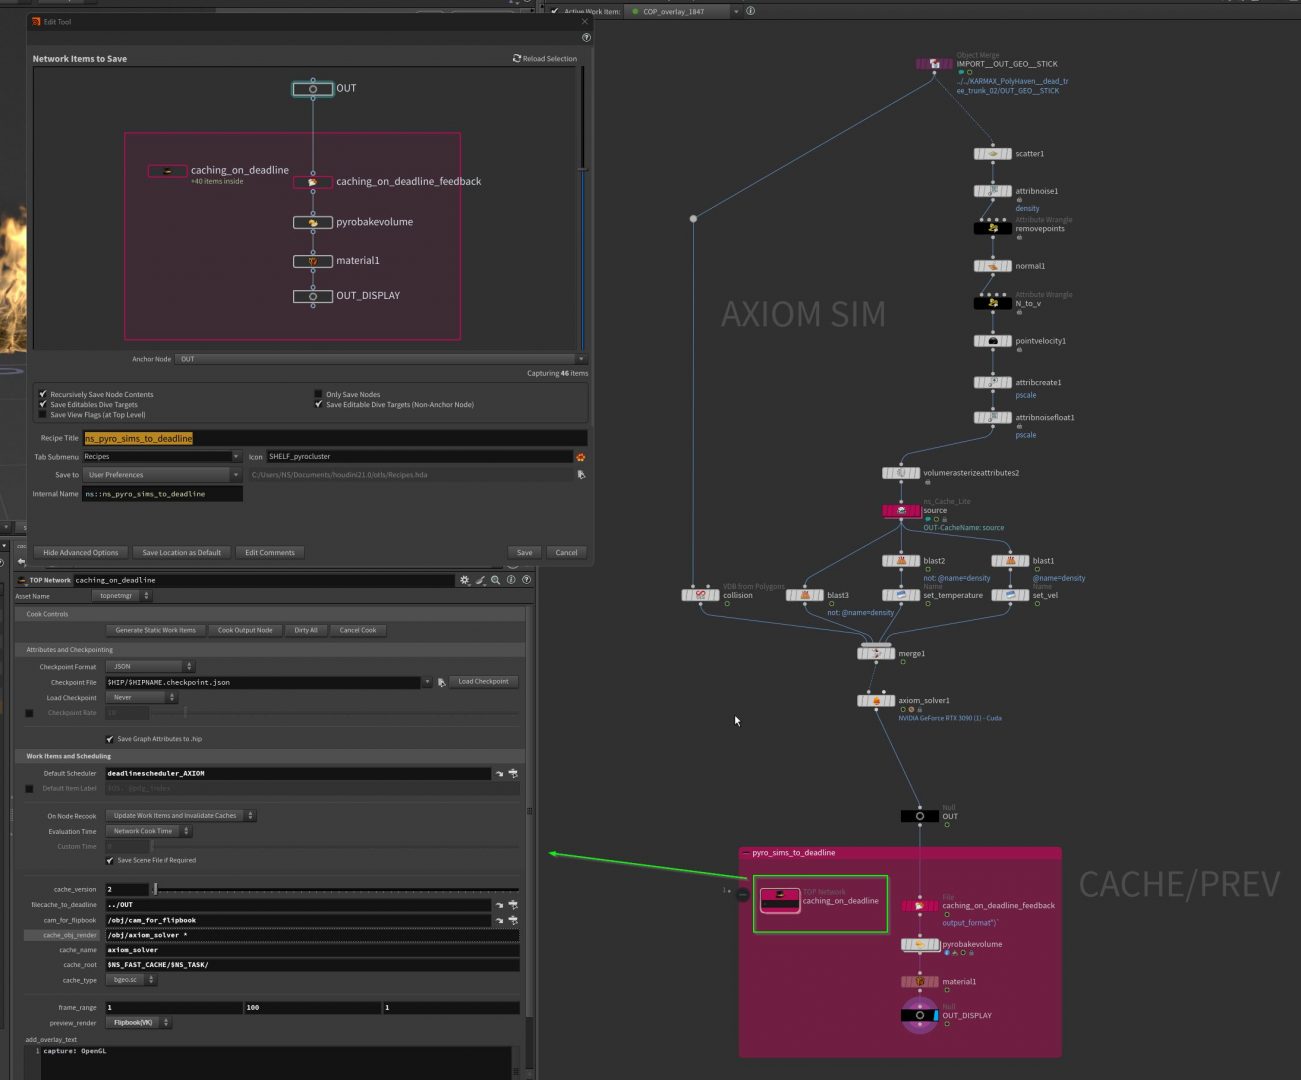
You can capture your wedges using OpenGL/Vulkan or Karma. I set up the whole caching process first, and after creating all the wedges, the TOP network compute the flipbook preview work items (therefore the ‘caching_on_deadline_feedback’ file reader). This is because the simulations run on the GPU, and this method produced the best performance outcome in my tests. I’m not 100% convinced it’s the smartest way, but it works in this case.
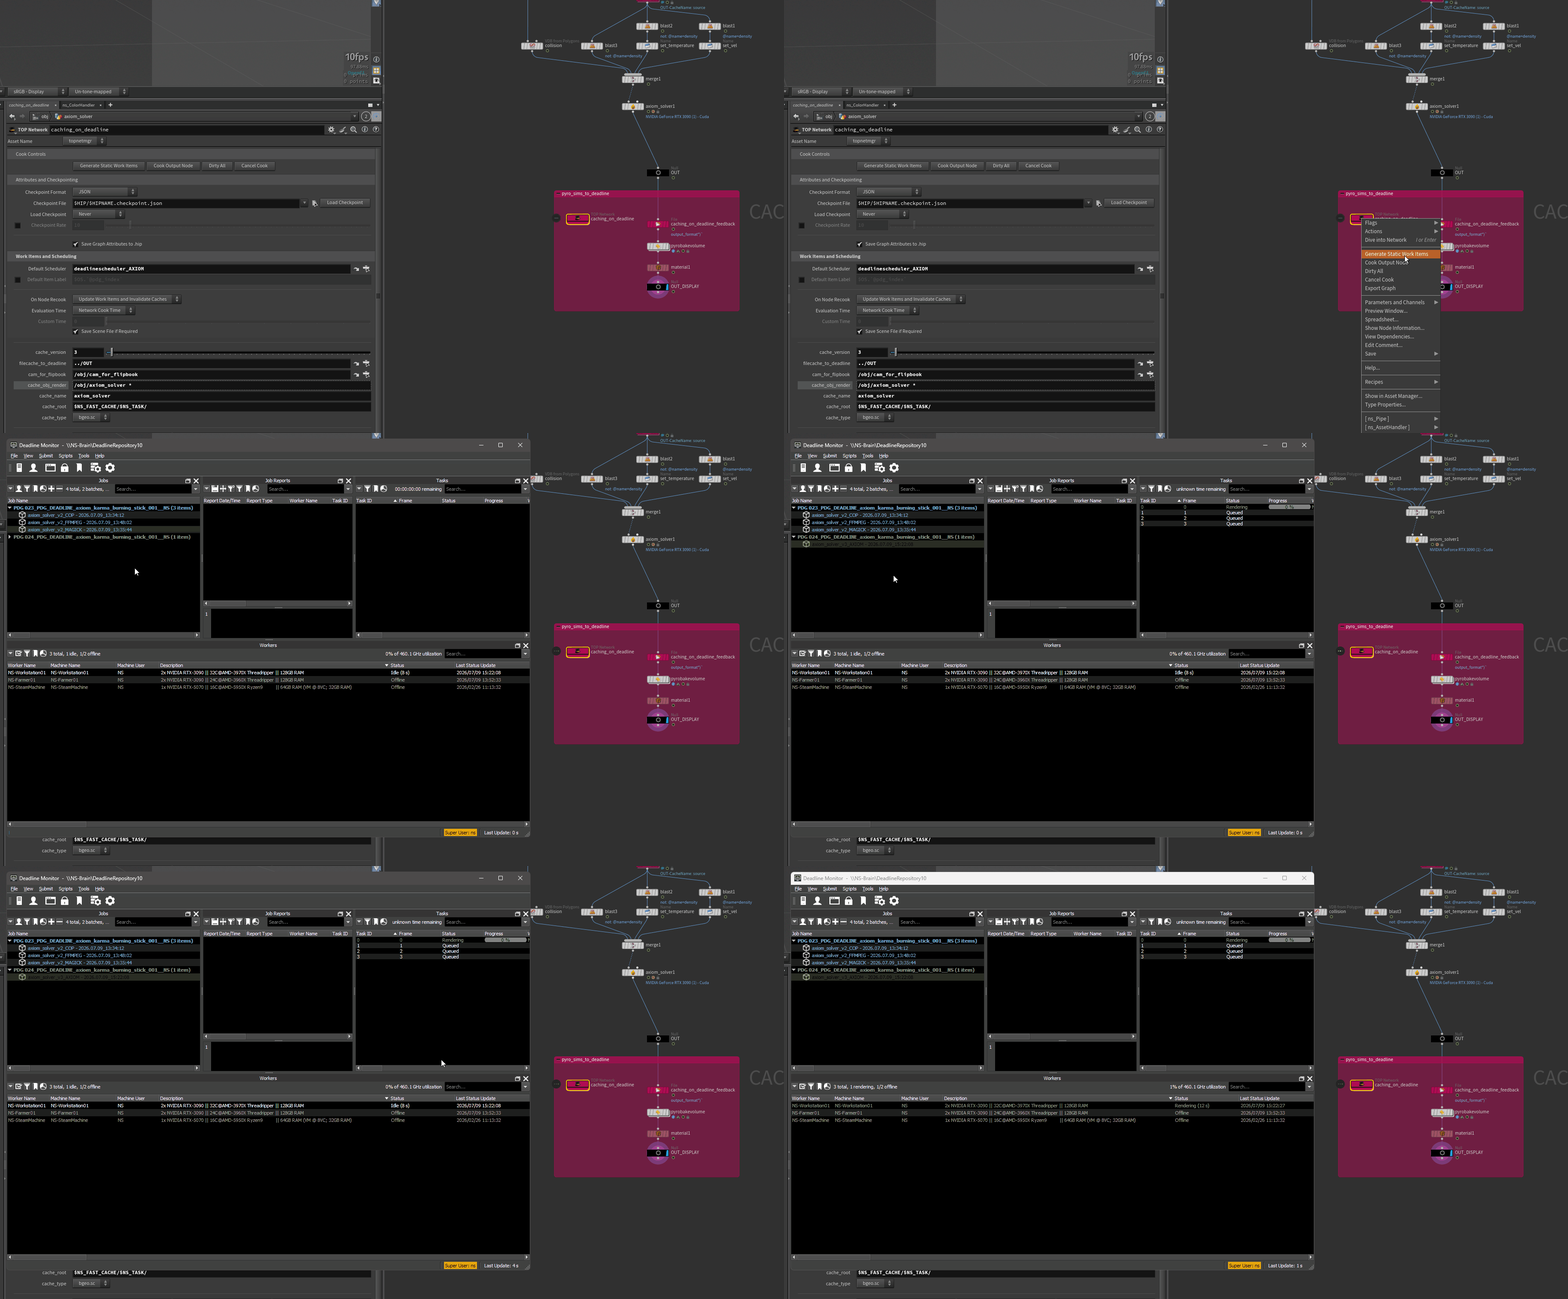
Please note that you should not close the current Houdini session. You can view updates to the computed work items in real time. If you close it, the Deadline jobs will fail. If you want the cache task to be a persistent Deadline job, you can submit it here:
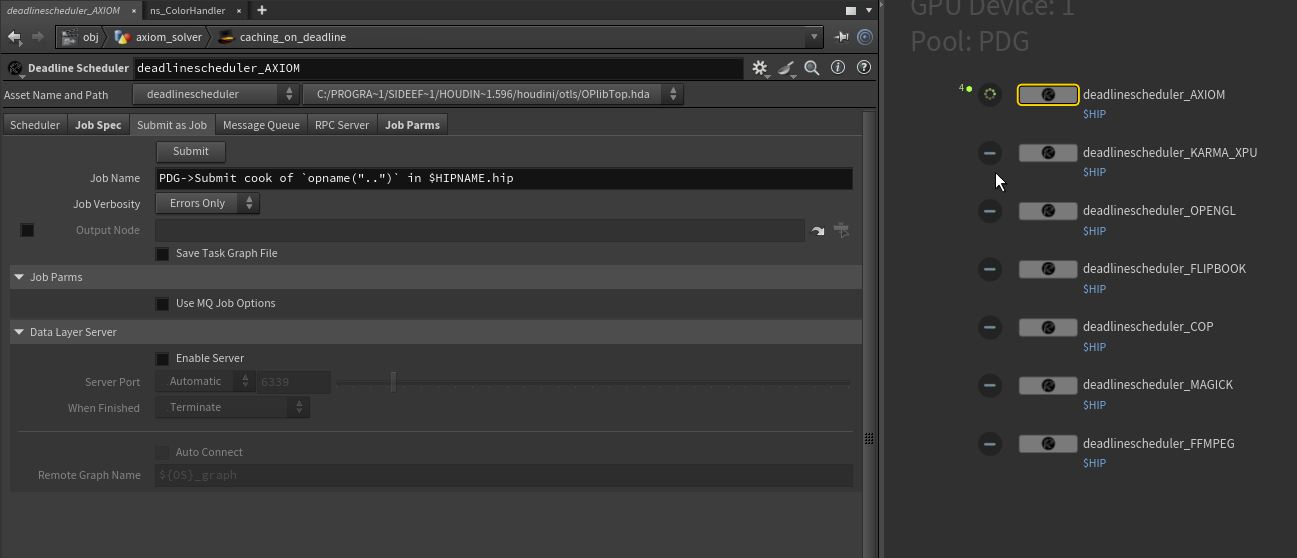
I like the separation with the different deadline schedulers. It creates separate Deadline jobs, which makes it easier to debug and follow. Of course, you can just use one single Deadline scheduler.
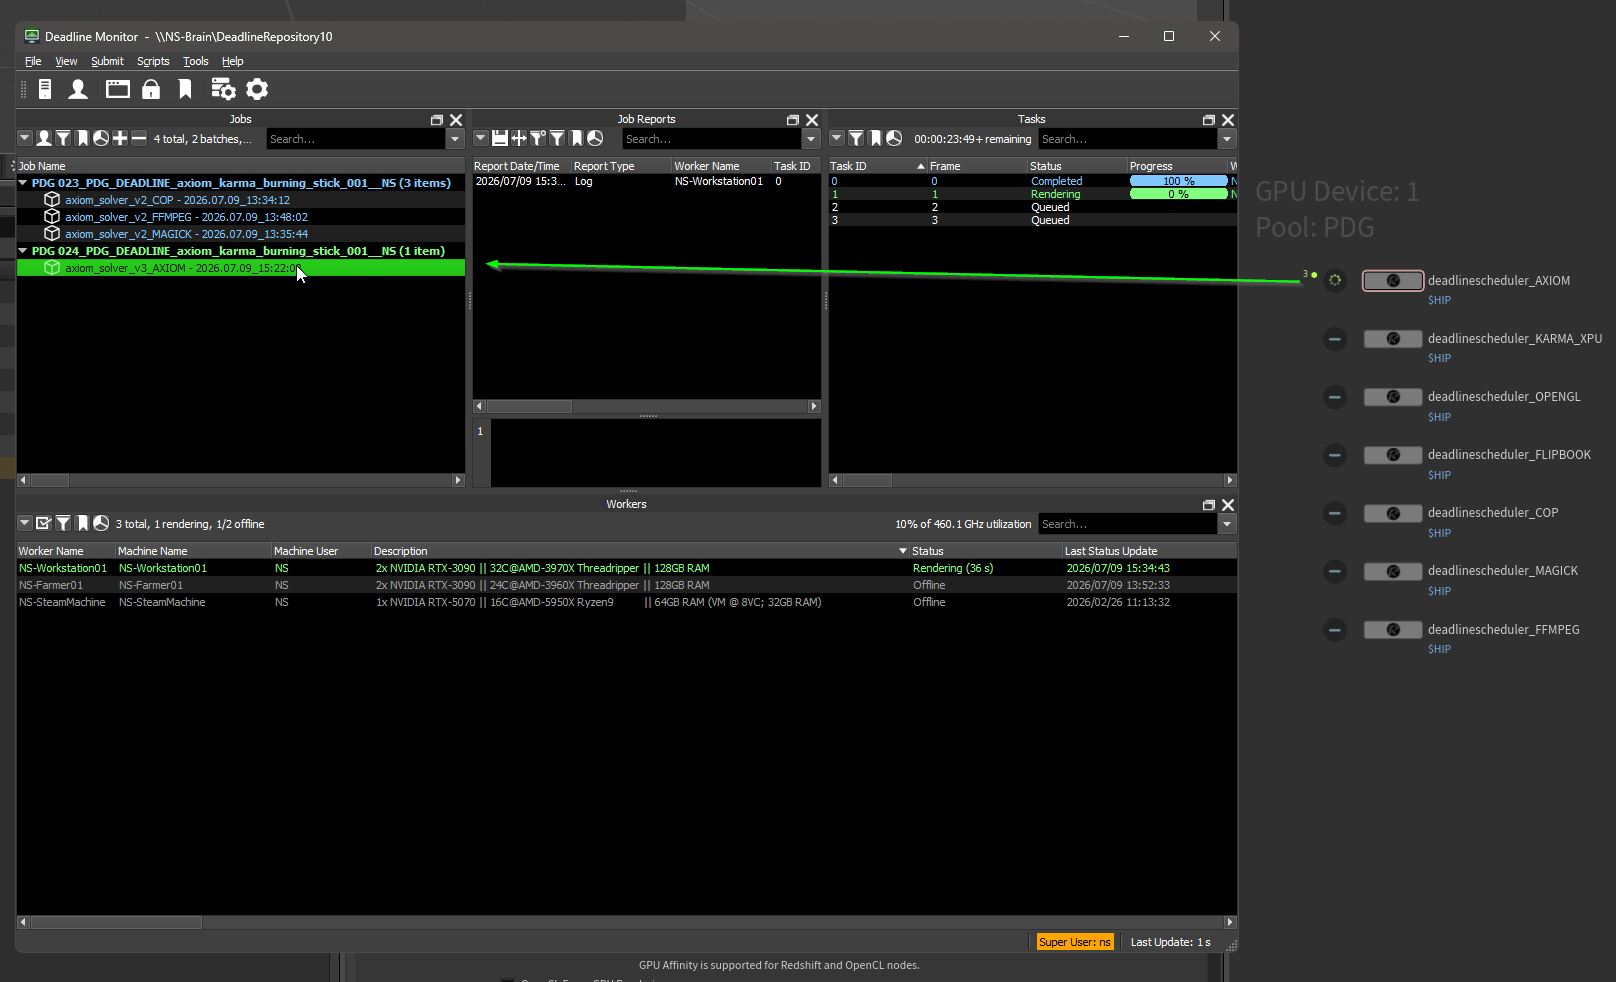
the TOP Network Walk Through:
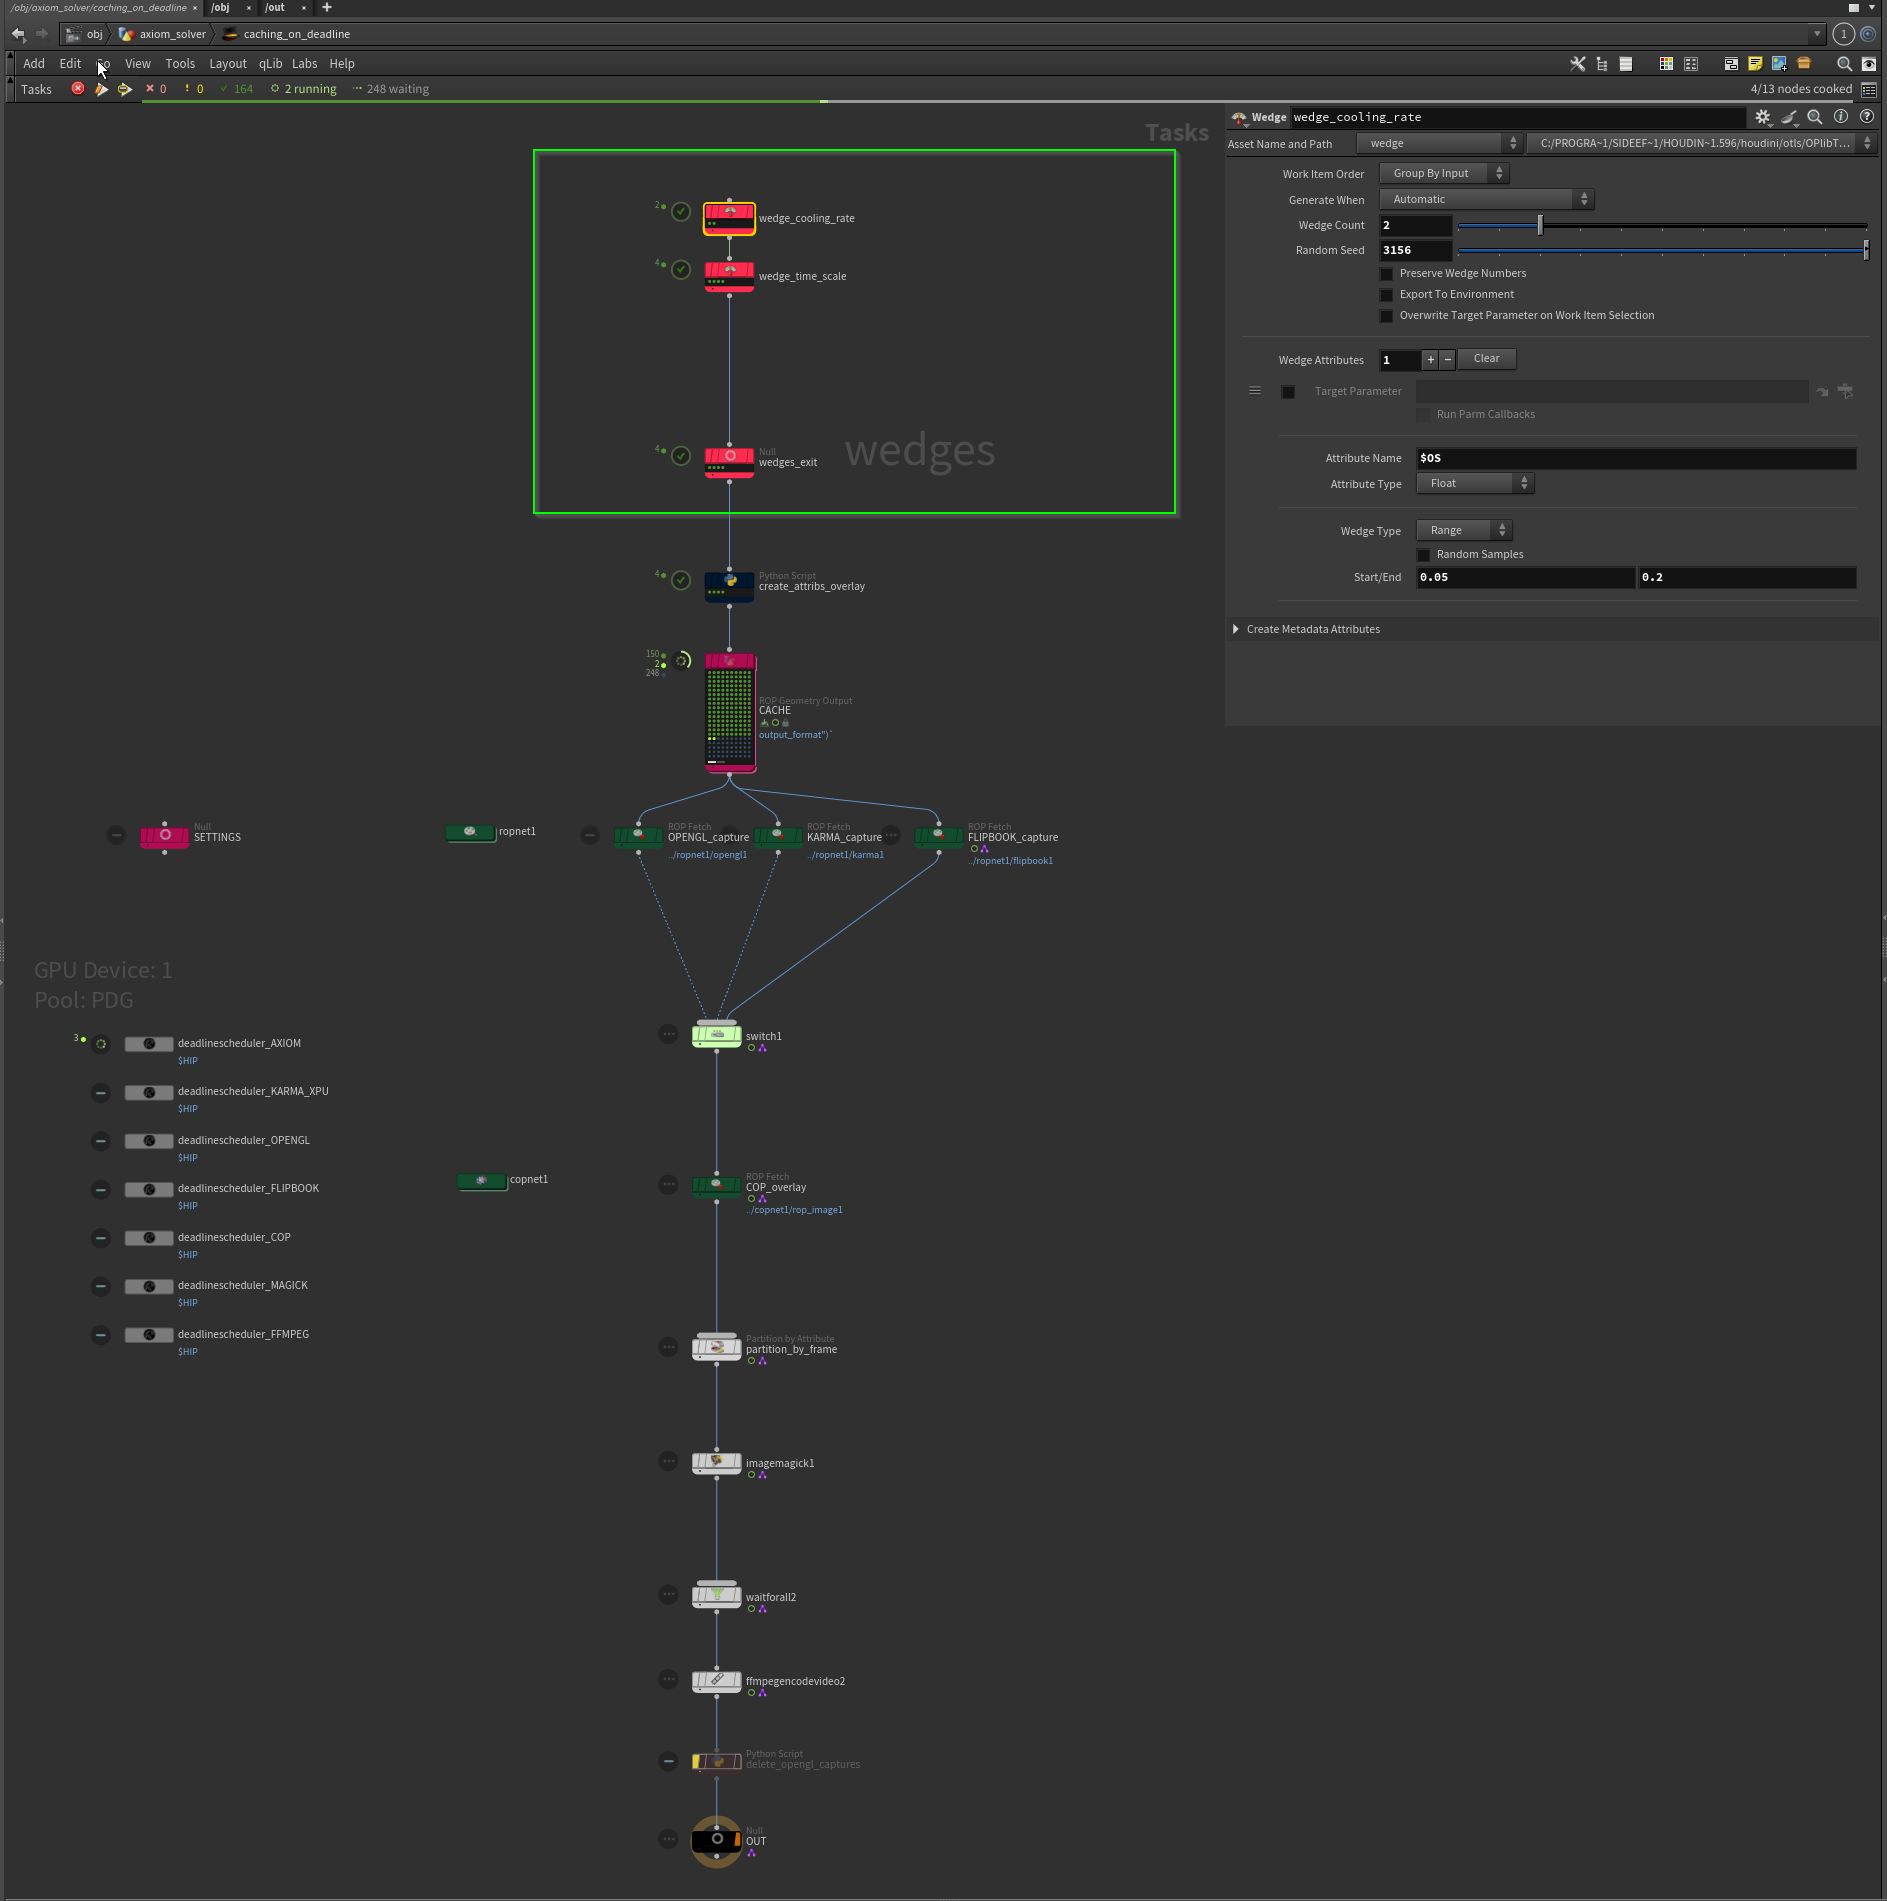
This could be optimised and automated further. But here just chaining wedge nodes and linking the wedge attributes to the AXIOM solver.
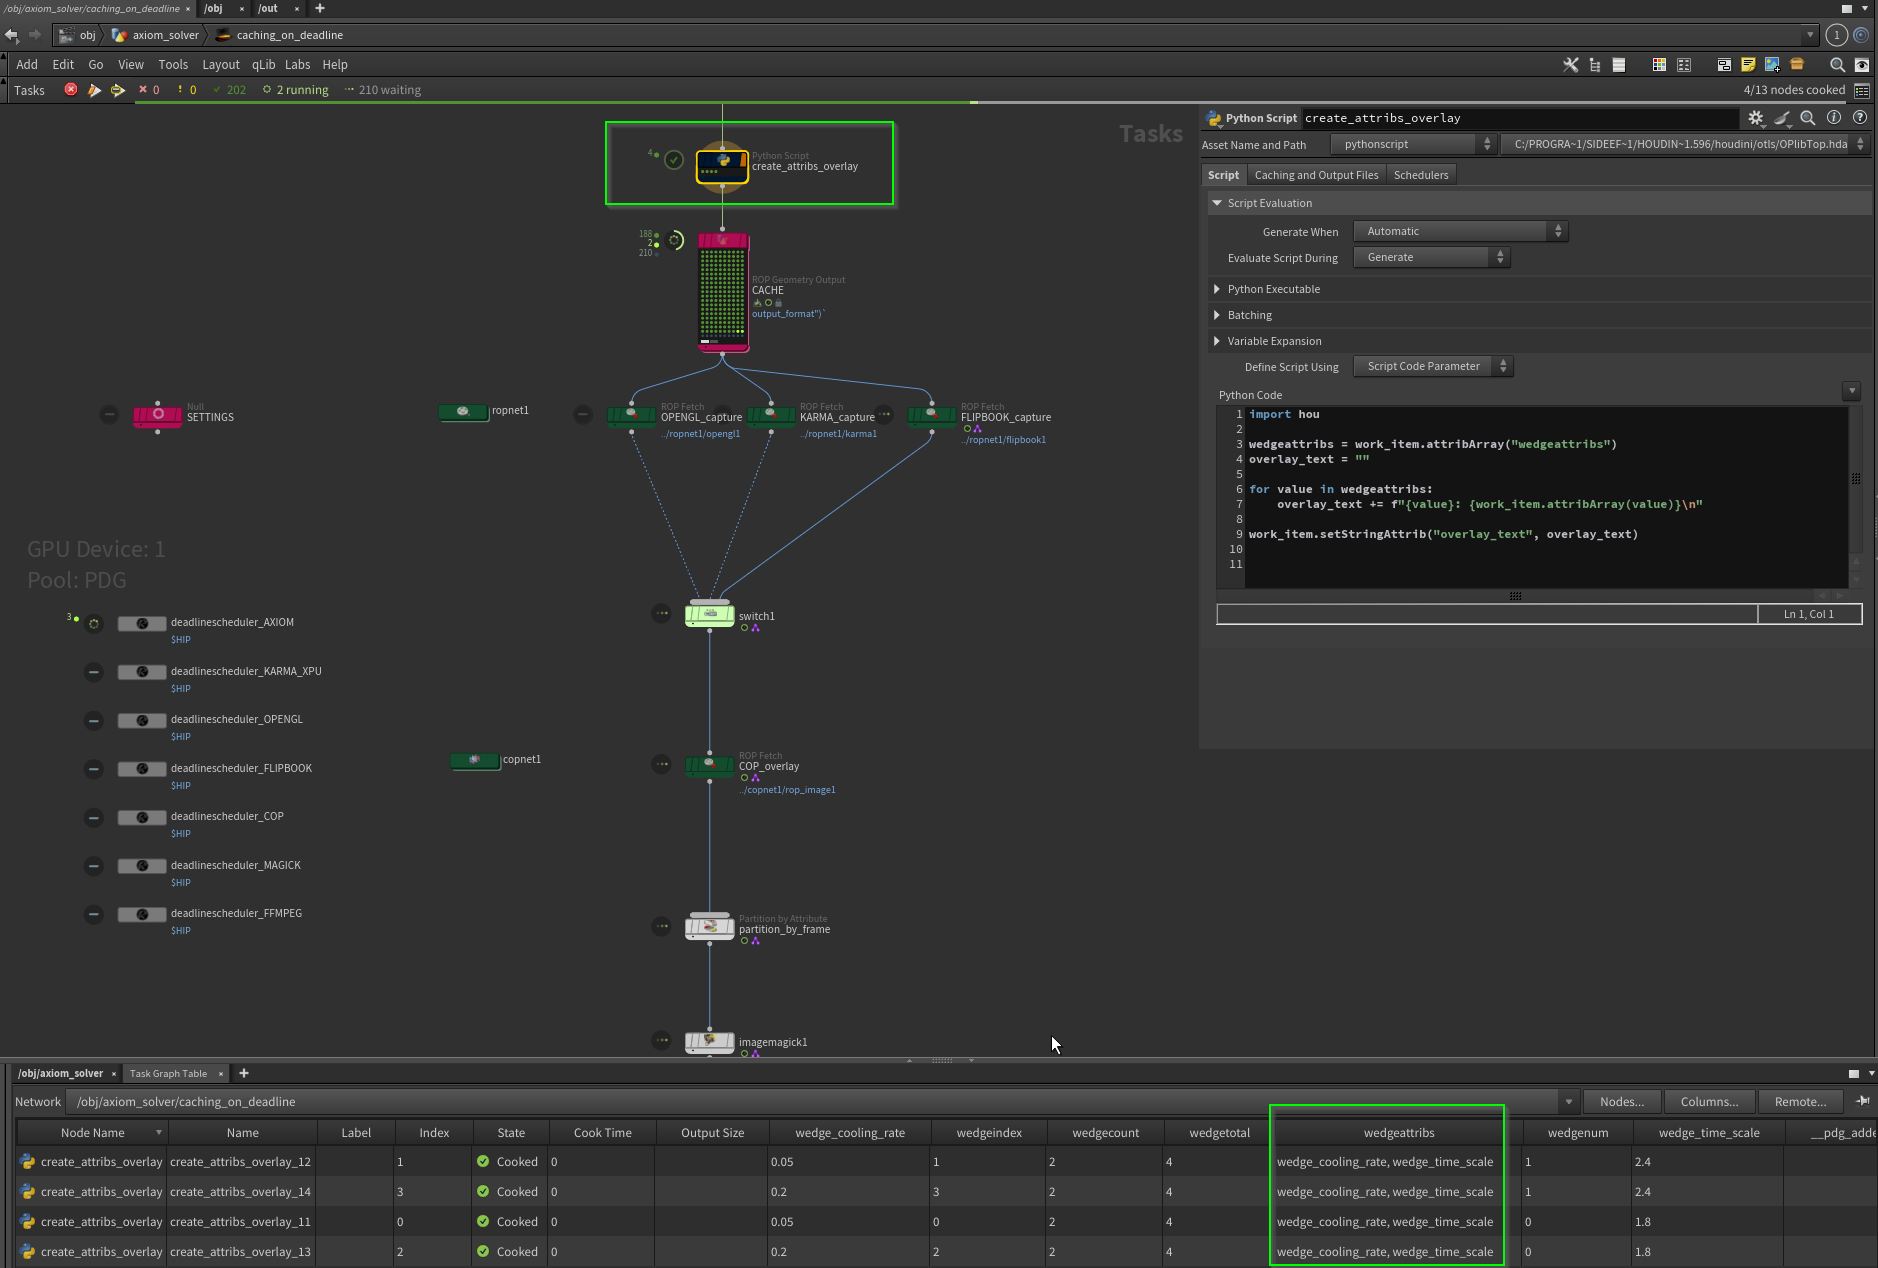
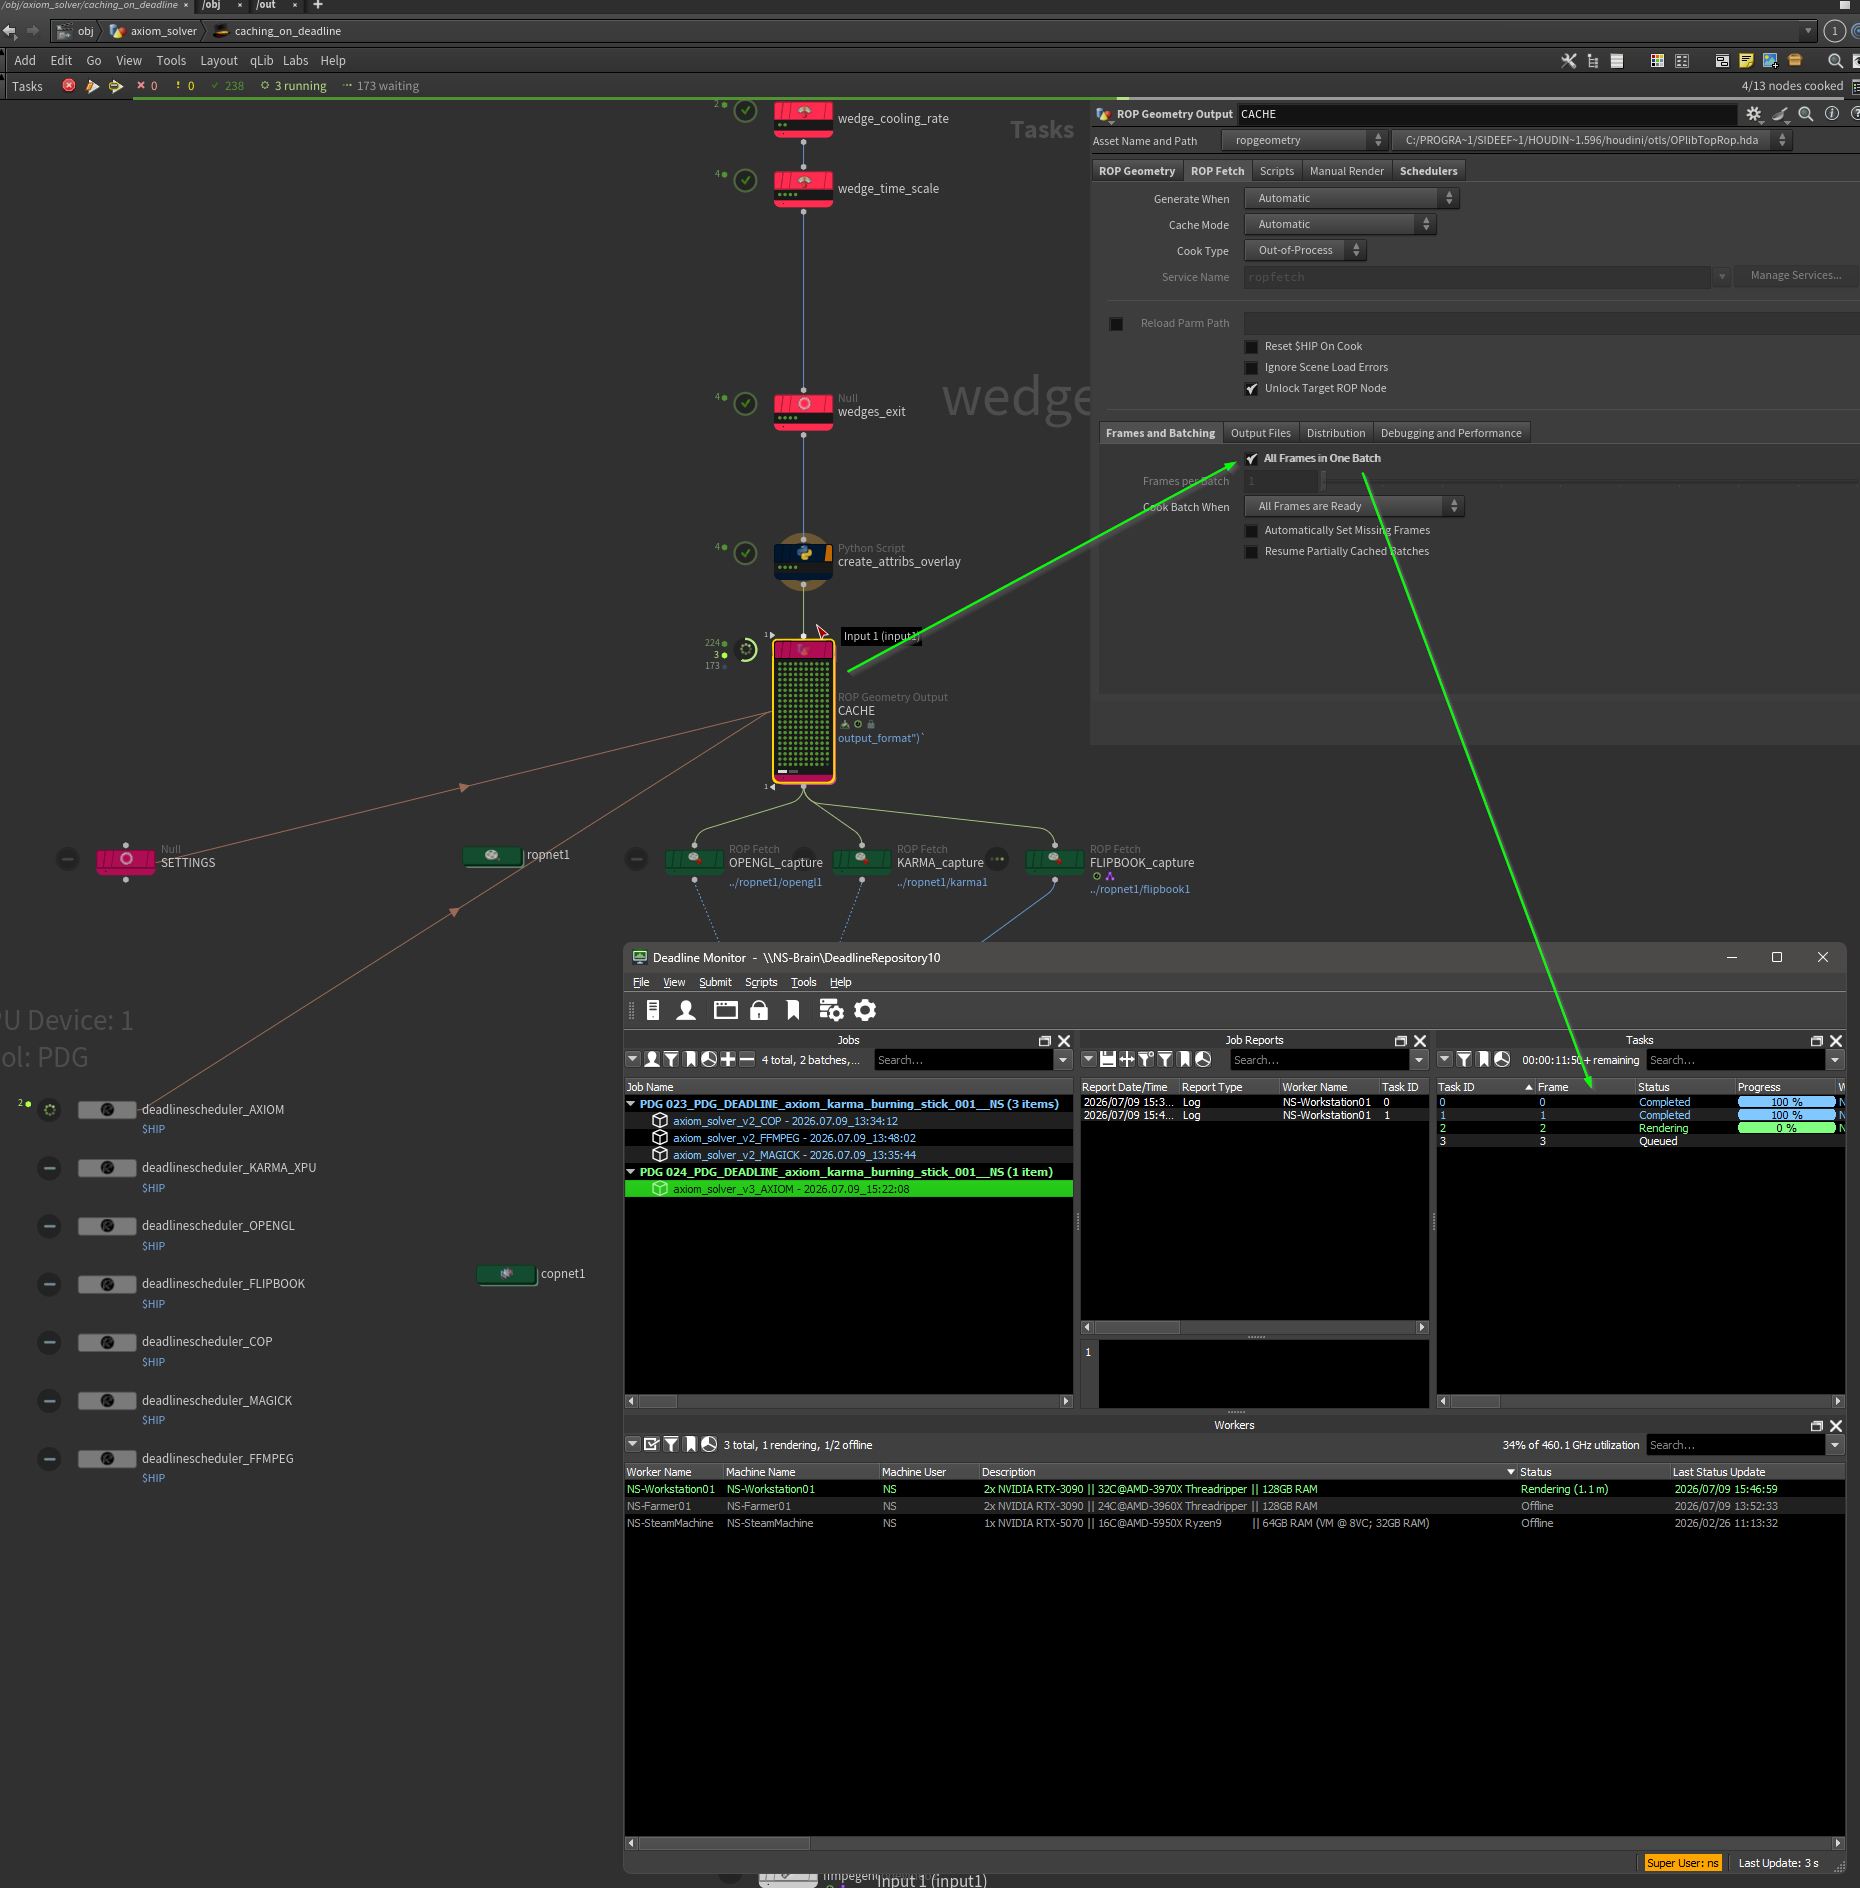
It is important to set the ‘All Frames in One Batch’ flag to generate one Deadline job for every wedge sequence. The output paths are assembled with and against the ‘@wedgeindex’ attribute.
As mentioned before, i set the GPU device for the caching to a idle device that let me works on other parts beside the caching process. You can set the device numbers in the scheduler:
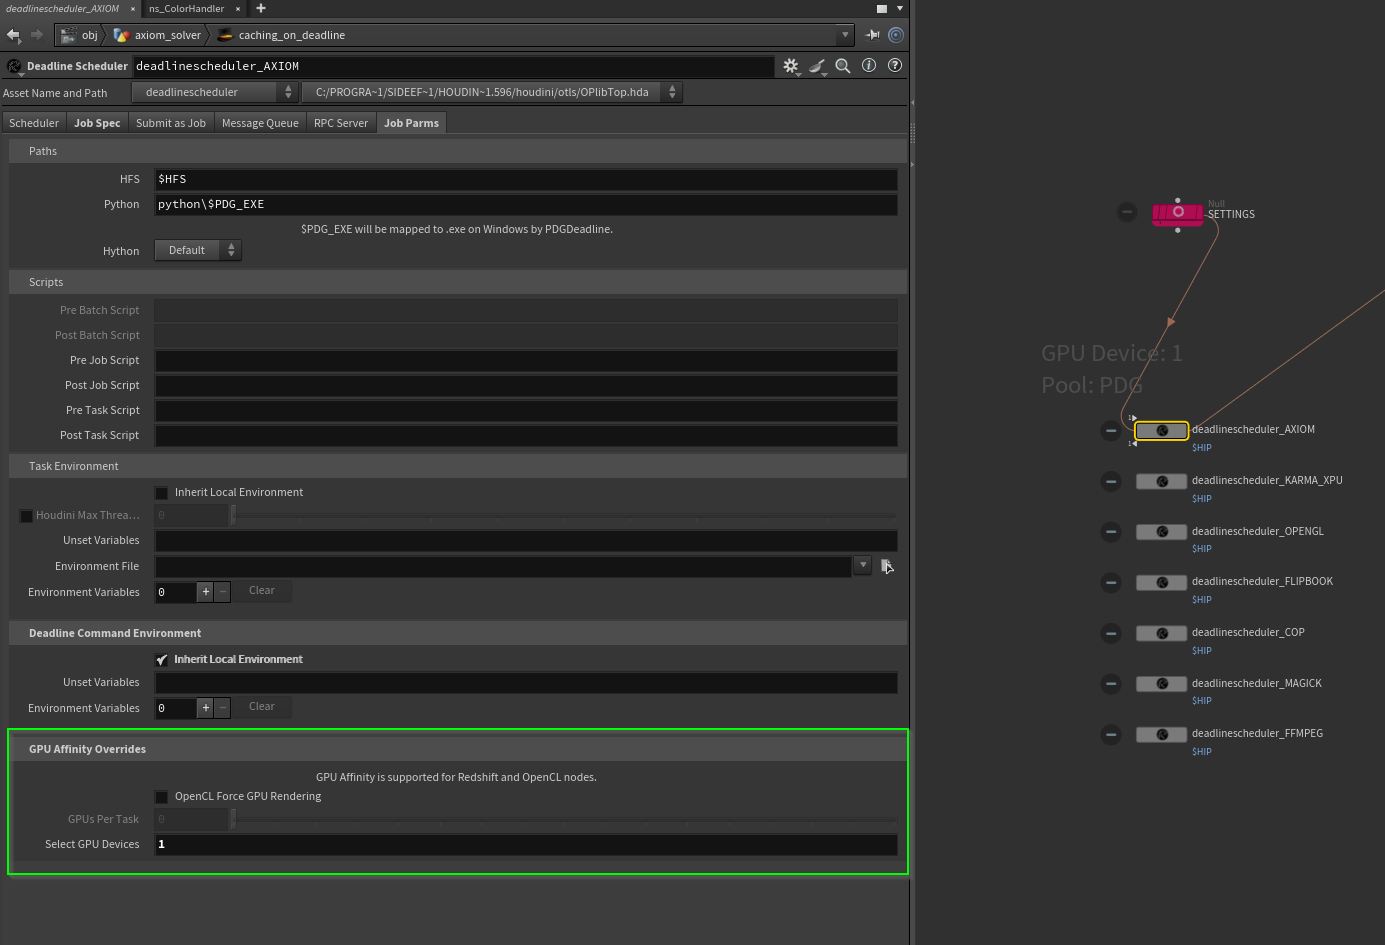
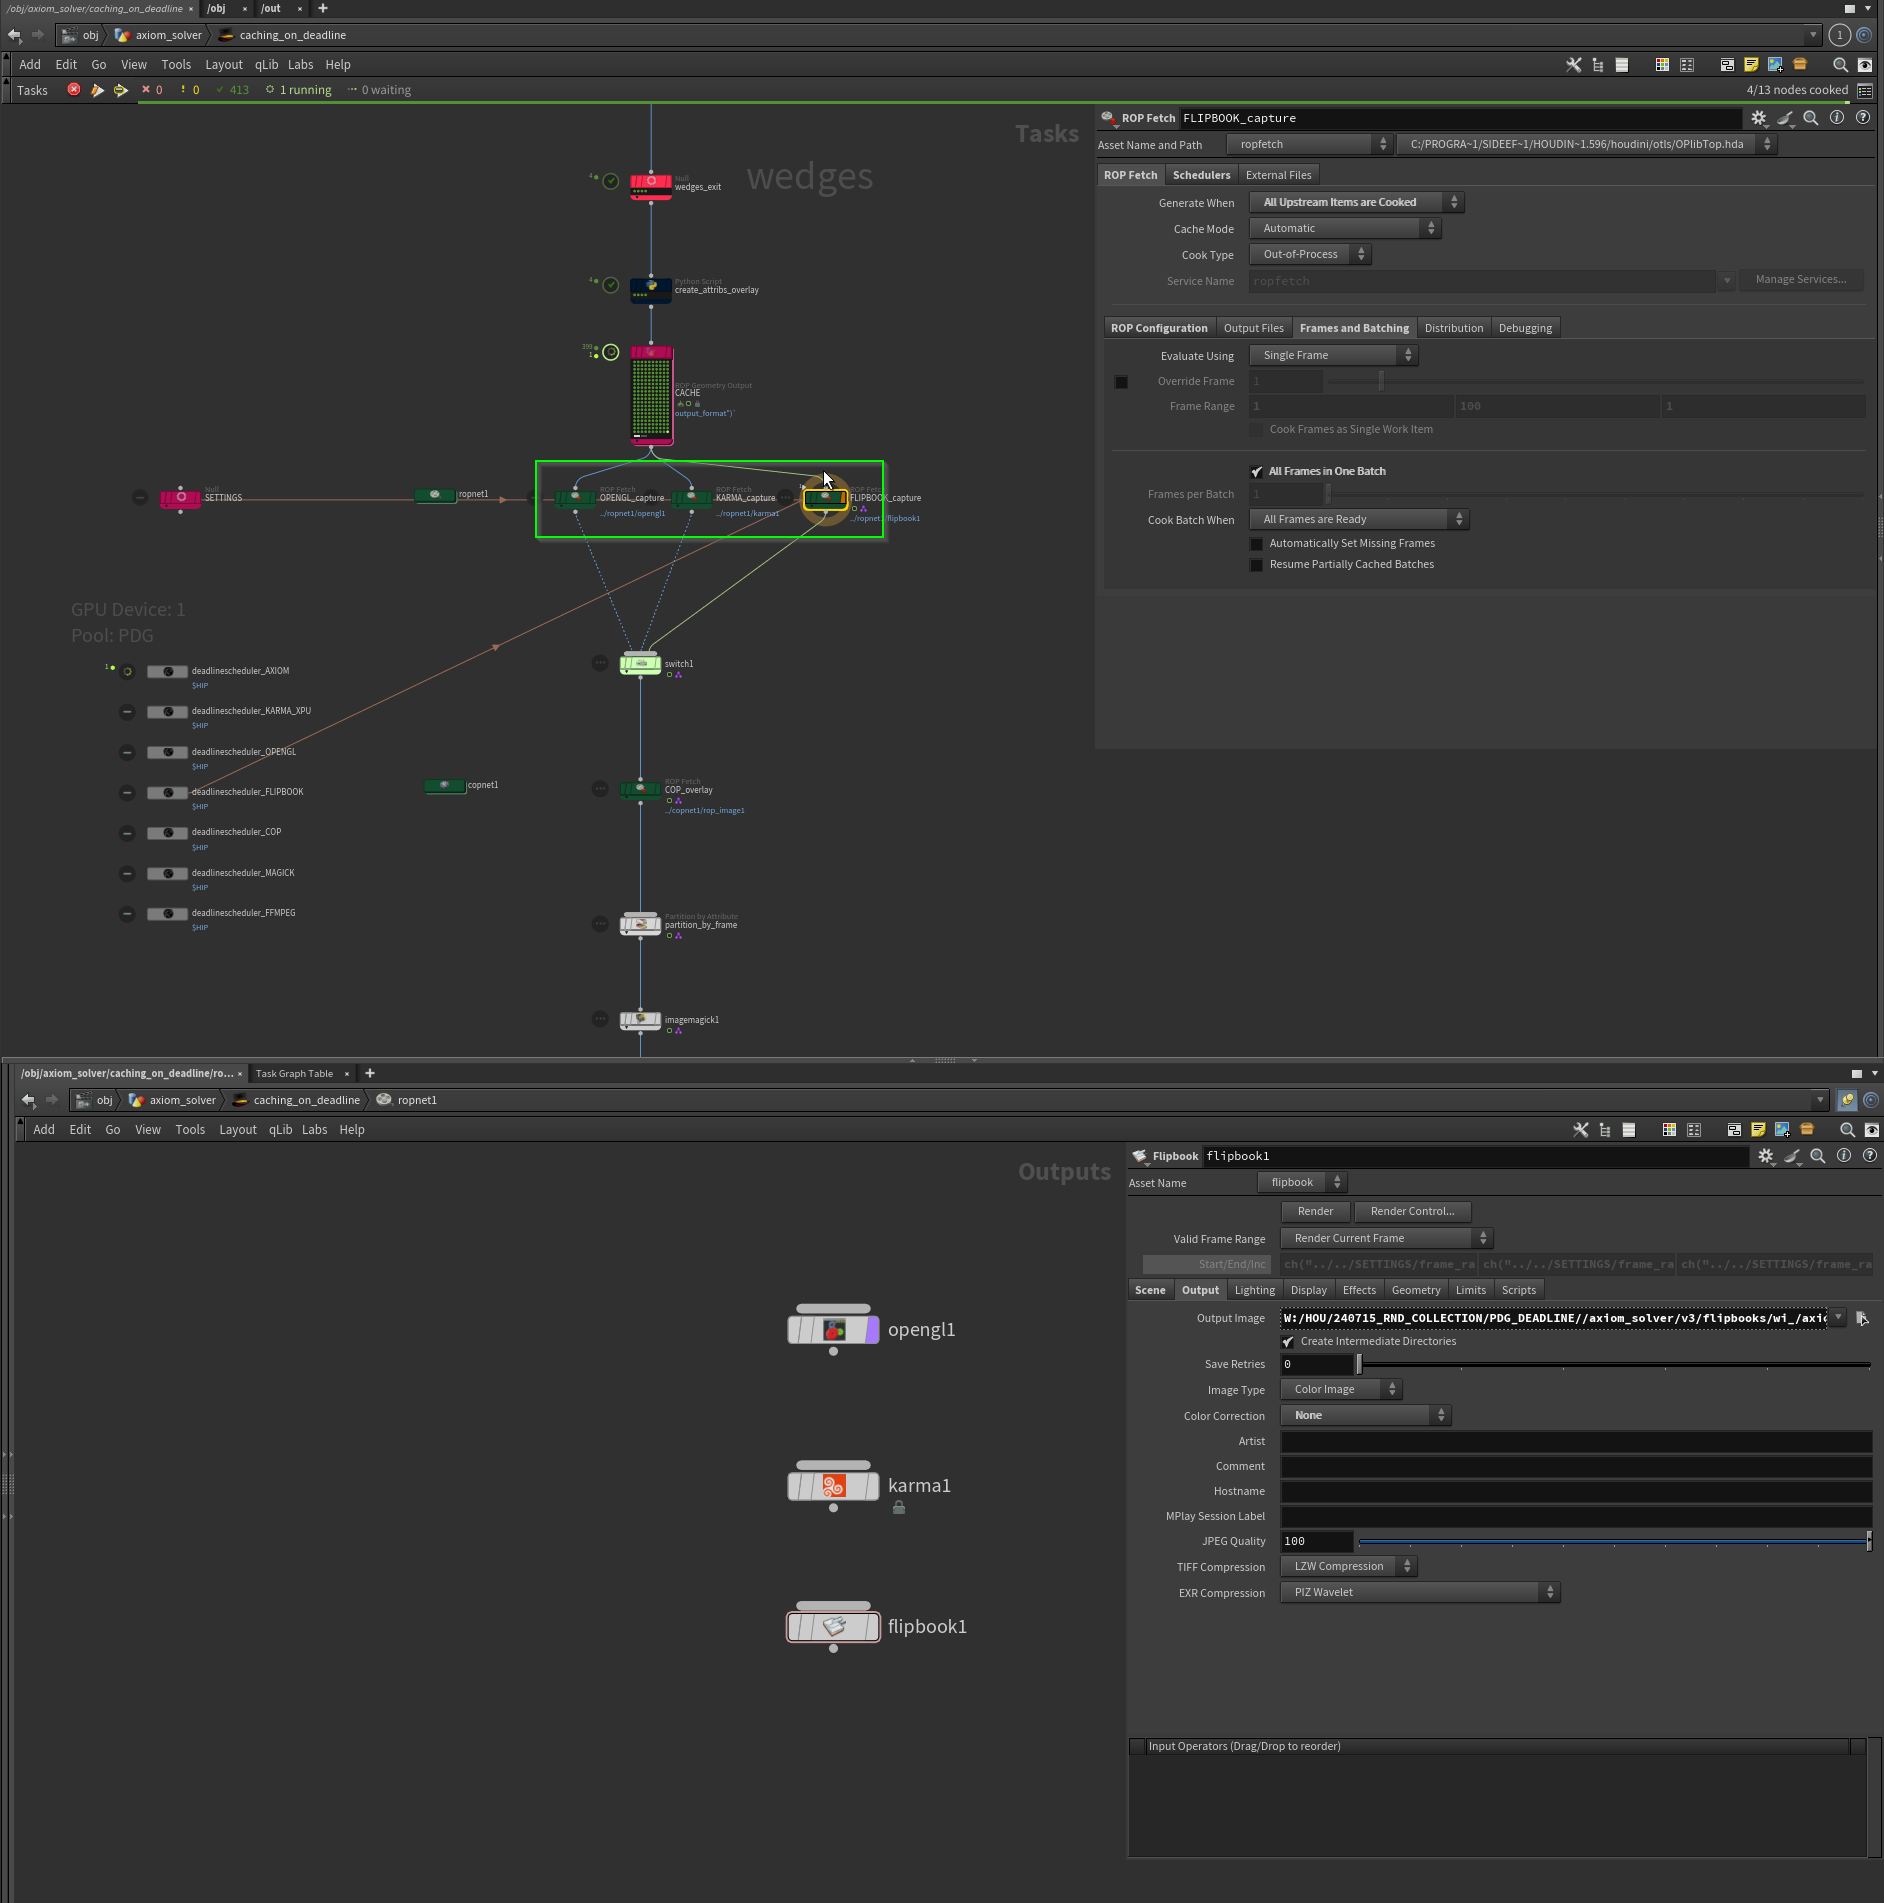
The settings are the same here, and I set the ‘Generation When’ flag to ‘All Upstream Items are Generated’, so the node is waiting for the work items in the CACHE TOP node to finish.
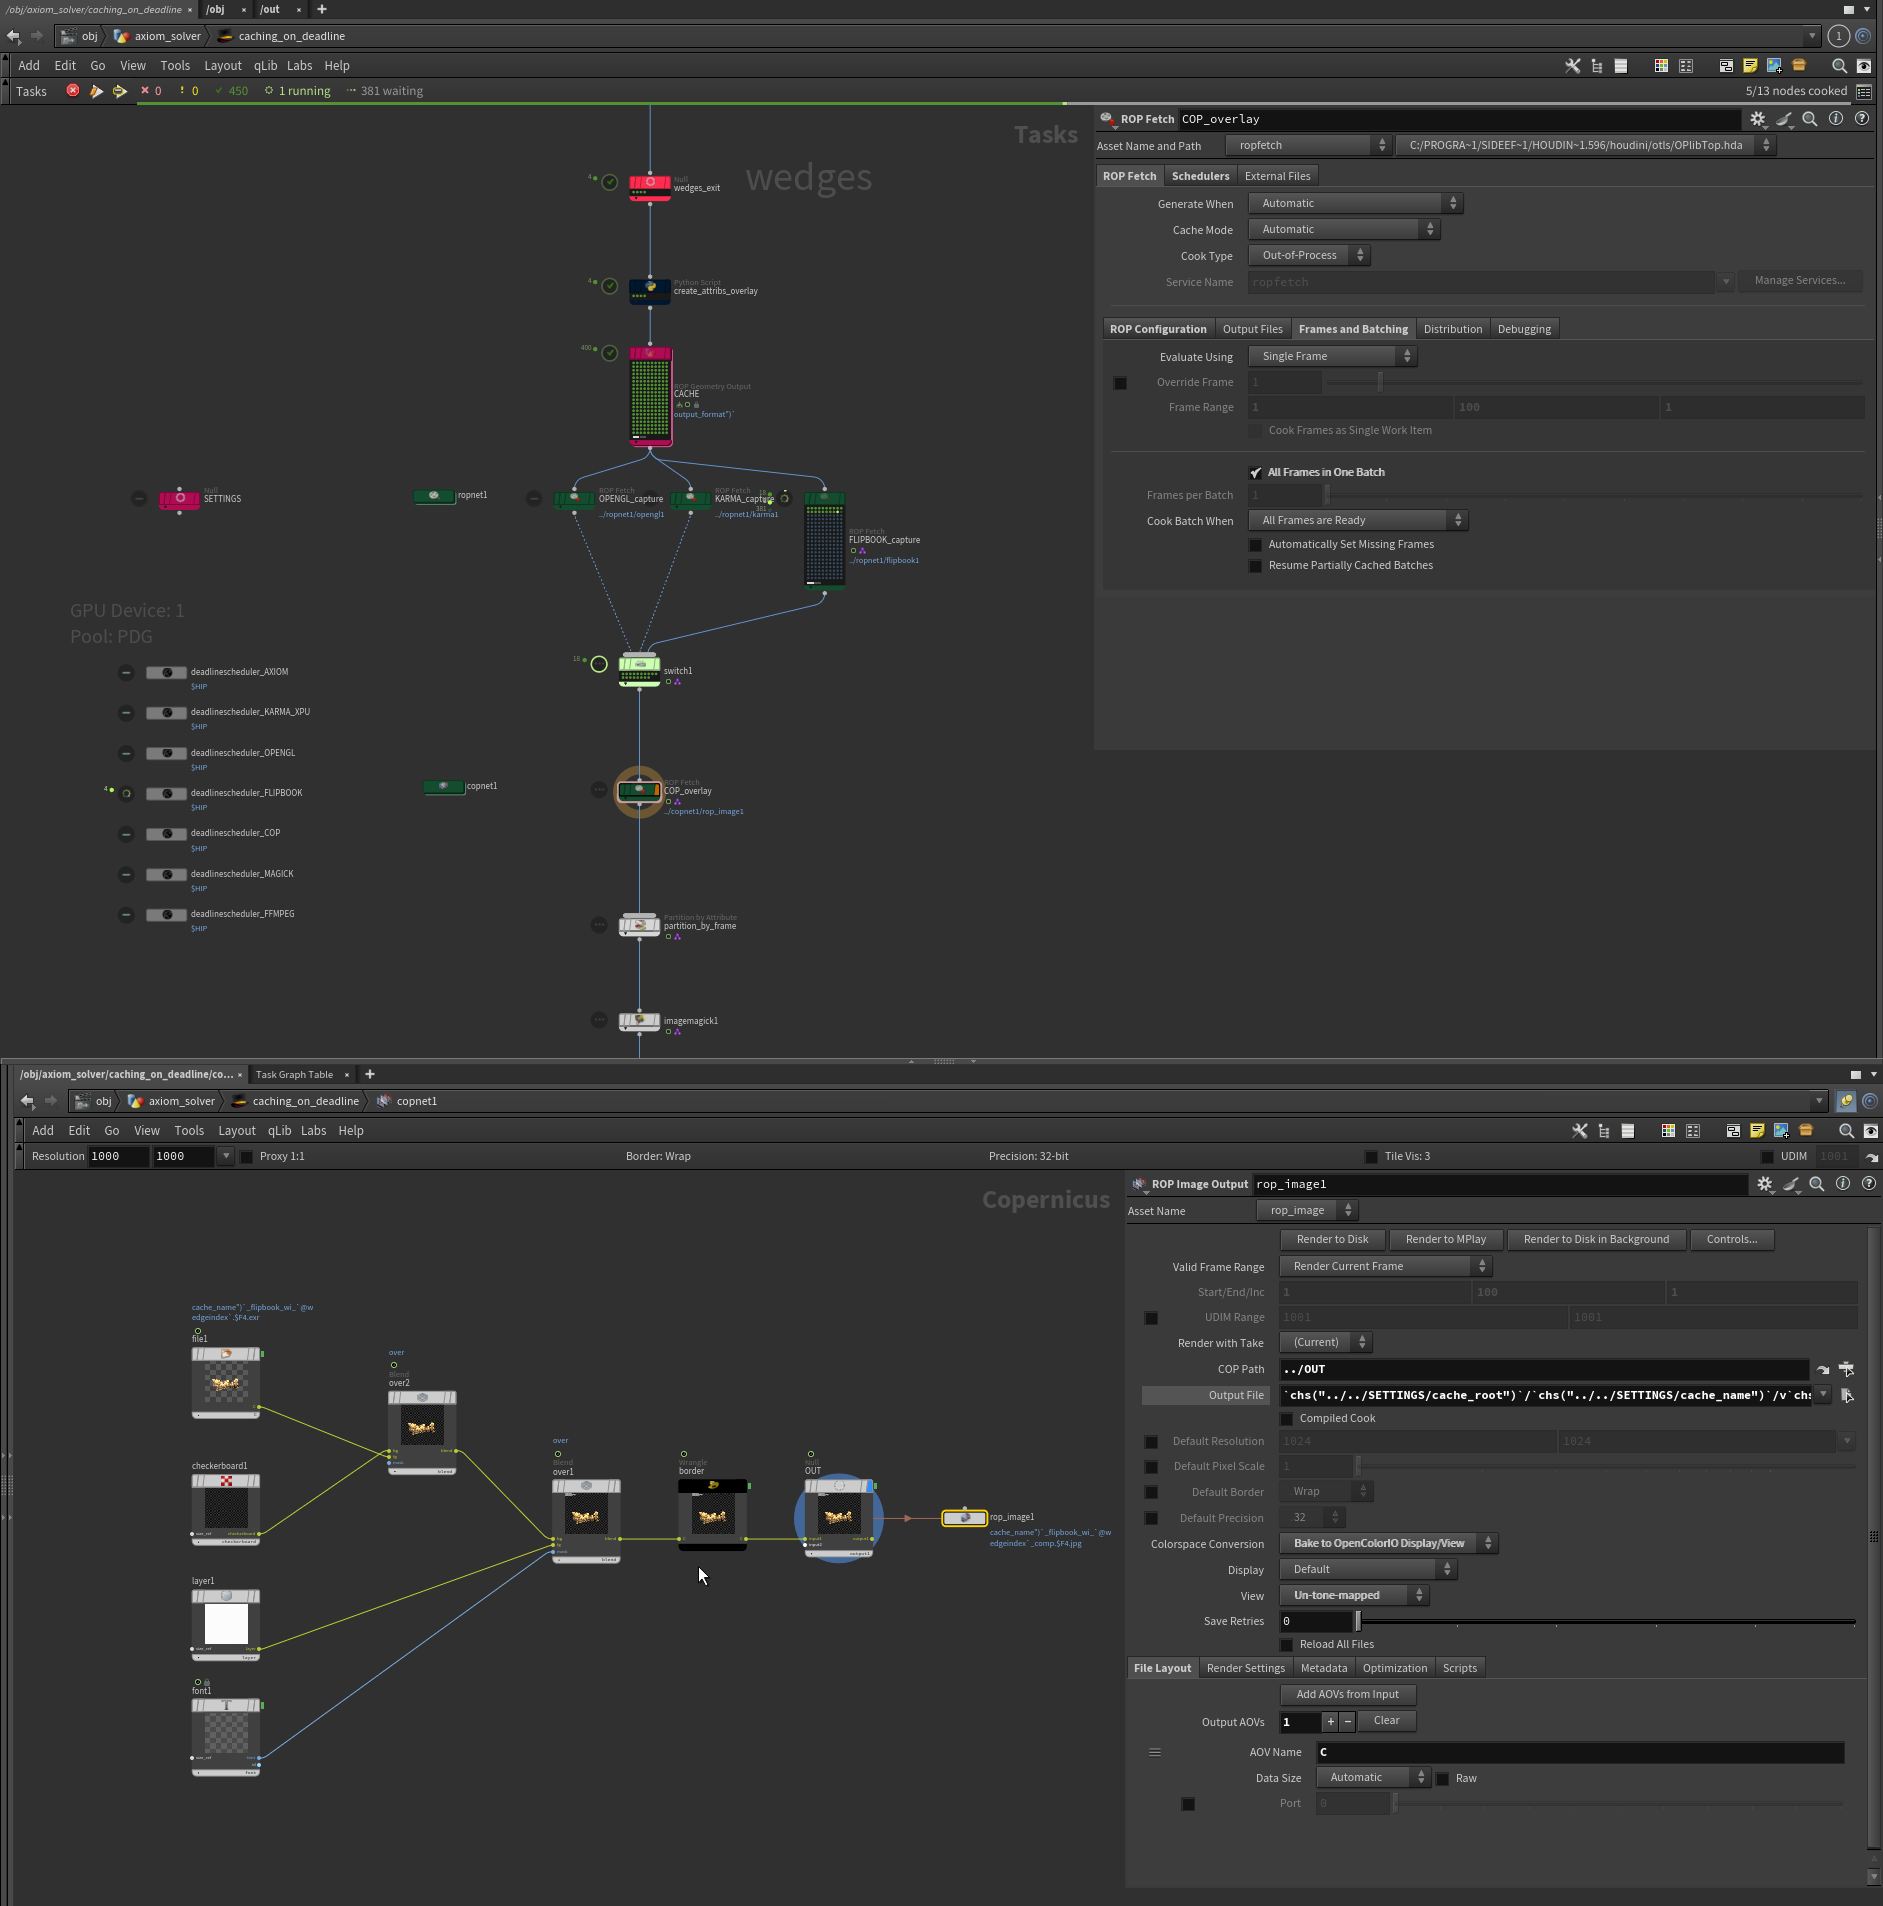
Here comes the capturing/rendering, checkerboard and overlay text together.
I`m really confused sometimes with the color outputs and OCIO in Houdini. This is a bit of flaw right know and have to investigate more about my the color management. It`s really messy sometimes.
I render out .exr files (AcesCG) because .png gives wrong results with the Alpha channel.
I only get the right colors (which I set up in the 3D editor) when the ‘None’ option is selected in the ‘Color Correction’ menu on the OpenGL/Flipbook ROP. On the Karma ROP i set the Image Filter and the C plane to “Gamma 2.2 Rec.709” and the input space to AcesCG.
The File loader in the COP network i had to set “Raw” at the ‘Incoming Colors’ space menu. The output is set to ‘Un-tone-mapped’.
In COPs, it’s not easy to translate text, for example, because you don’t really have a pixel space. You always have to calculate the conversion from a picture ratio space to a pixel space. As well as drawing a simple yellow border for each montage tile, I had to use a wrangle like this:
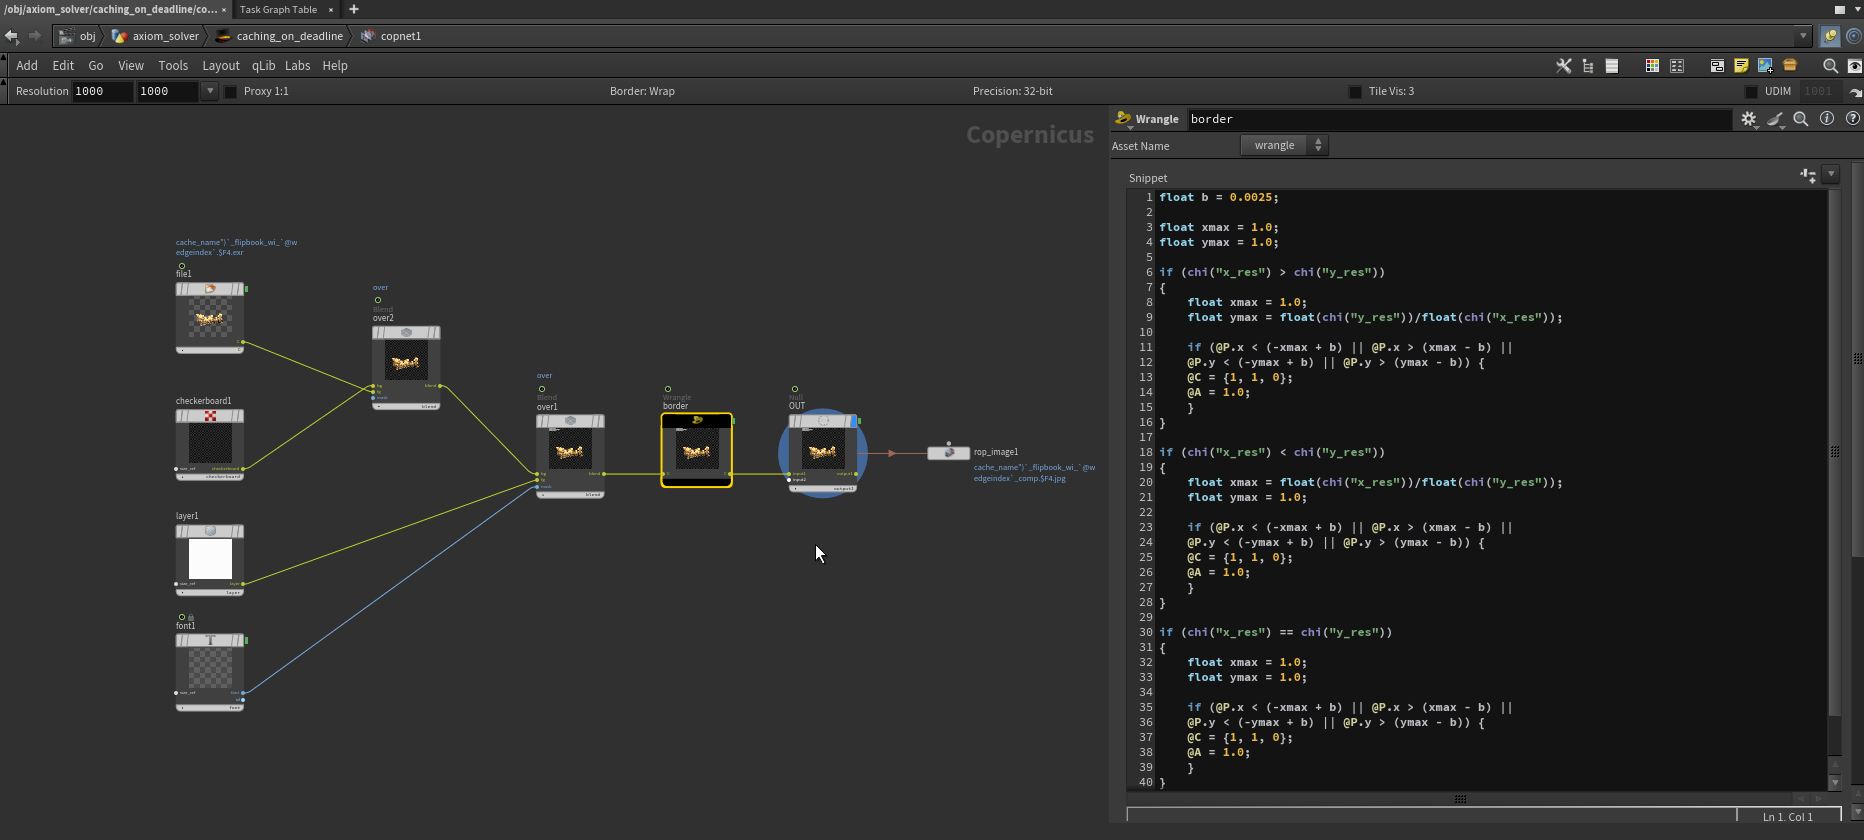
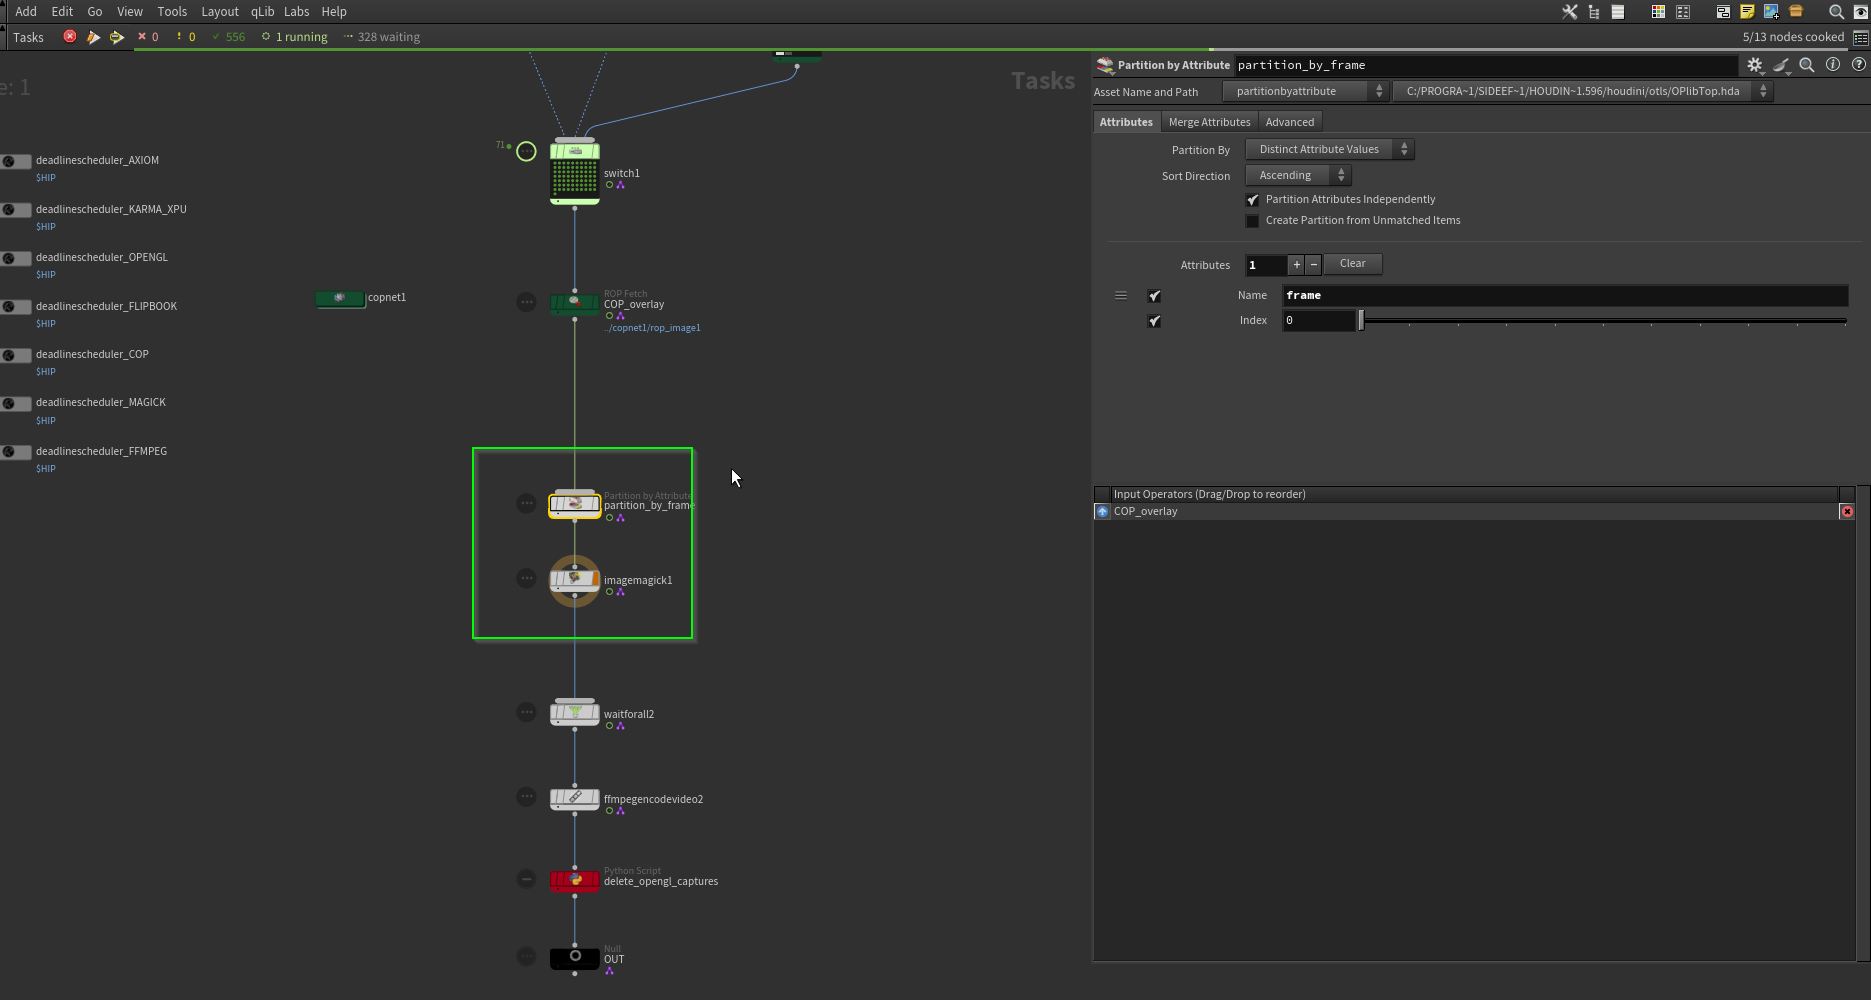
You have to install ImageMagick manually, SideFX dont ship it with there package.
‘Partition by attribute’, where ‘frame’ generates work items where the frame number matches in every wedge, flipbook and overlay sequence. Here, I had to deselect ‘All Frames in One Batch’. The CMD output string would be too long for Deadline in one batch and would result in failures on the Deadline side. Funny.
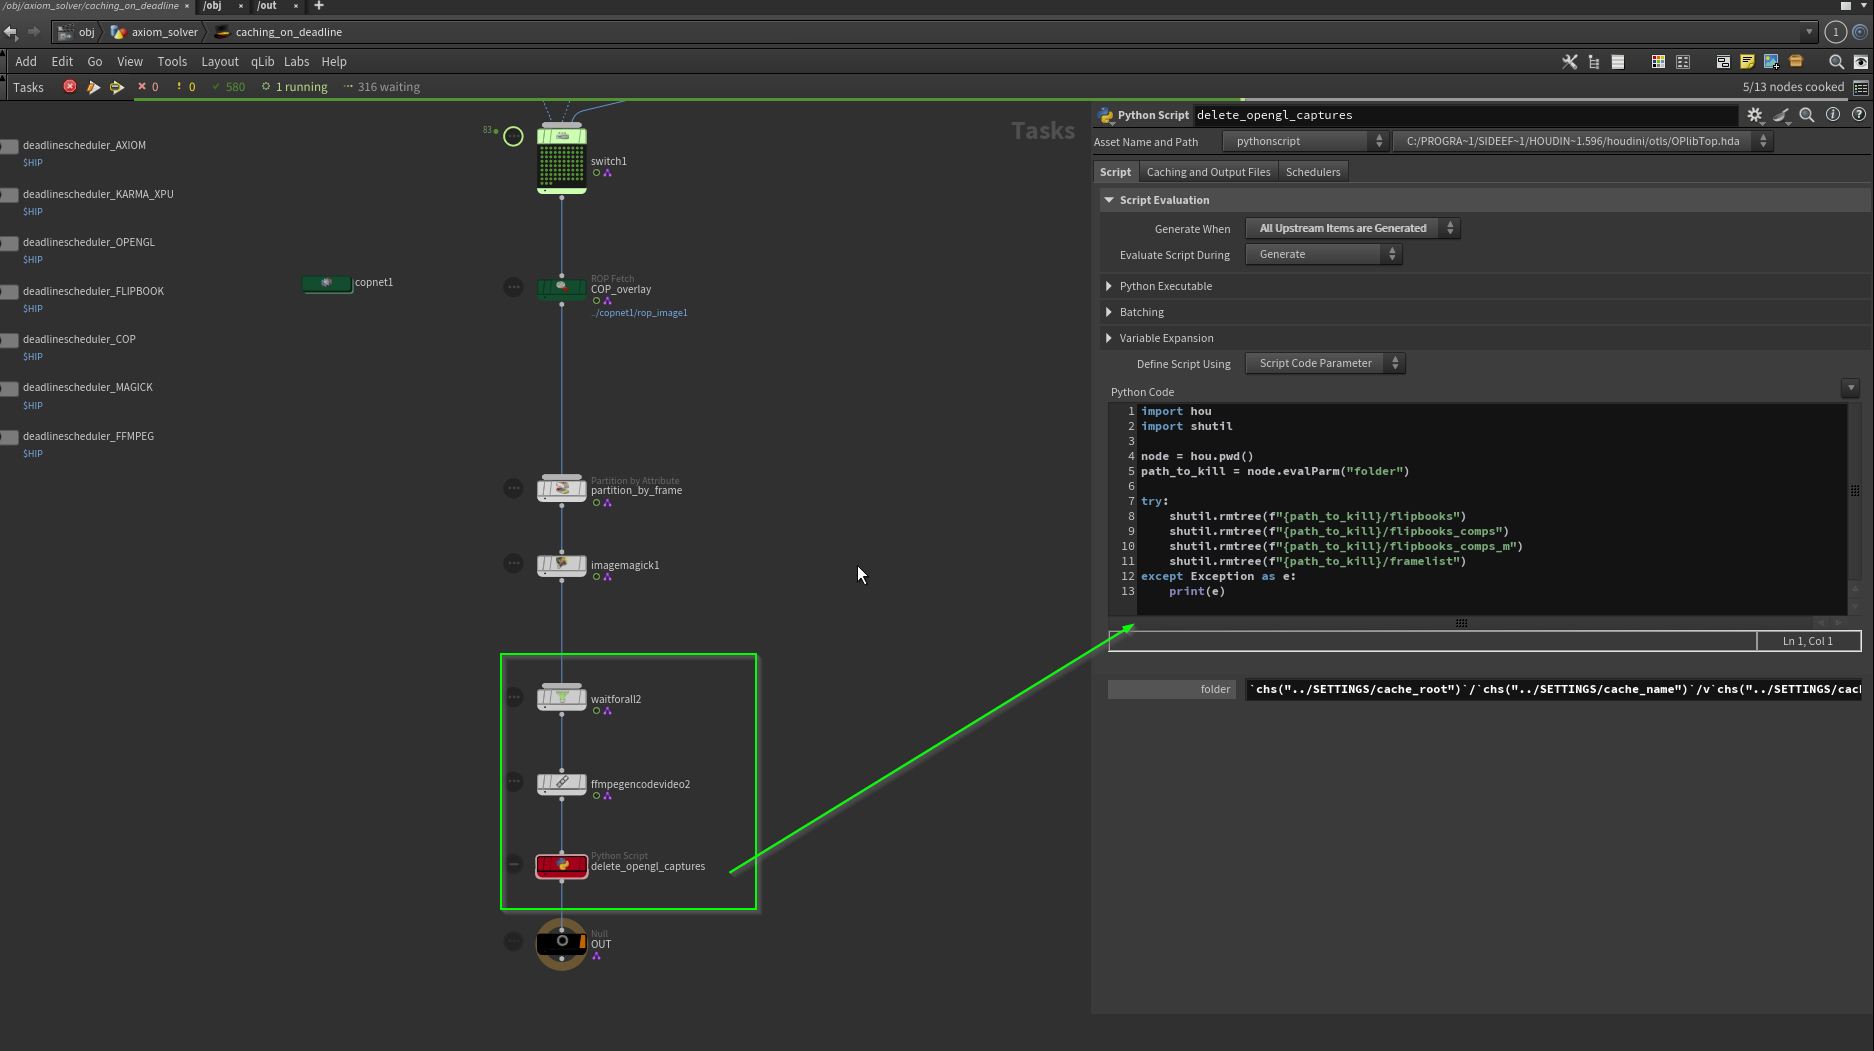
Rendering a final .mp4 via ffmpeg and delete tmp files/folders with a Python TOP node.